

Today’s post is a longer post, looking back to February 2023. The post shows you all a new area of the garden that we have been developing since that time.
Most recently, the Mr and I also installed a walk-in fruit cage on a very warm Saturday in the garden. Keep reading to see more.
Introduction
There is an area at the top of our garden that is accessed by walking up some steep and precarious steps. It must be around a 2-3 metre height difference compared to the rest of the garden. There are also no railings bordering the sheer drop down! It is definitely not safe in its current state.
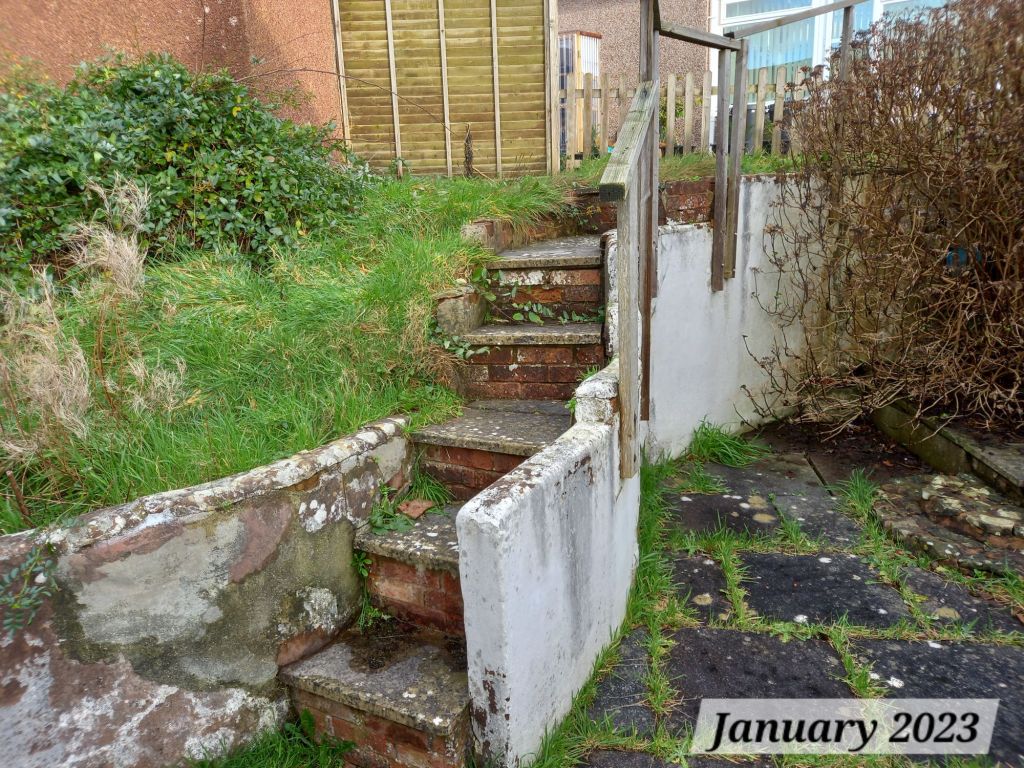
In total, the top area measures approximately 7 metres in length and 2 metres in width.
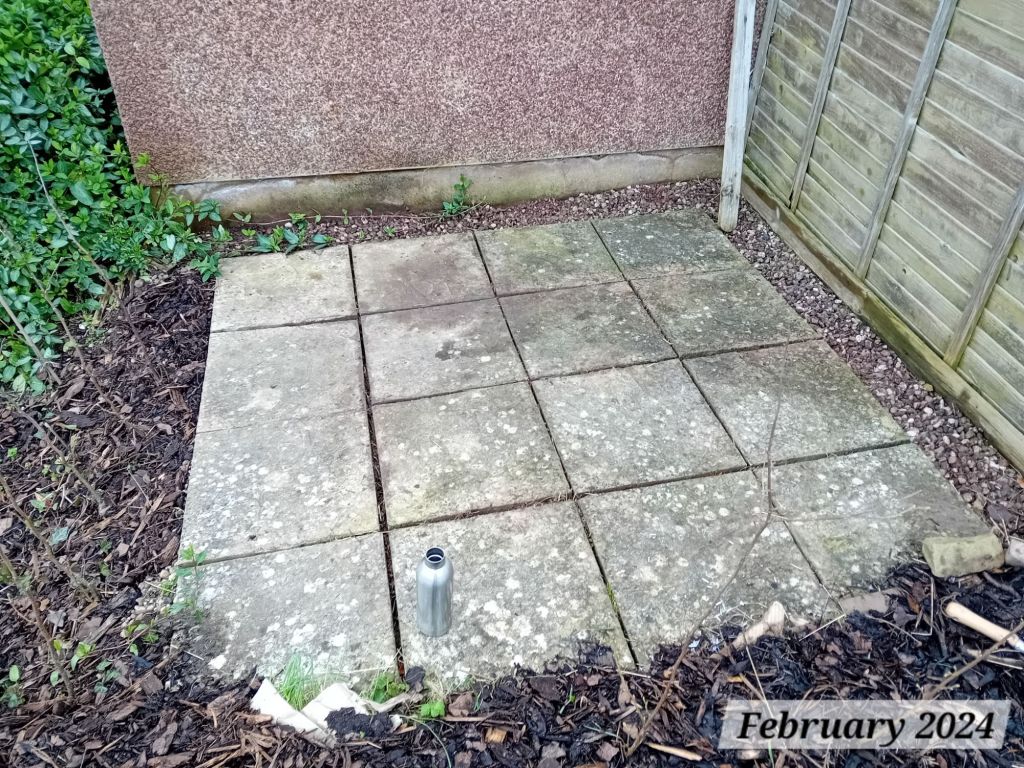
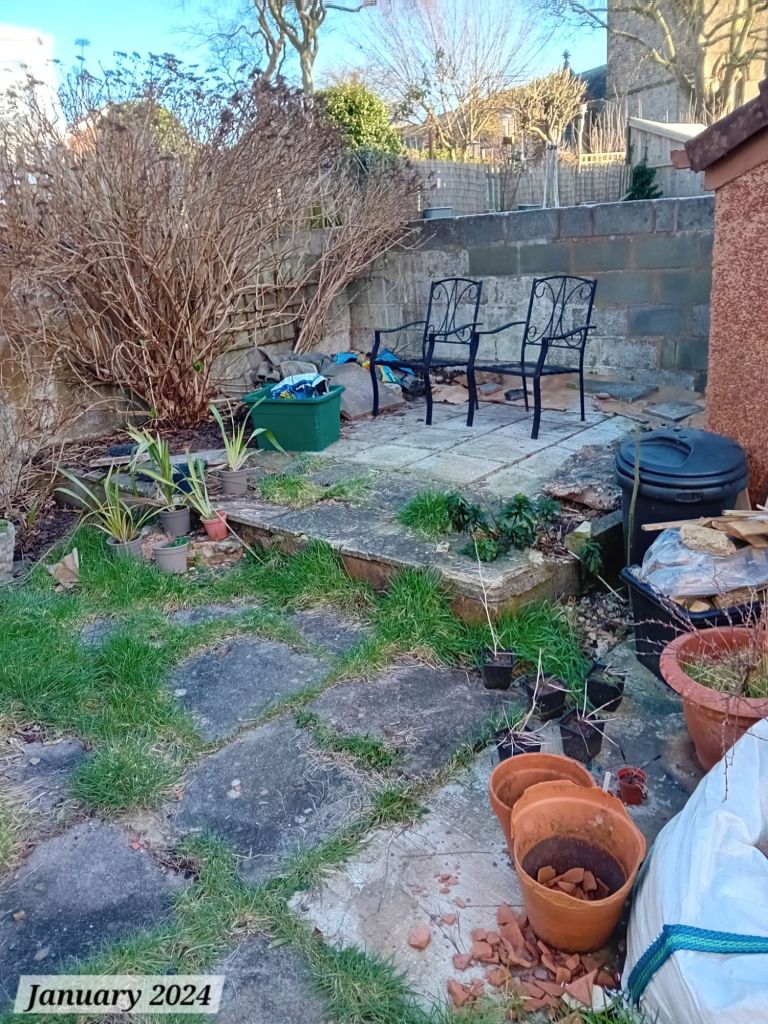
The top area has a small patio on the left hand side, which I have mostly just been maintaining by weeding every so often. The gaps between the paving slabs need repointing in the future.
I had originally planned to put the greenhouse up on this pad, but I soon realised that it wasn’t the best position for it. I wrote a post all about my new greenhouse and where I positioned it, in a post that you can read about here.
To the right hand side of the top area, there was previously a grassed (and weedy) area. There was also an overgrown lace cap hydrangea bordering the right side edge, taking up a lot of space:
Looking back over the area, it has developed slowly over the years…
February 2023
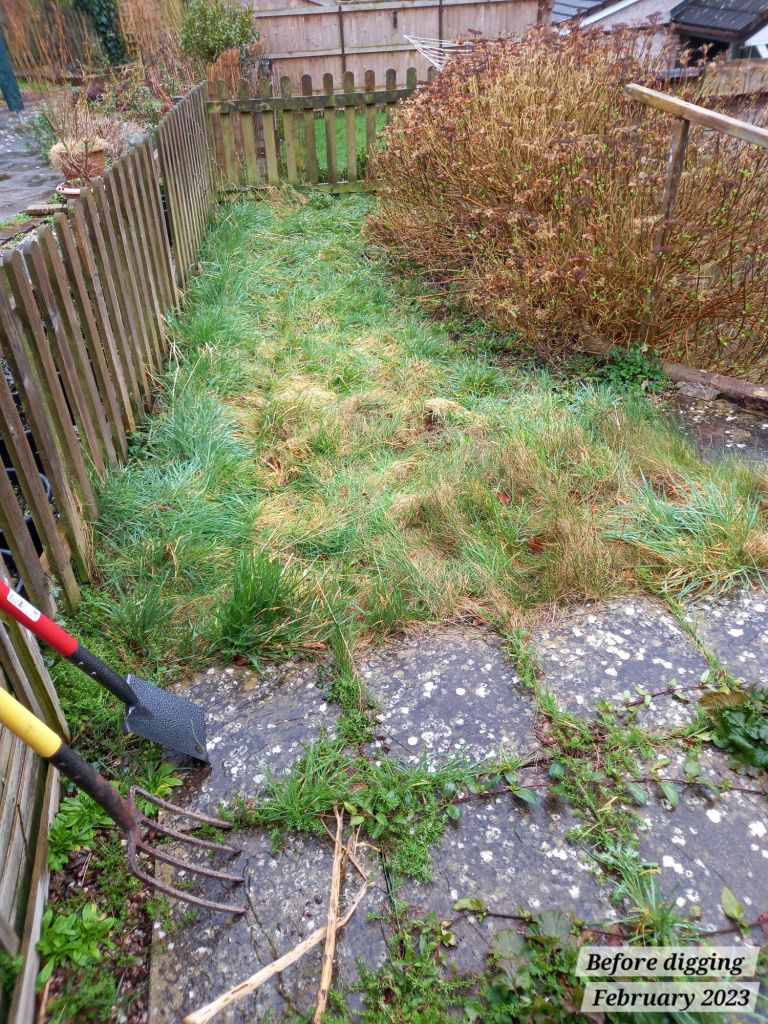
In February 2023, I dug out a long bed all around the edge of the grassed area and planted a bare root hazel hedge.
I chose hazel because I wanted to plant a native hedge to support the local wildlife and also because of its attractive catkins and its ability to deal with a windy site. It is rather exposed up on this area at certain times of year when strong winds are forecast.
As you can see, this part of our garden joins with neighbours at the back and on the right; we get on well with both of our neighbours fortunately, but we do want to improve the sense of privacy in our garden, so I decided that hedging would help with that, as it matures over the years.
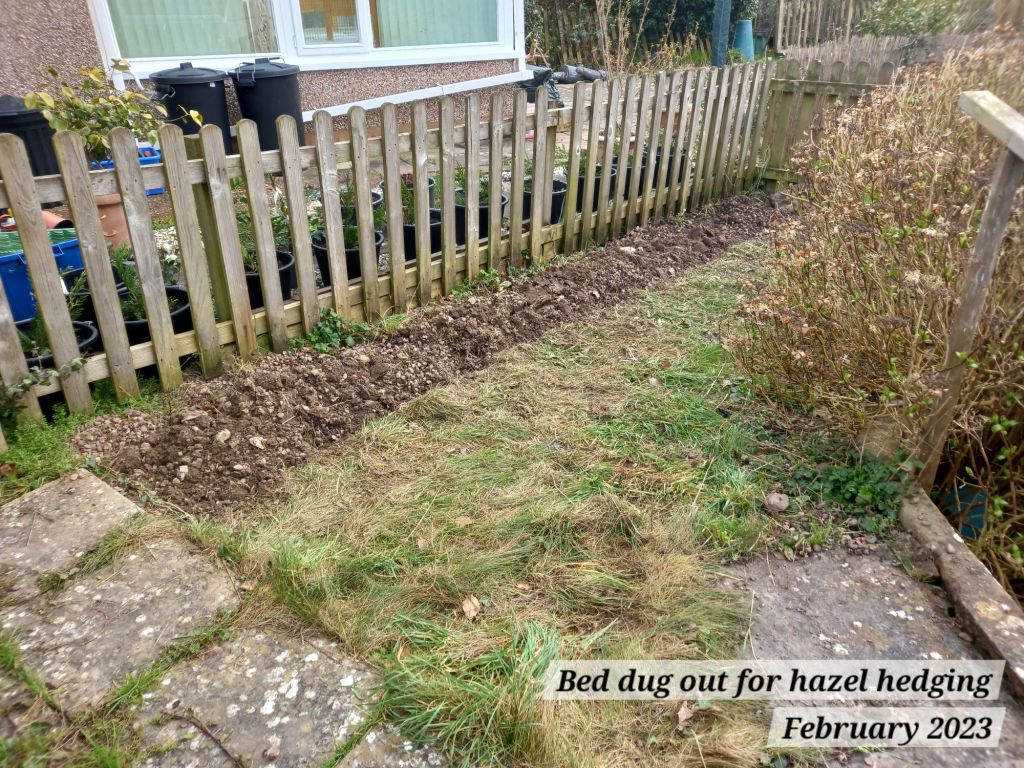
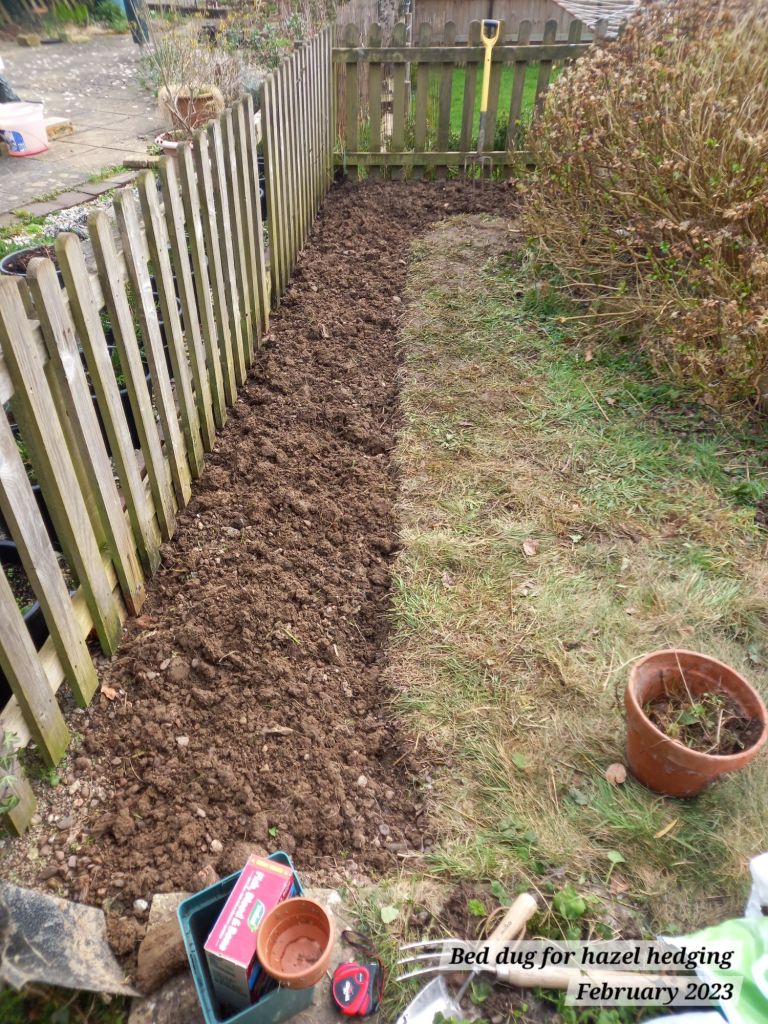
Digging the bed for the hedge was really difficult, firstly because we have clay soil and secondly because I discovered weed membrane fabric had been installed underneath the grass. This made digging up the grass in neat easy chunks impossible: the grass had grown into the weed membrane.
I therefore decided that I would save my back and instead use the no-dig method to get rid of the rest of the grass in the area.
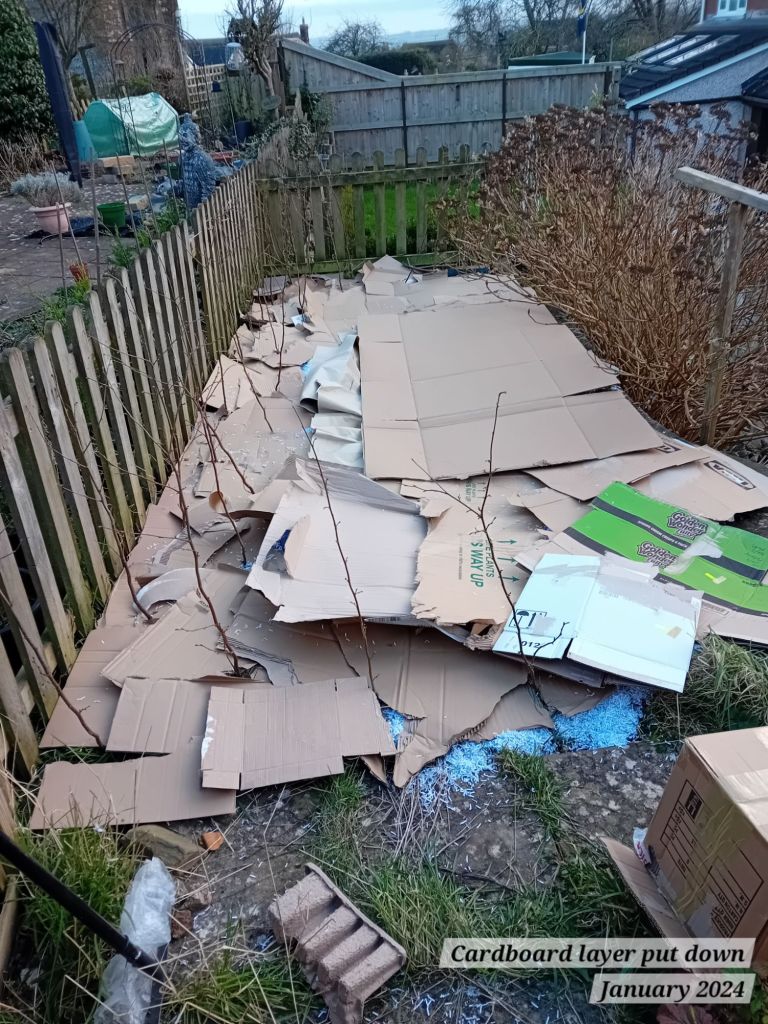
In January 2024, we laid down some shredded paper (which I have in abundance from my job role), with generous layers of cardboard on top of that and then a thick layer of bark mulch on top. We had plenty of cardboard boxes to recycle from our move into the property, so it was an ideal solution:

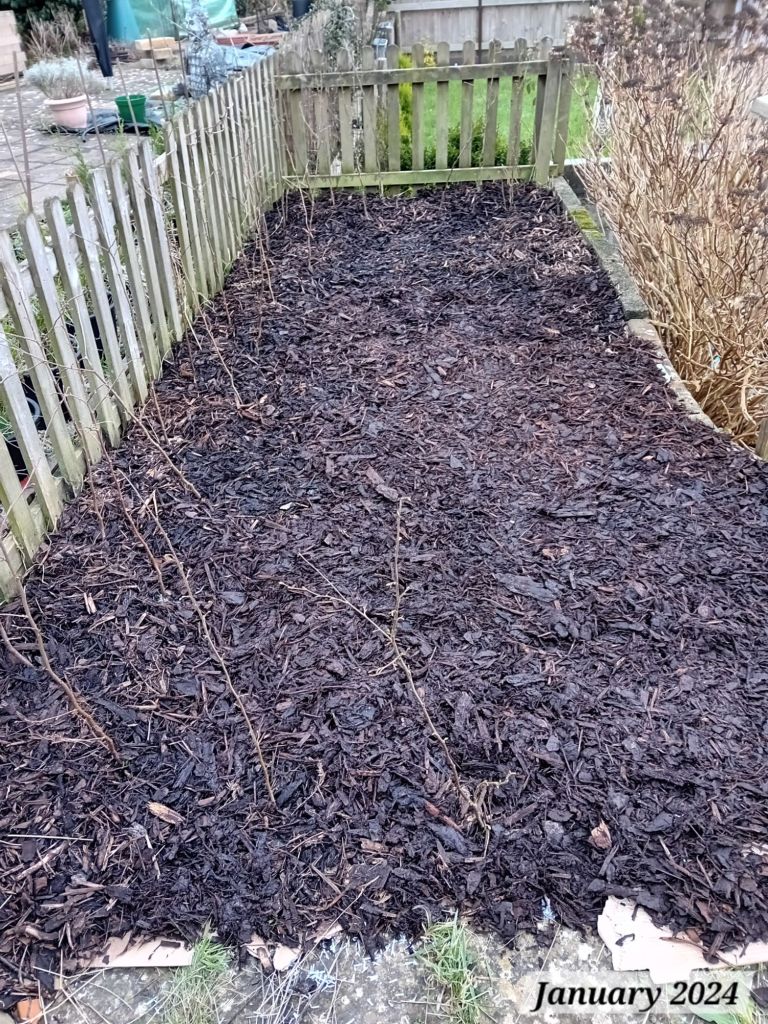
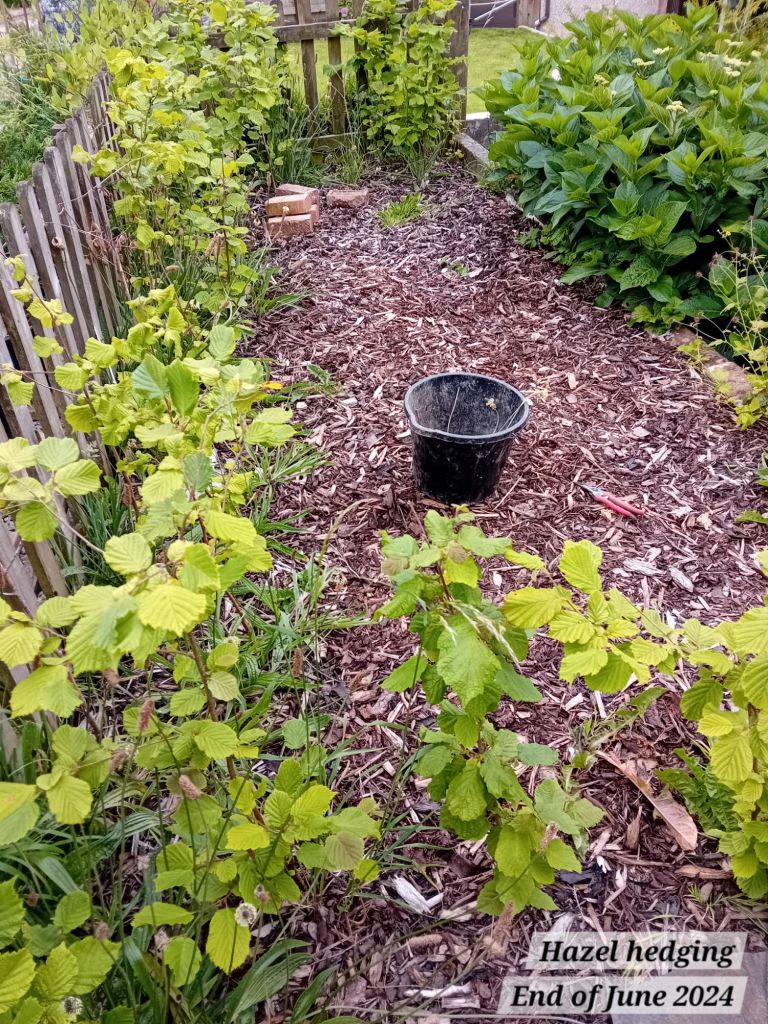
As you can see, using this method reduced so many of the weeds and the grass, and it was really simple to do. I would definitely use this method again.
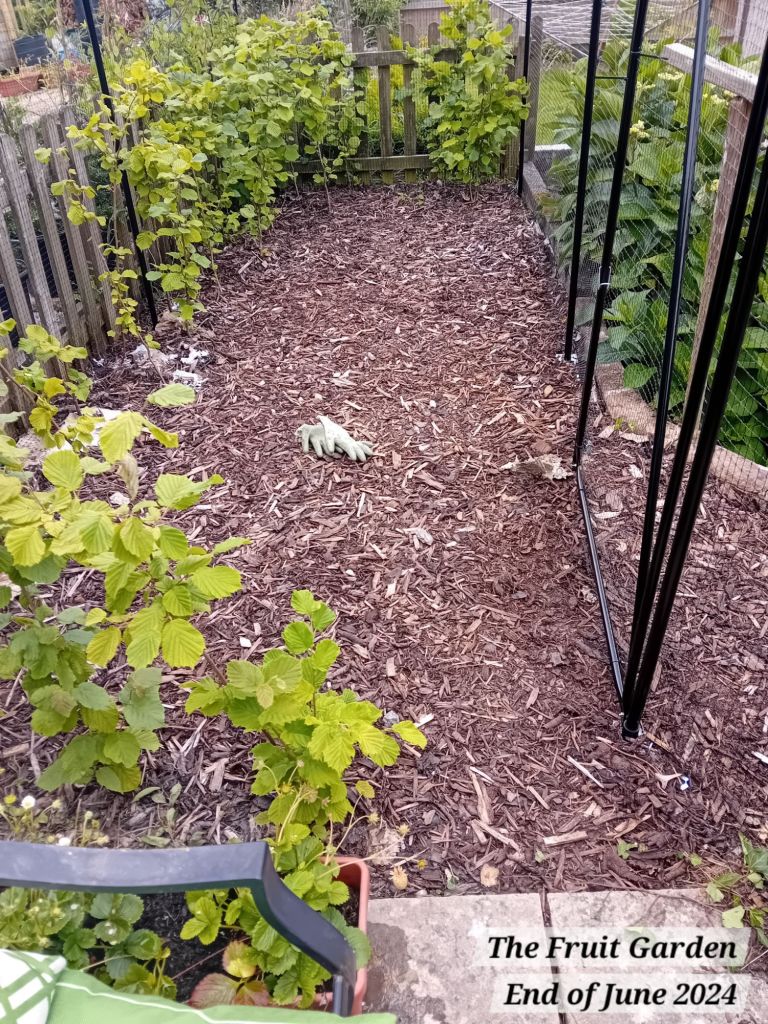
Following the above, I then essentially left the top area to settle in and did near-zero maintenance.
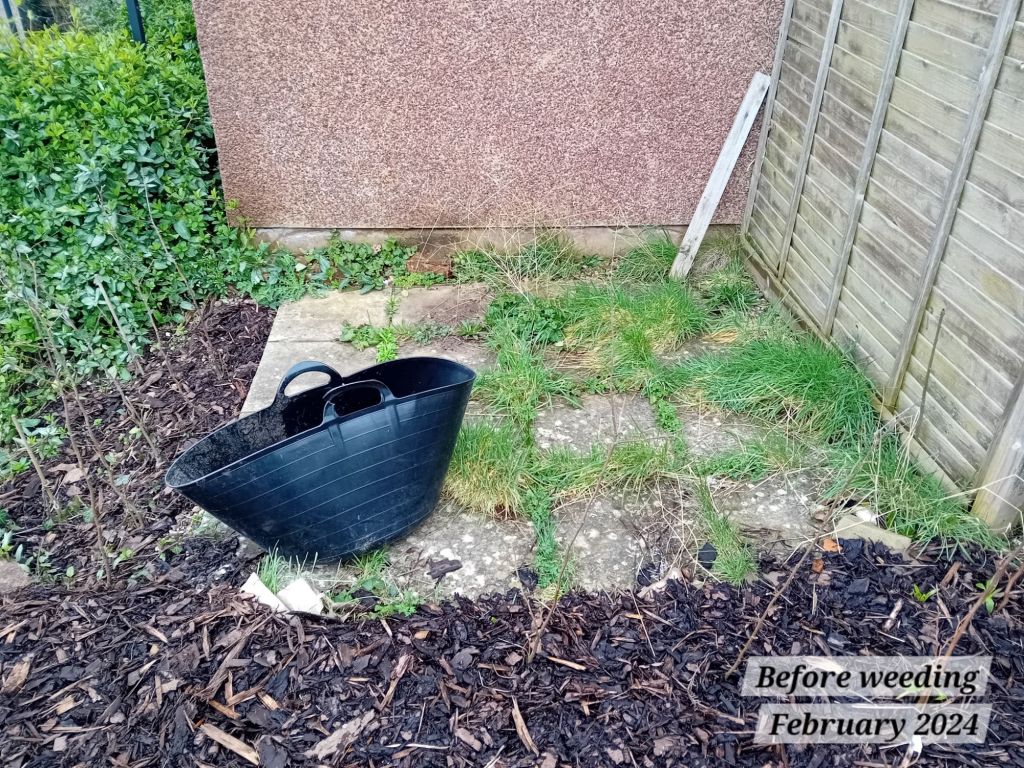
It was only recently that I had to weed the area lightly, to remove the remaining perennial weeds that had managed to get through the cardboard and mulch. The hazel hedge has started to establish very well too. The picture below was taken before weeding and it shows you how well the no dig and bark mulch method worked:
Other changes I’ve made to the area have included giving the lace cap hydrangea a hard prune.
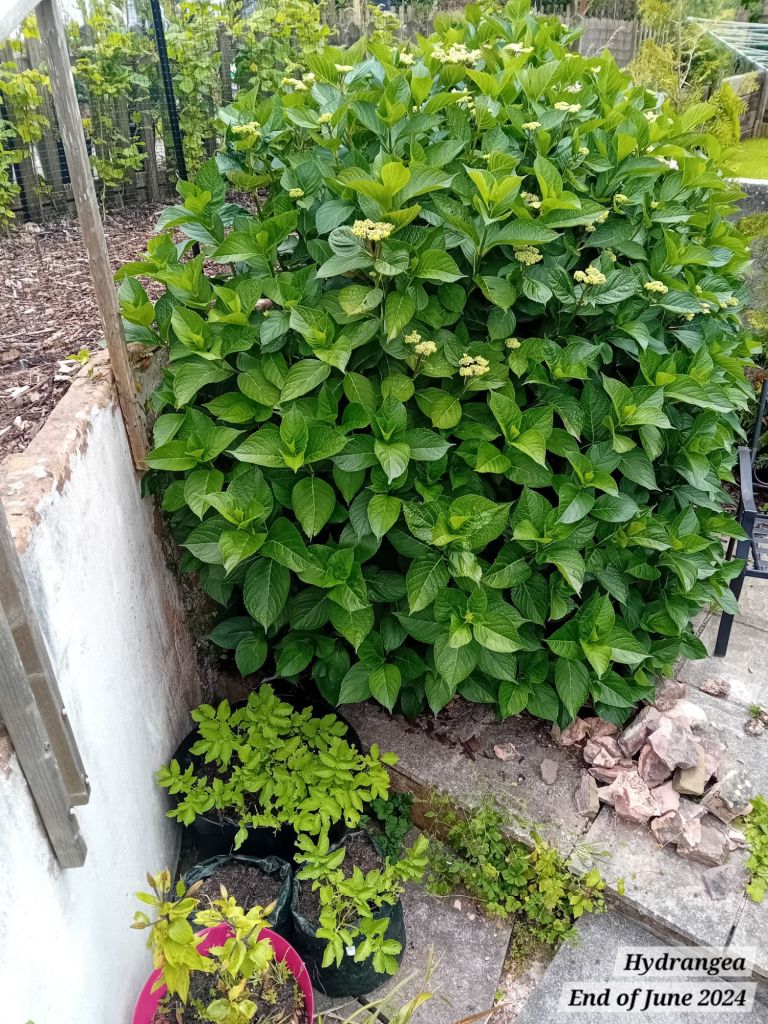
This hydrangea (pictured on the left-side of the below photo) had grown far too large and took up lots of space on the top area. Here is a photo of it when looking from the lower level of the garden, before I pruned it:
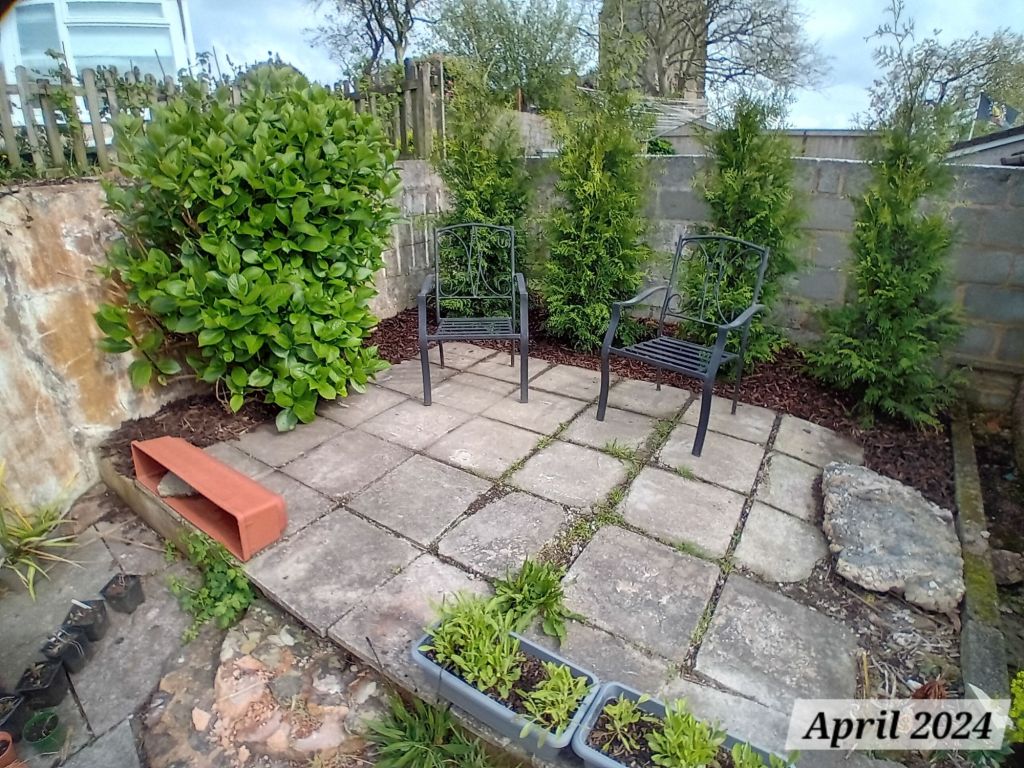
Here is how it looked after pruning it hard this year:
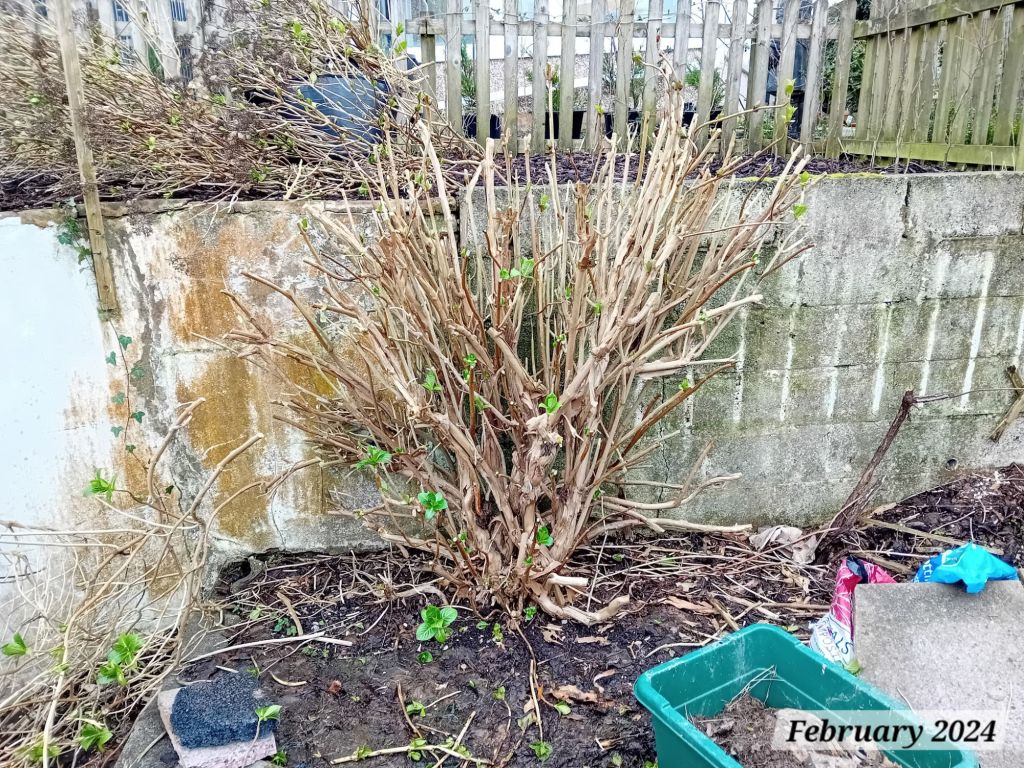
It responded surprisingly really amazingly – its shape is much rounder and better formed this year (see photo below). Last year, it looked okay until it flowered and then it started flopping over everywhere.
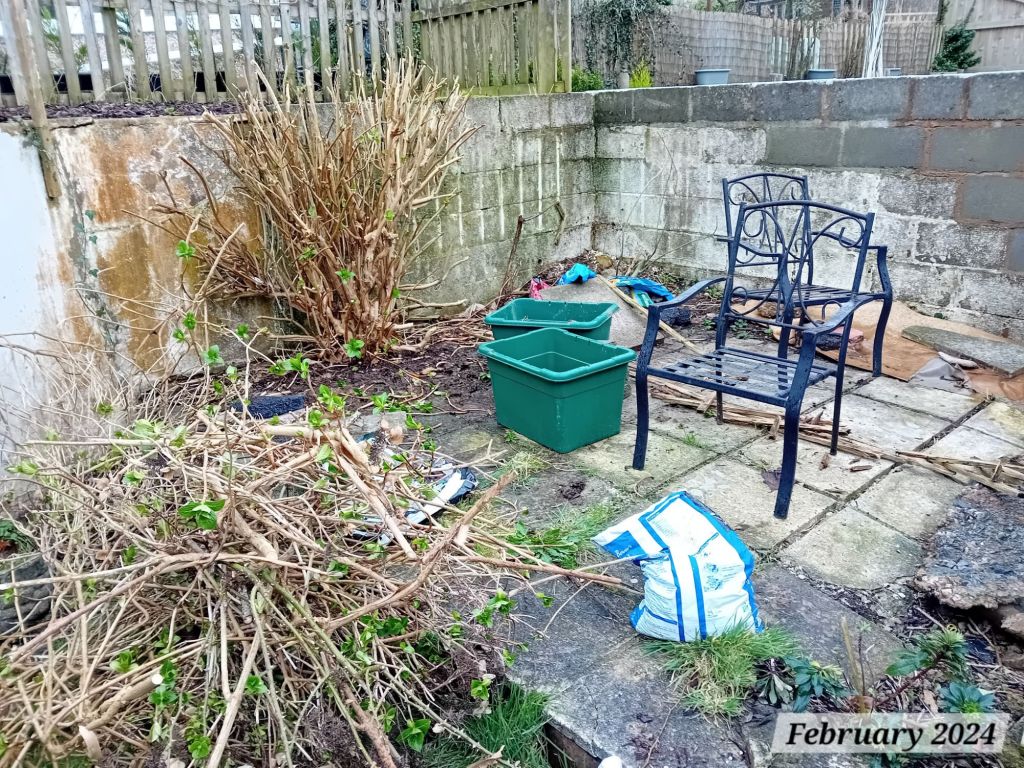
The patio seating area pictured below also looked much better after a tidy up and planting some western red cedar hedges, which I wrote about in a previous post that you can read about here. The hedges add some evergreen structure during the Winter months, when the hydrangea loses all its leaves.
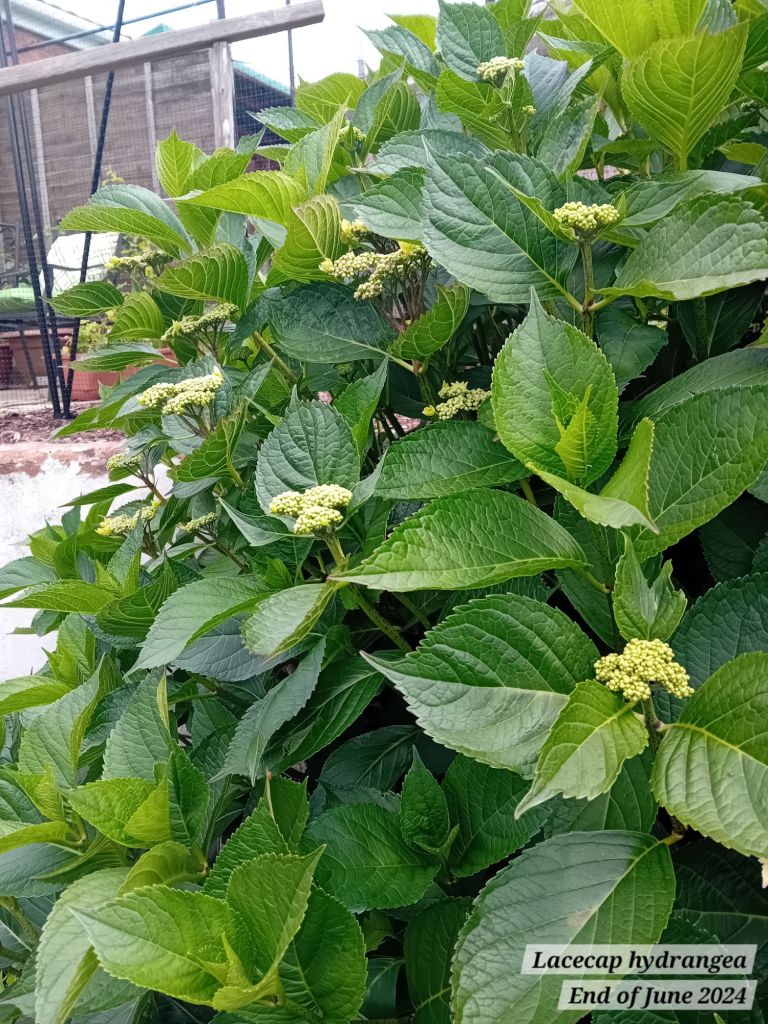
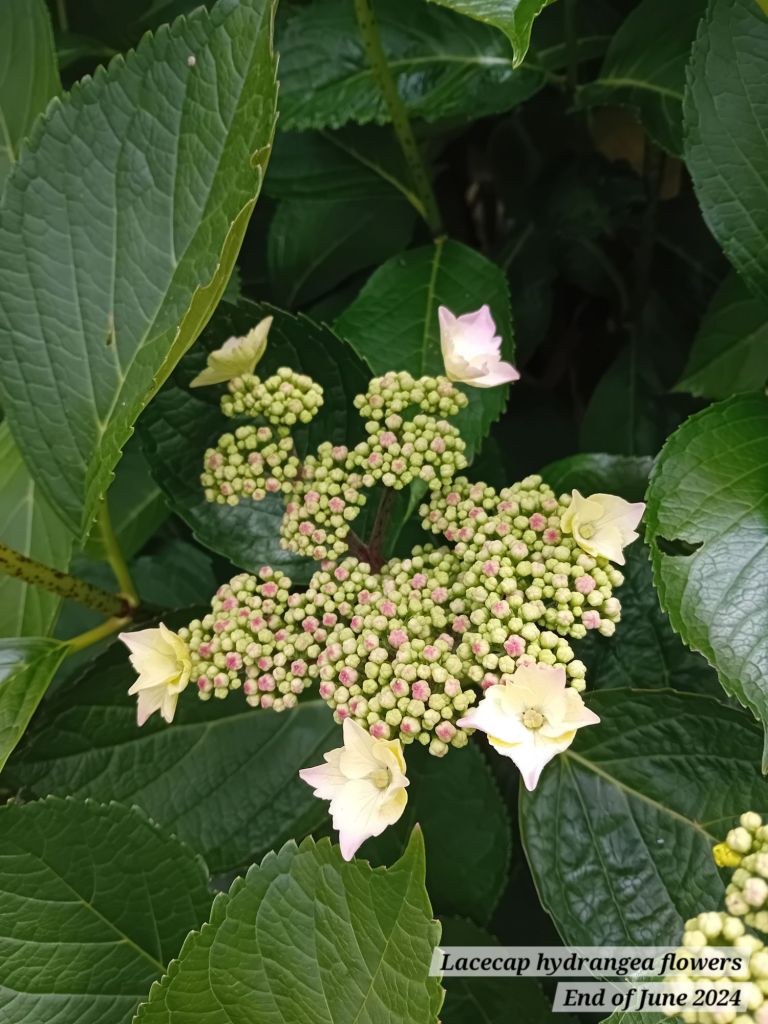
To my further surprise, the hydrangea has also still started flowering this year (!) – I had thought that with pruning it back so hard, I would sacrifice a year of flowers. But somehow that hasn’t been the case:
July 2024 – The Fruit Garden
Fast forward to this month, my ideas for the top area evolved further. After some brain storming, I settled on wanting to create a dedicated growing space for fruit. Hence, this area of the garden is now going to be called The Fruit Garden 🙂
One issue with our garden is that we live close to a large, mature tree that houses many rooks. The rooks generally leave our garden alone and don’t cause any bother. However, I knew that there was a real risk with growing fruit and it attracting all of the rooks into the garden. Therefore, the idea for a fruit cage was born.
For those of you that follow along with my blog posts, you may also recall that when I visited Kew Gardens in May this year, (the post is available to read here), I shared how much I liked the walk in fruit cage used in their Kitchen Garden:

I researched the idea for some time before taking the plunge with purchasing the fruit cage. I decided I wanted to buy a walk-in fruit cage, as it seemed like it would be convenient for gardening in and growing taller plants.
My birthday is in July, so naturally, the fruit cage has become a birthday present! I chose a higher quality black coated steel fruit cage, with a ten year guarantee, because as I said earlier, this can be an exposed area of the garden at certain parts of the year, so durability and stability are a must.
I purchased the fruit cage from Knowle Nets: Fruit Cages – Made in the UK, 50 Year Heritage | Knowle Nets They offer sizing in 25cm increments and each cage is made to order, so you can find a cage to fit your space really well.
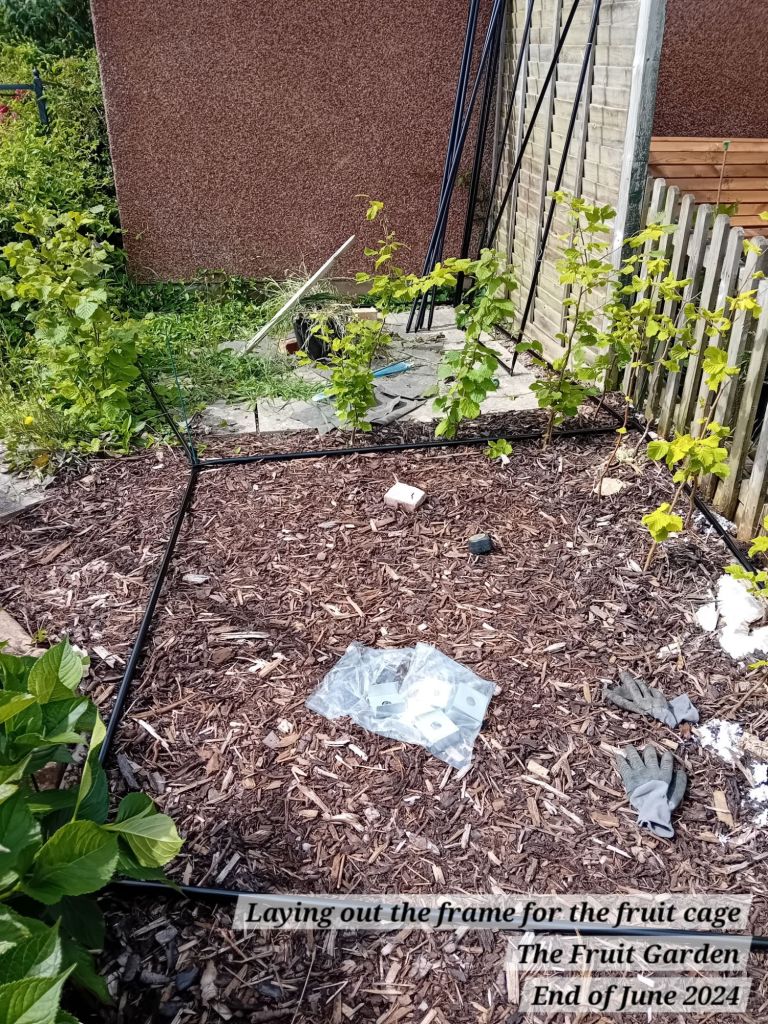
I ended up somehow having a mishap with the measurements I took, but the Mr and I managed to modify the cage to fit into the space well – we simply swapped some of the shorter sections around with longer sections. This particular fruit cage can be built into any shape you want and also on sloped ground. We have level ground, but the shape of The Fruit Garden isn’t entirely square.
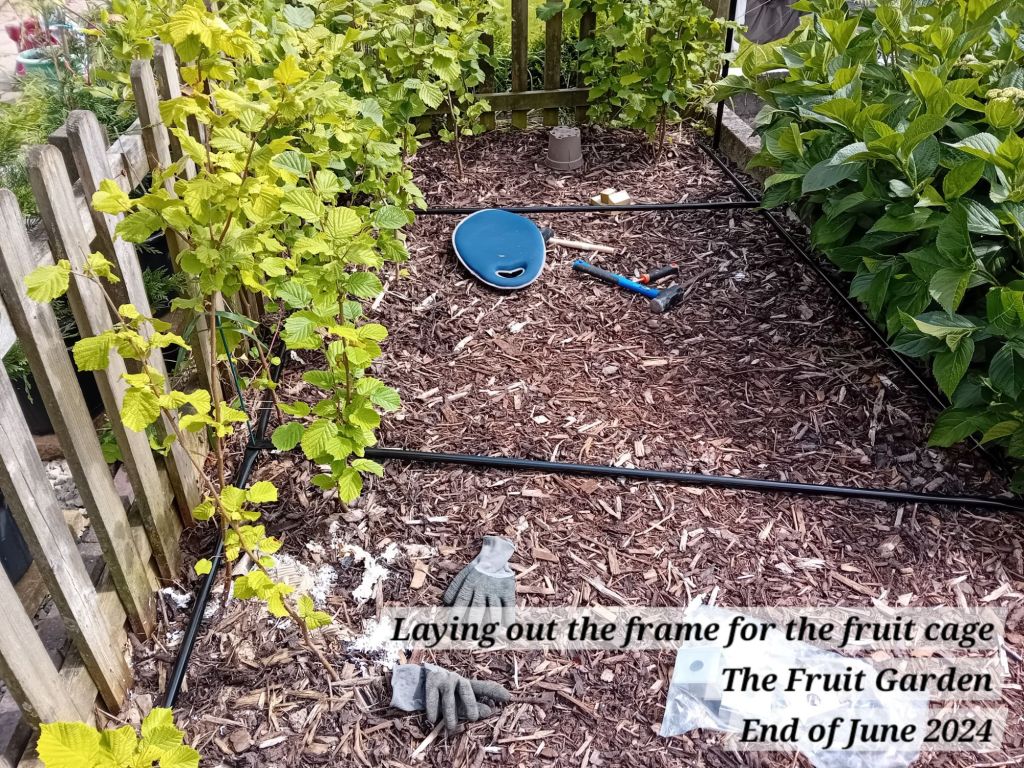
The upright posts simply get staked into the ground almost 40cm deep, with ground plates for stability and then you build the rest of the frame from there. What took the longest was working out where each upright needed to go (especially after my measuring mishap…)
Here is how it looked when we placed the frame onto the ground to check for the positioning:
The fruit cage also comes with a door, so there is no extra cost for buying a door. When I was researching, I found that many fruit cages required you to pay extra for a door!
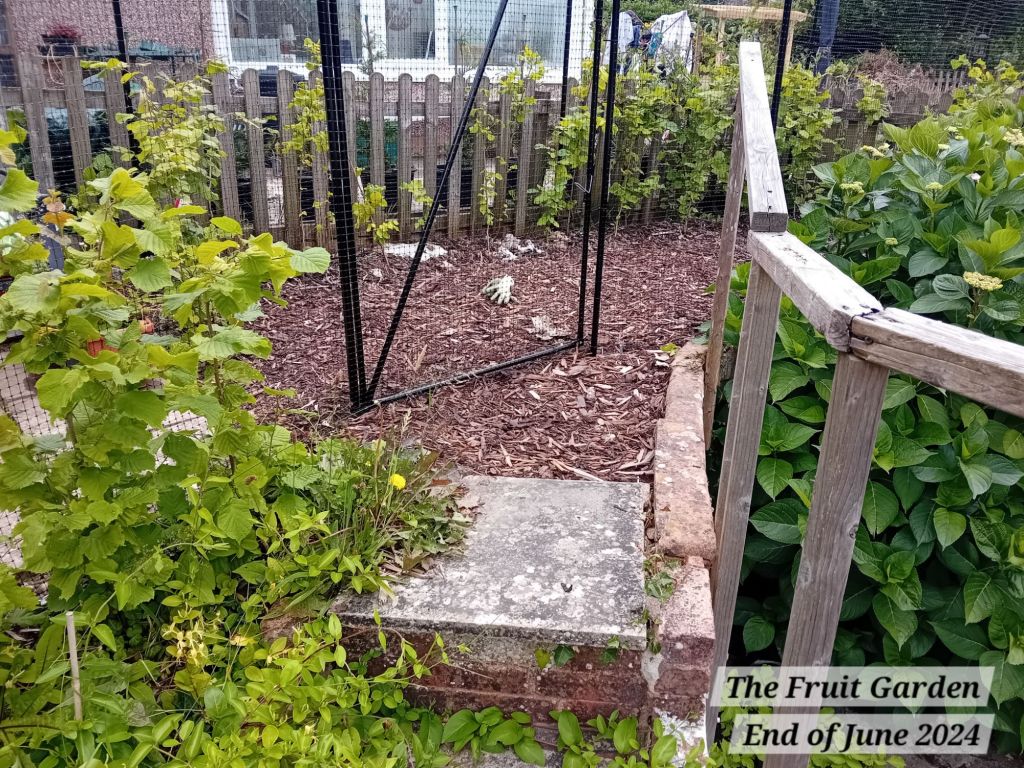
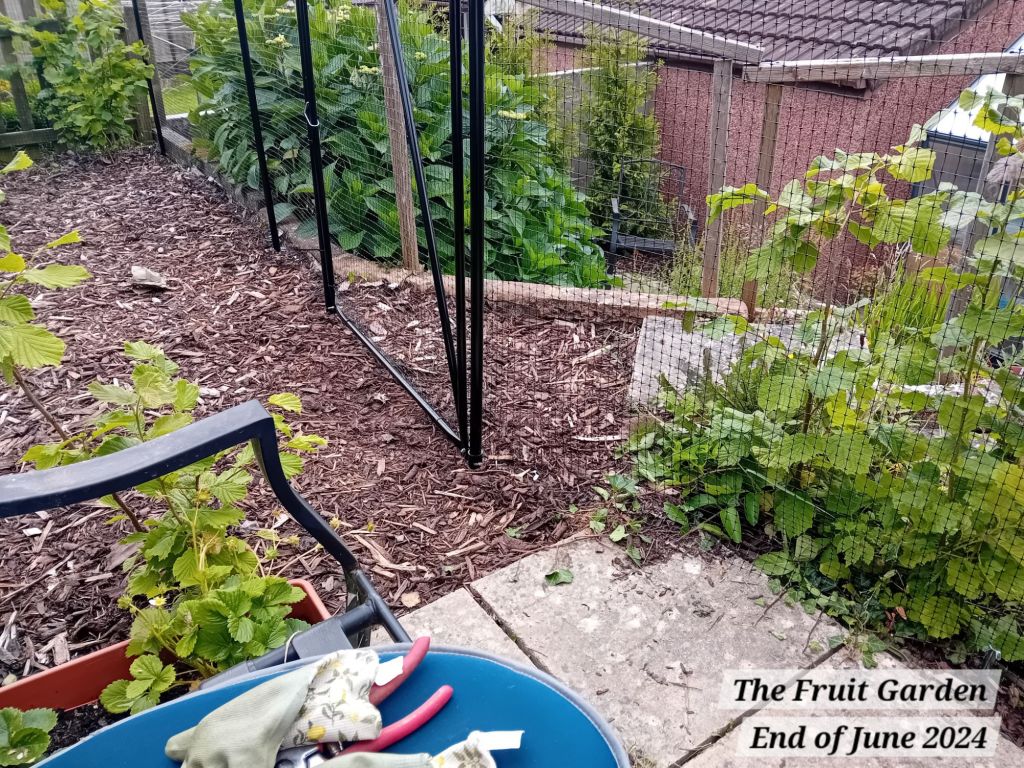
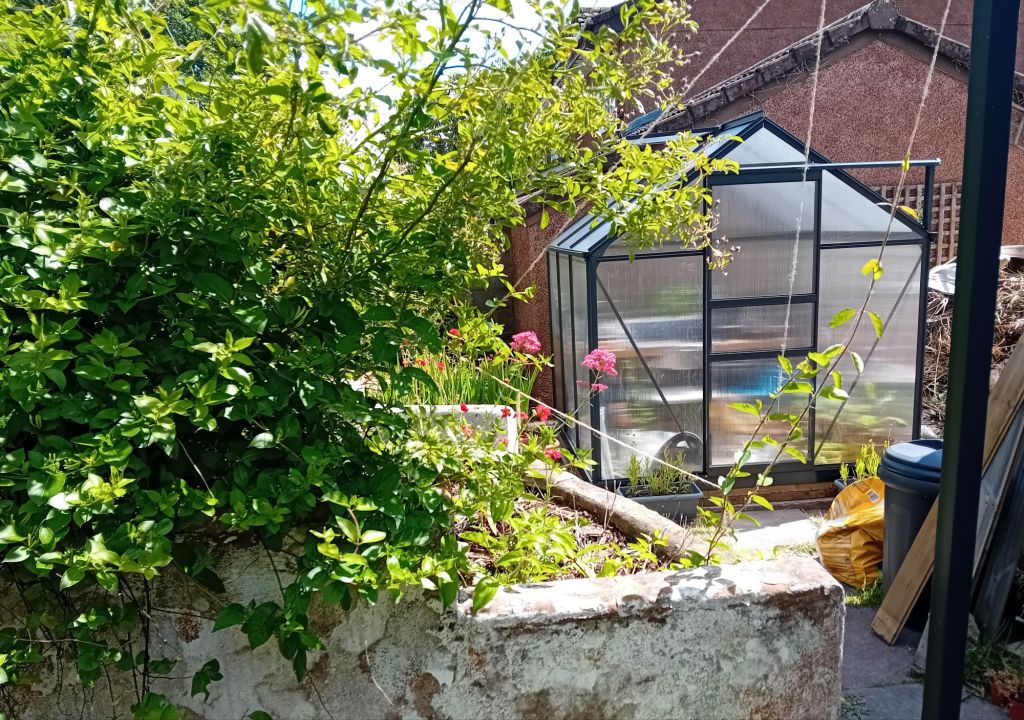
I decided to extend the fruit cage over the patio seating area. I am presently using the small patio area for a seating area with potted fruit plants. This area sits in the sun all day and gets the last bit of sunshine at the end of the day, so it makes a very nice seating area.
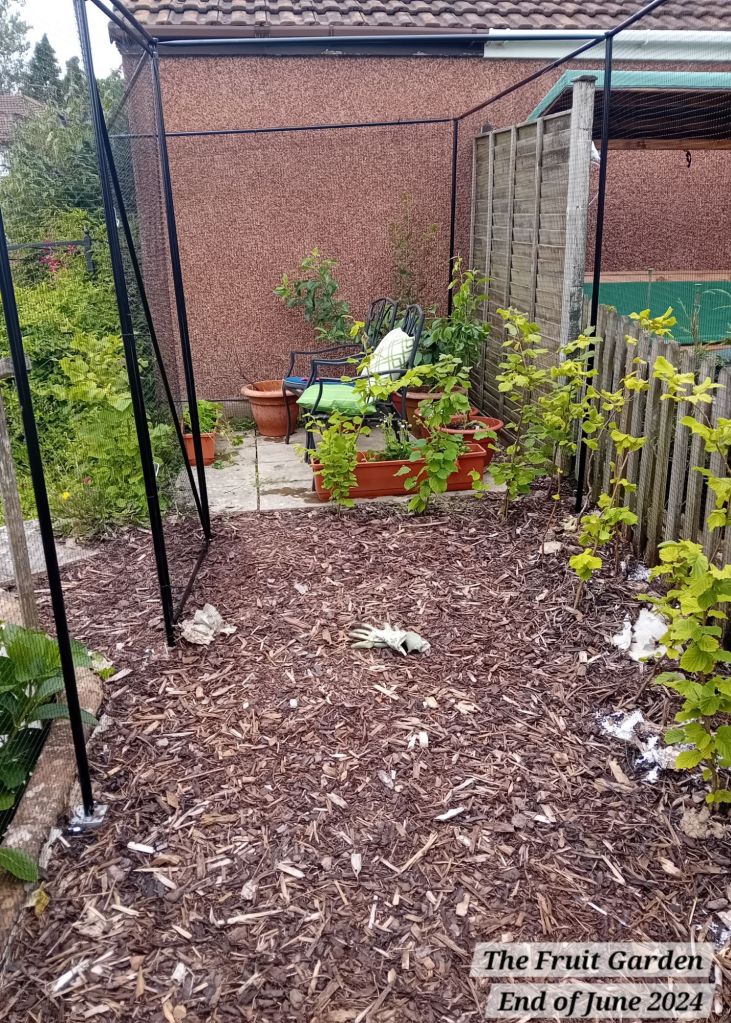
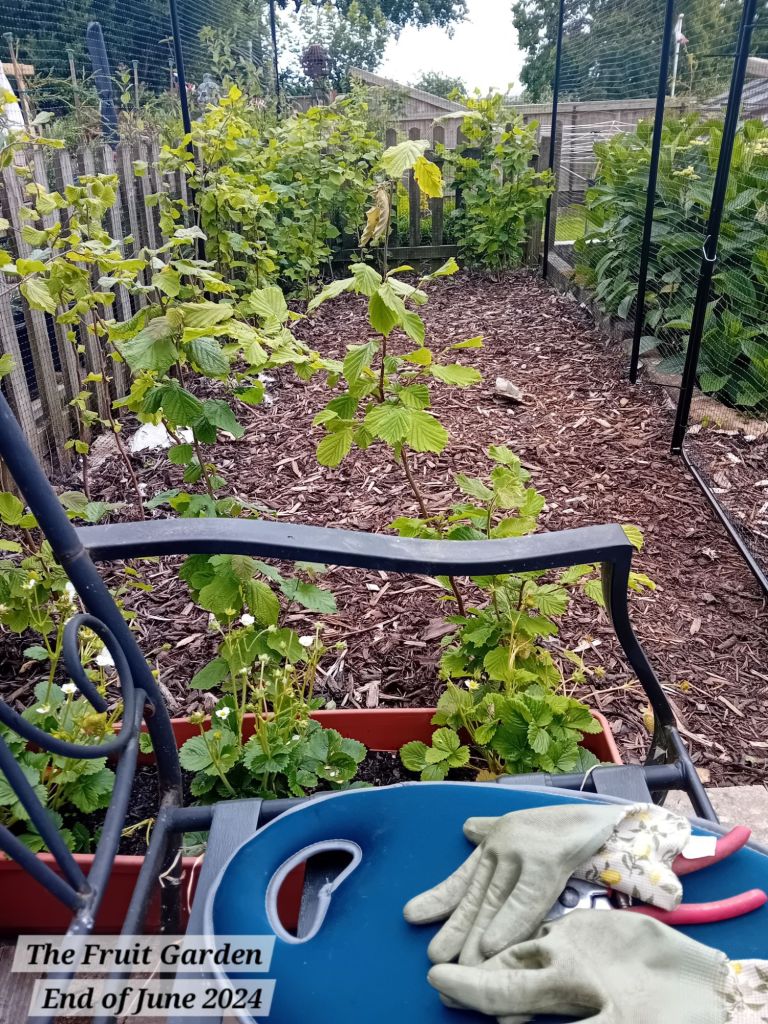
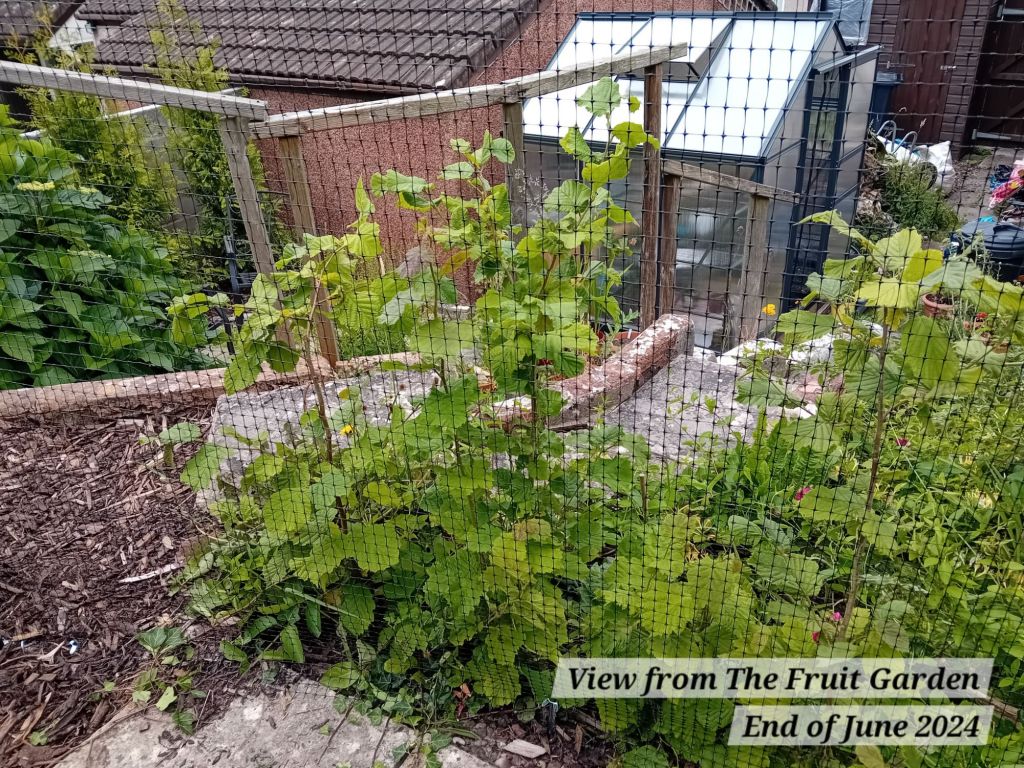
The view from the seating area also gives a different perspective to oversee another part of the garden:
I had purchased some bare root patio fruit trees in Winter/early Spring this year, which I planted up in large pots, so I knew a fruit cage would give them a dedicated and protected space to grow.

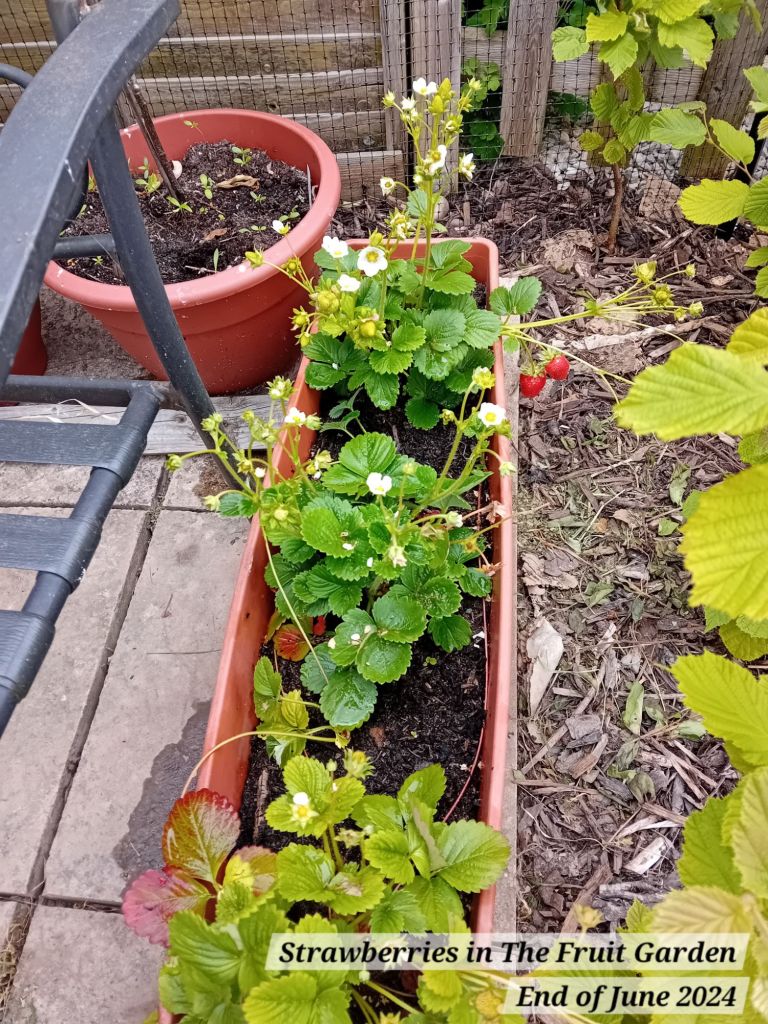
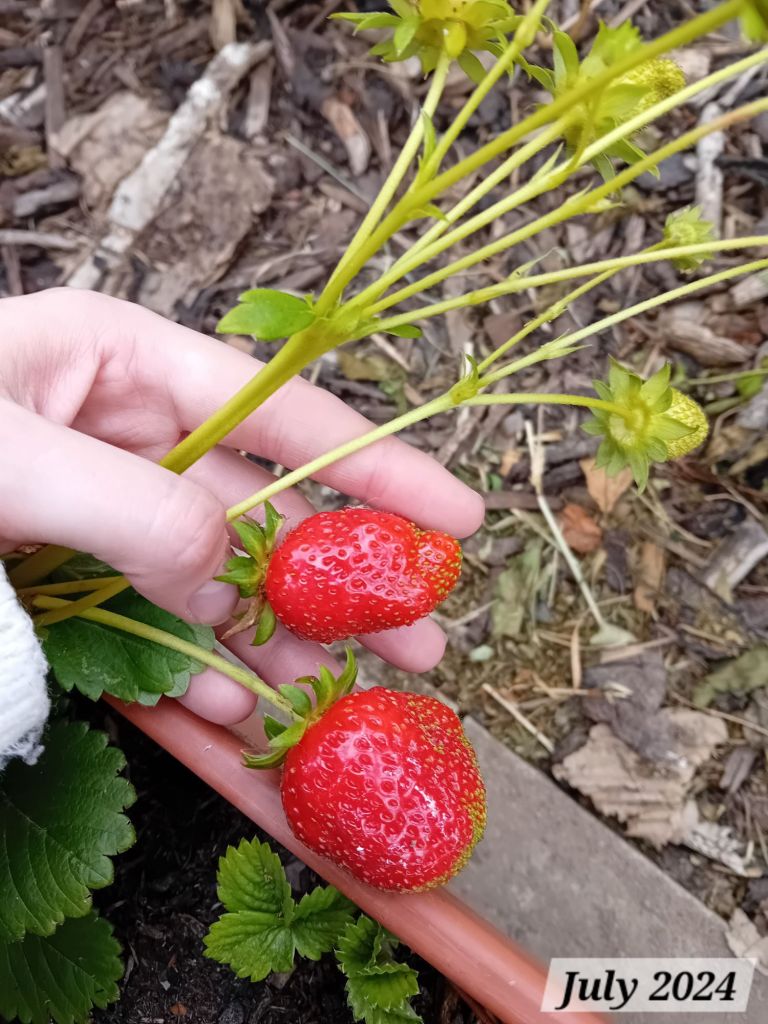
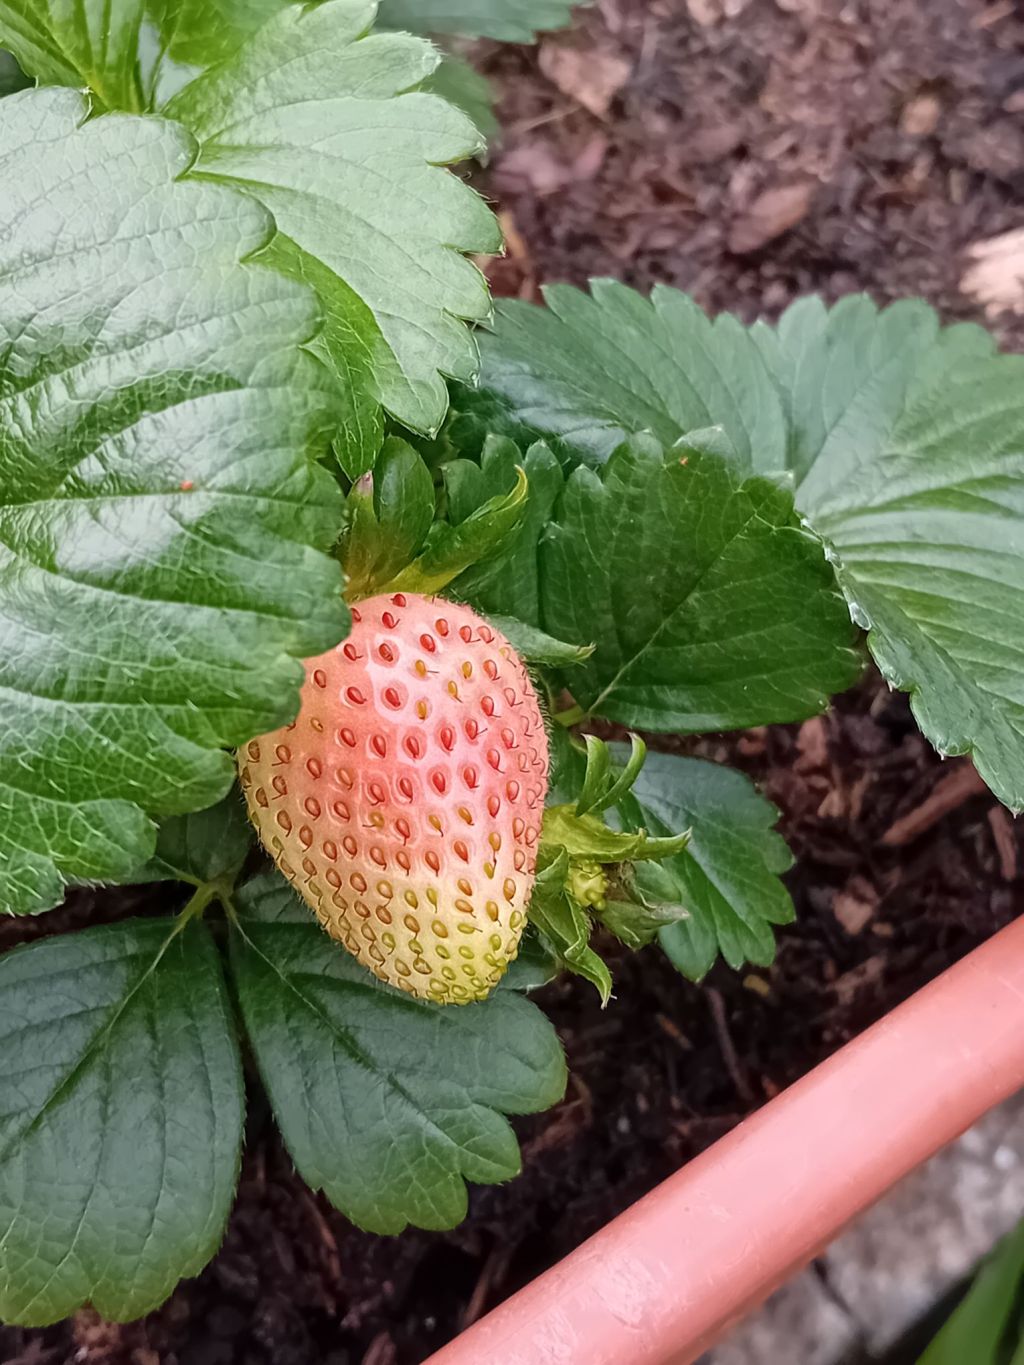
I placed the fruit trees in the patio area, along with the strawberry plants I bought this year and wrote a post about. It has already been really nice coming out during the day, sitting in the area and then eating some strawberries!
Here you can see the patio fruit trees:
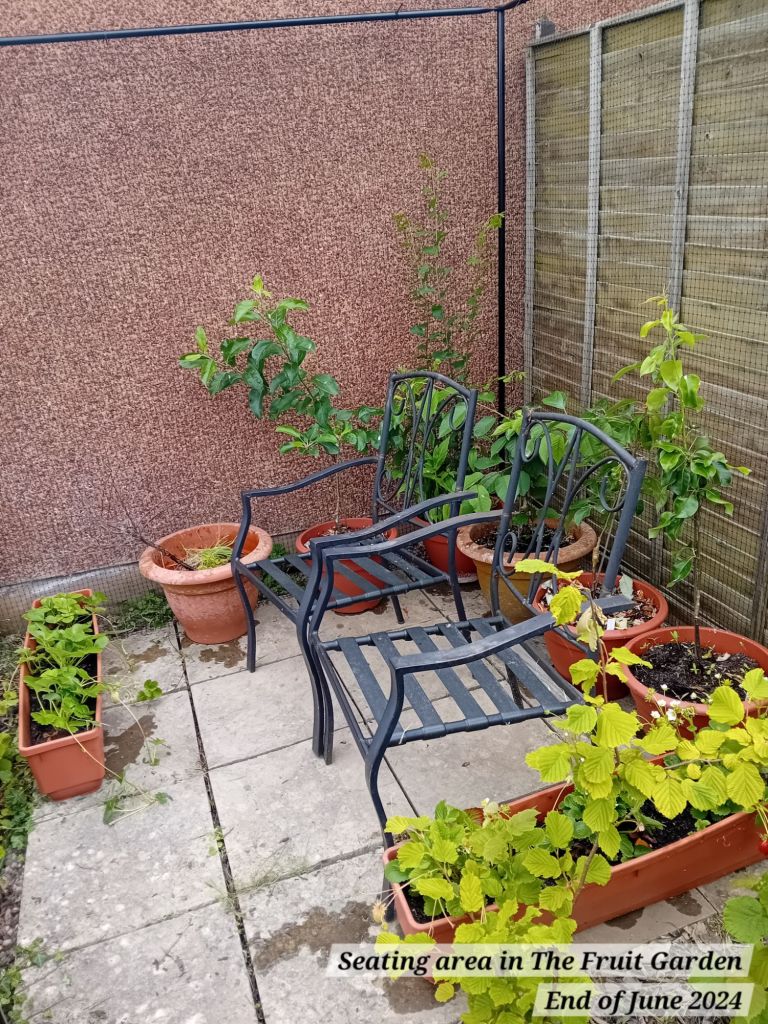

And here you can see the strawberries:
We also inherited an old gooseberry bush in a pot, which I am in the process of bringing back to life:
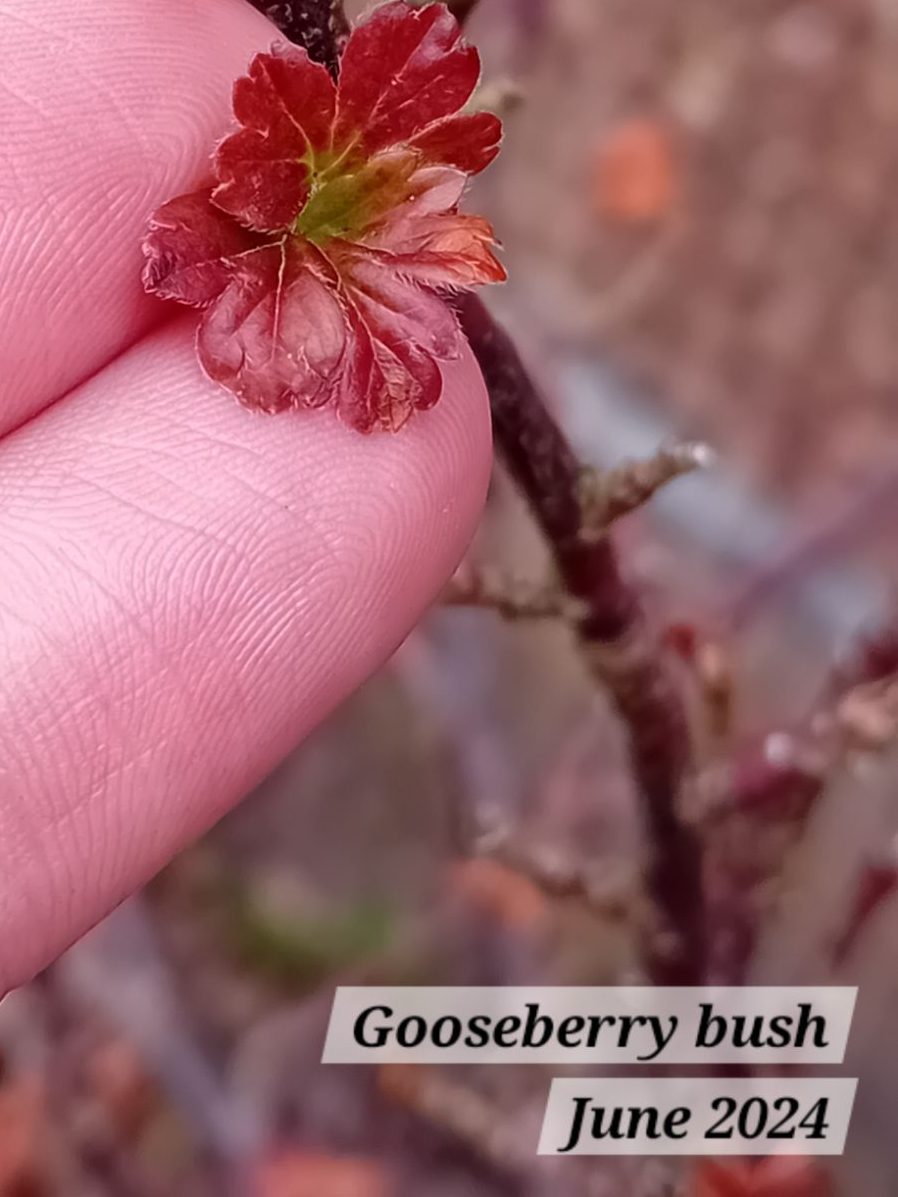
I have read that gooseberries are great for training against a wall or into various confined shapes and are therefore perfect for smaller spaces. Although the fruit cage does provide a good sized space for growing, I will need to plan the space wisely as I am still limited.
So far, my plan is to put a large raised bed in the center of the barked area and use that for growing raspberries in:
The fruit cage can be viewed from our property, as well as the neighbouring gardens, so I will also be ensuring it becomes well bedded in with planting, so that it will become visually softened over time.
Our back neighbour has a honeysuckle that I have already started training up the back of the netting on the boundary fence line. I may also look into an evergreen climber to soften the look of the back of the frame, to provide some year-round privacy and to filter the wind.
This top part of the garden is South-West facing, so any climber grown up the back part of the netting will not case shade into the cage.
This leads me to the hazel hedges. Unfortunately, these may have to move to a new home. I have plans to create a three-bay compost heap (compost is probably our biggest on-going expense in the garden, hence why I am keen to try to create our own) and the hazel hedging would provide a screen to hide the compost heaps from sight… But that’s a project for another time.
There is also the option of moving some of the hazel hedges in Autumn to plant them in single rows (they are currently double rows), all the way around the perimeter of the fruit netting. This would filter the wind and also create a micro climate. Any shade cast wouldn’t be an issue if the raspberries are planted in a raised planter.
I won’t know whether that will fit well into the space, until I decide what raised planter I want to use. I want a walkway all around the raised bed, to make access for picking and tending easier and to prevent the fruit being too close to the netting, because that would mean the birds could still get to the fruit.
The honeysuckle and an evergreen climber can still grow up the back section of the netting without issue. That may be the better solution.
I clearly still have some brain storming to do!
I hope you enjoyed reading and seeing the development of this area of the garden. We still need to install the roof netting to the fruit cage as we were far too tired to finish the installation on the last weekend we worked on this project.
I will be planting up the area in the months to come and improving how it fits into the rest of the garden. It is great to know I have somewhere now though that I can properly dedicate to growing fruit, without worrying about the birds getting to the crop before I do! I will post more updates over the coming months.
Happy gardening 🙂


Leave a comment