
Hello and welcome back to my blog!
I took a break from writing on my blog for a week or so, as I was busy with other commitments. I am considering whether I will reduce my blogging on here to (at least) once a week, whilst continuing to increase my posts on Instagram instead. I haven’t yet fully decided which way I will go with this, as I have made some major progress in the garden that should ease things!
You may wish to follow me on Instagram to see additional photos and videos of my garden. Search on Instagram for: the_charming_nook (or click the pink icon below)
Anyway, I hope you enjoy reading today’s post. It is a longer one, combining updates from the last few weeks in The Fruit Garden, where major progress has been made and a fruit garden has finally emerged 🙂 Enjoy!
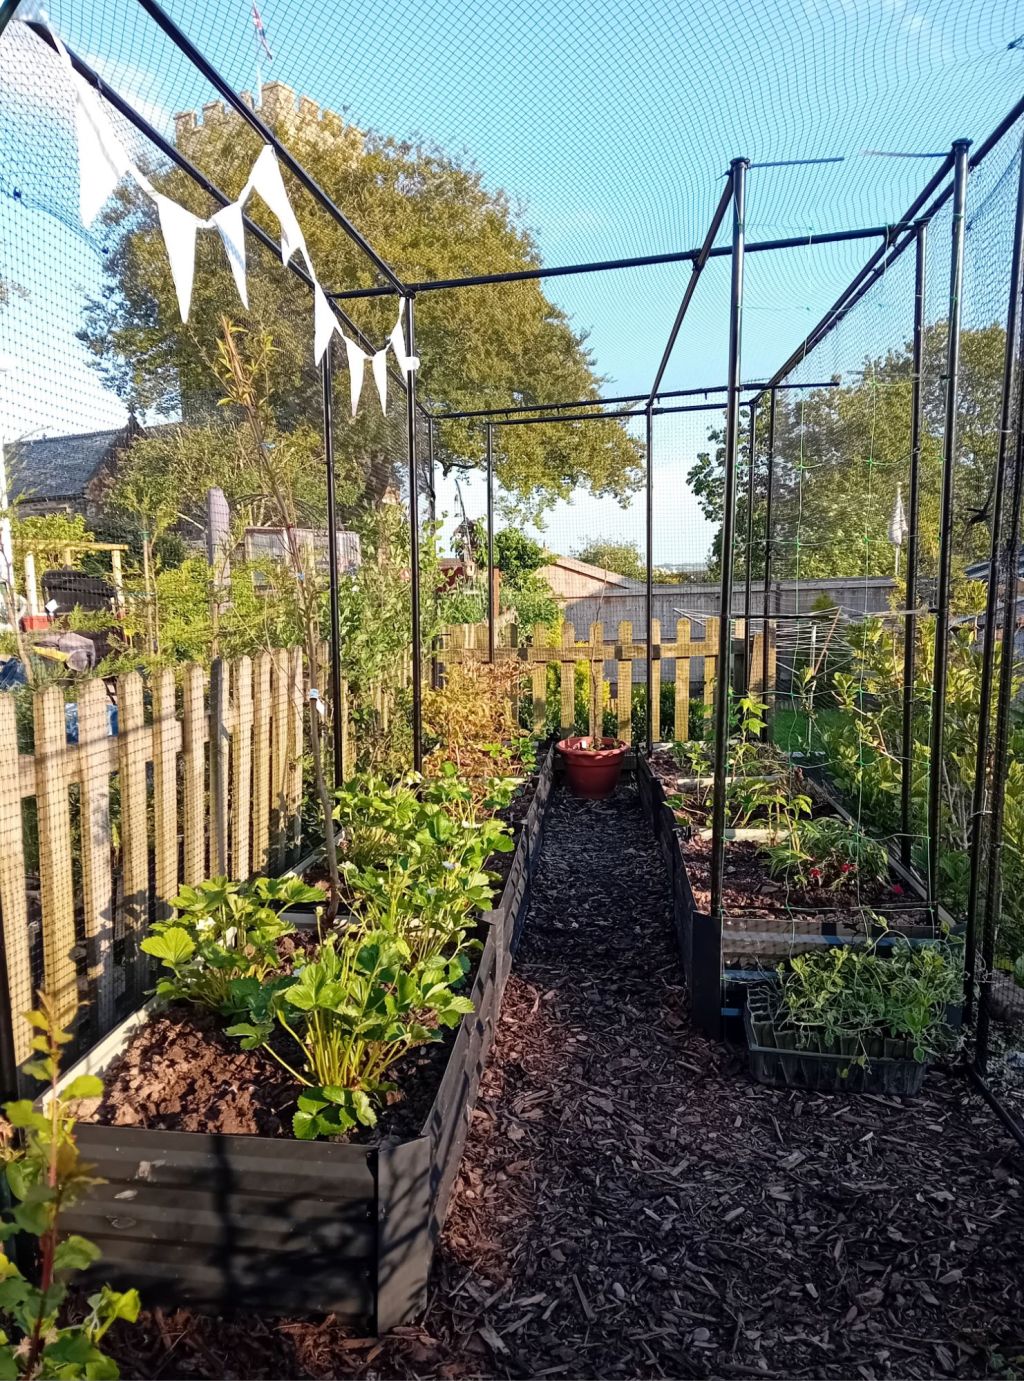
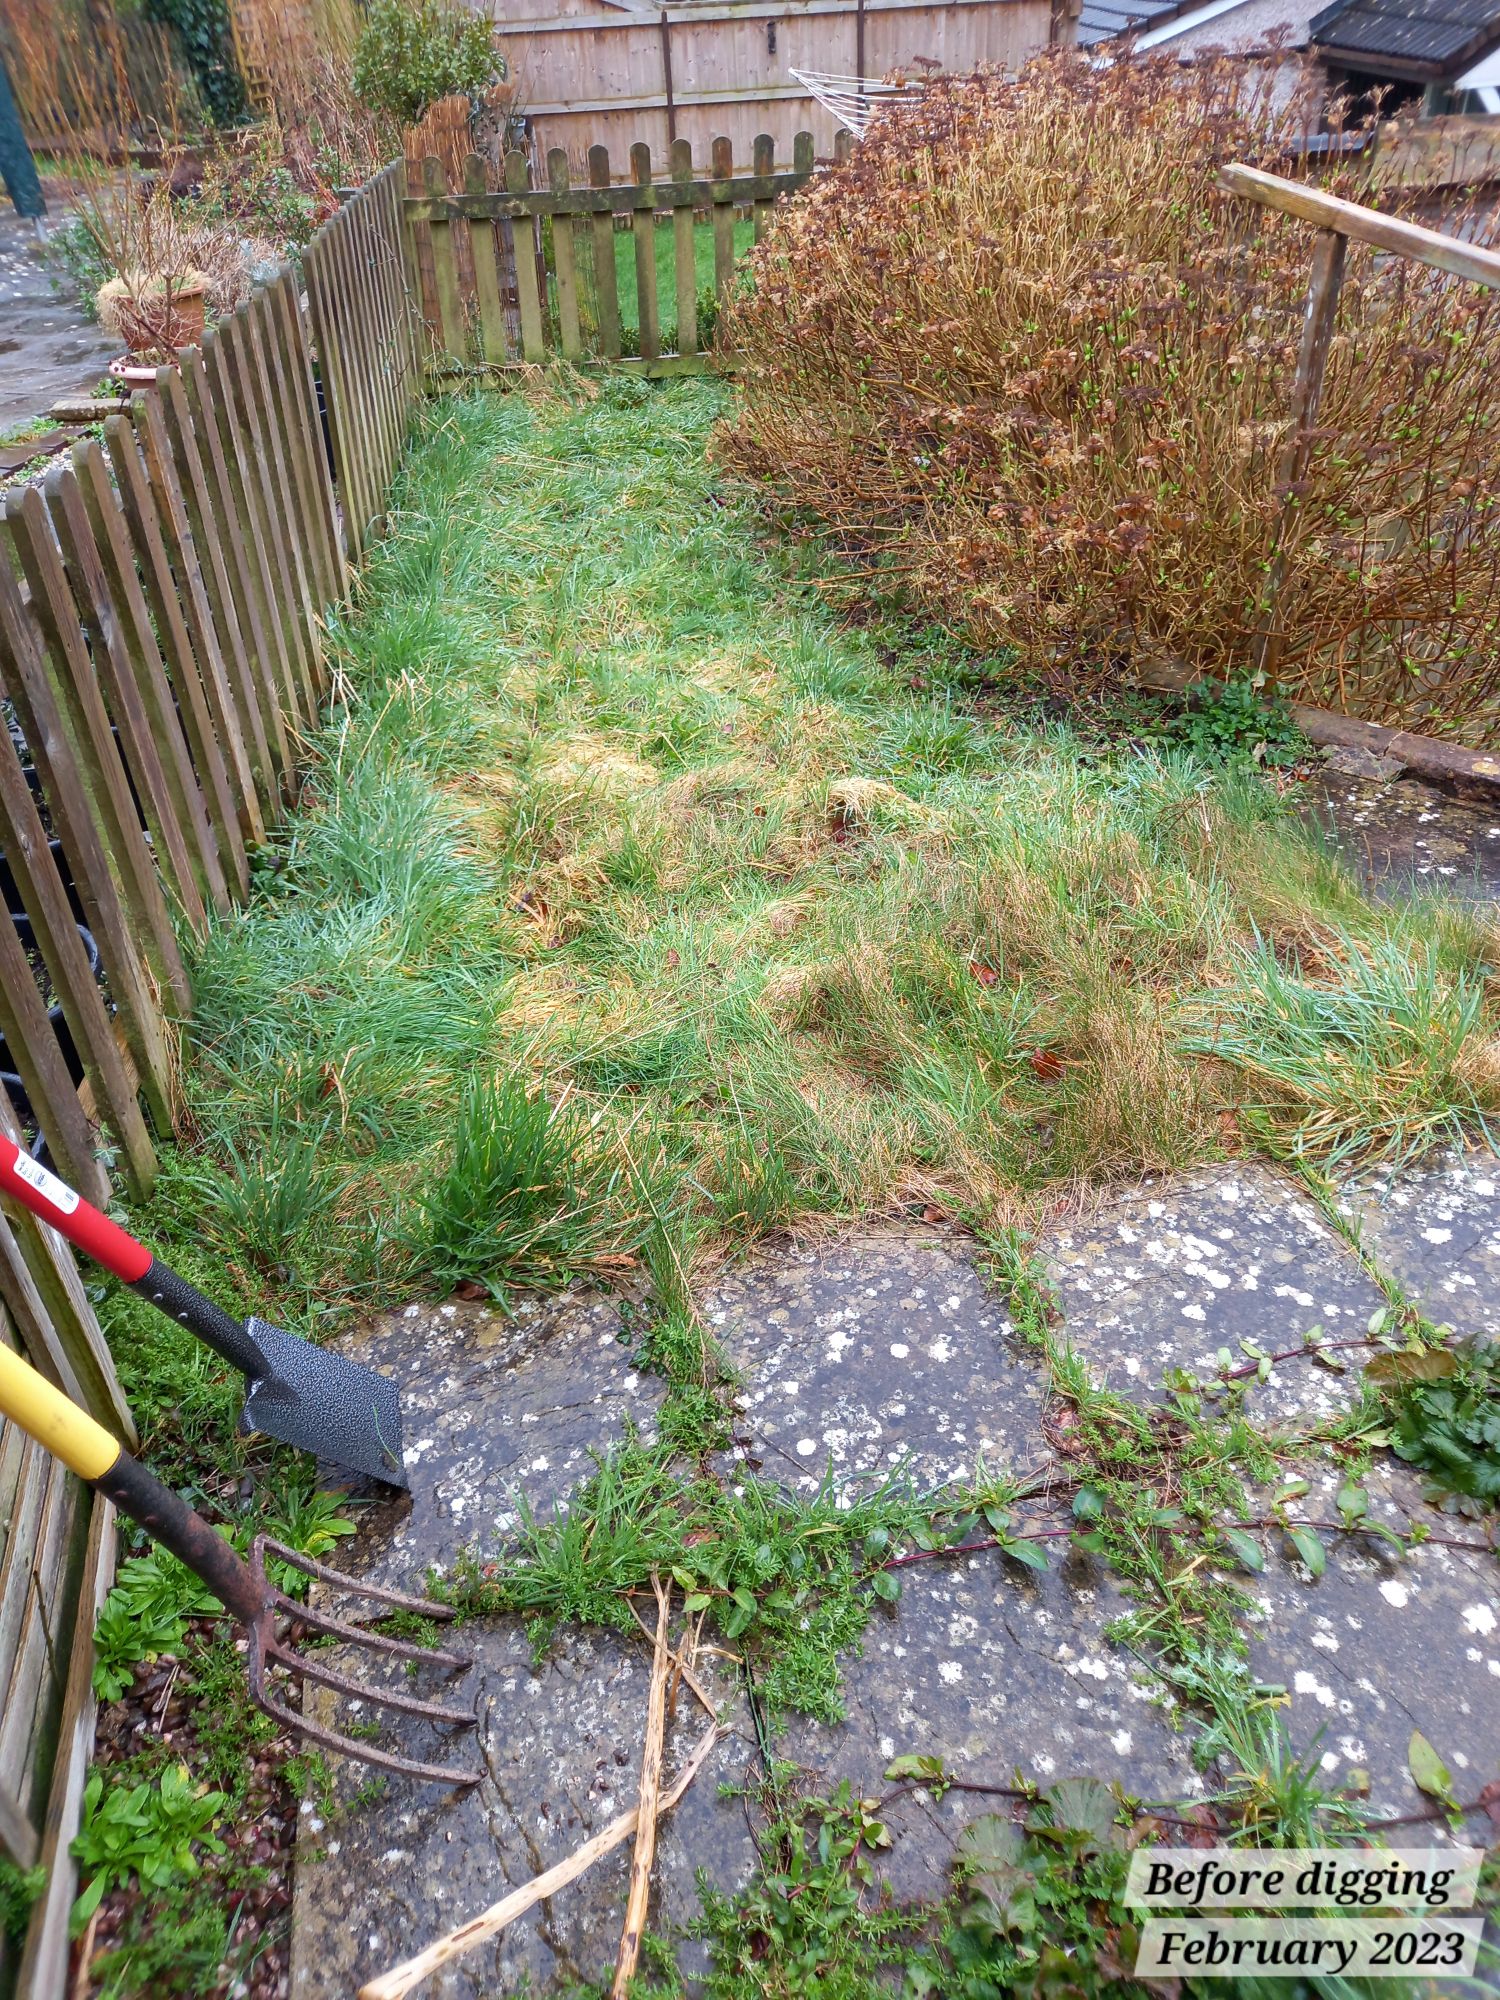
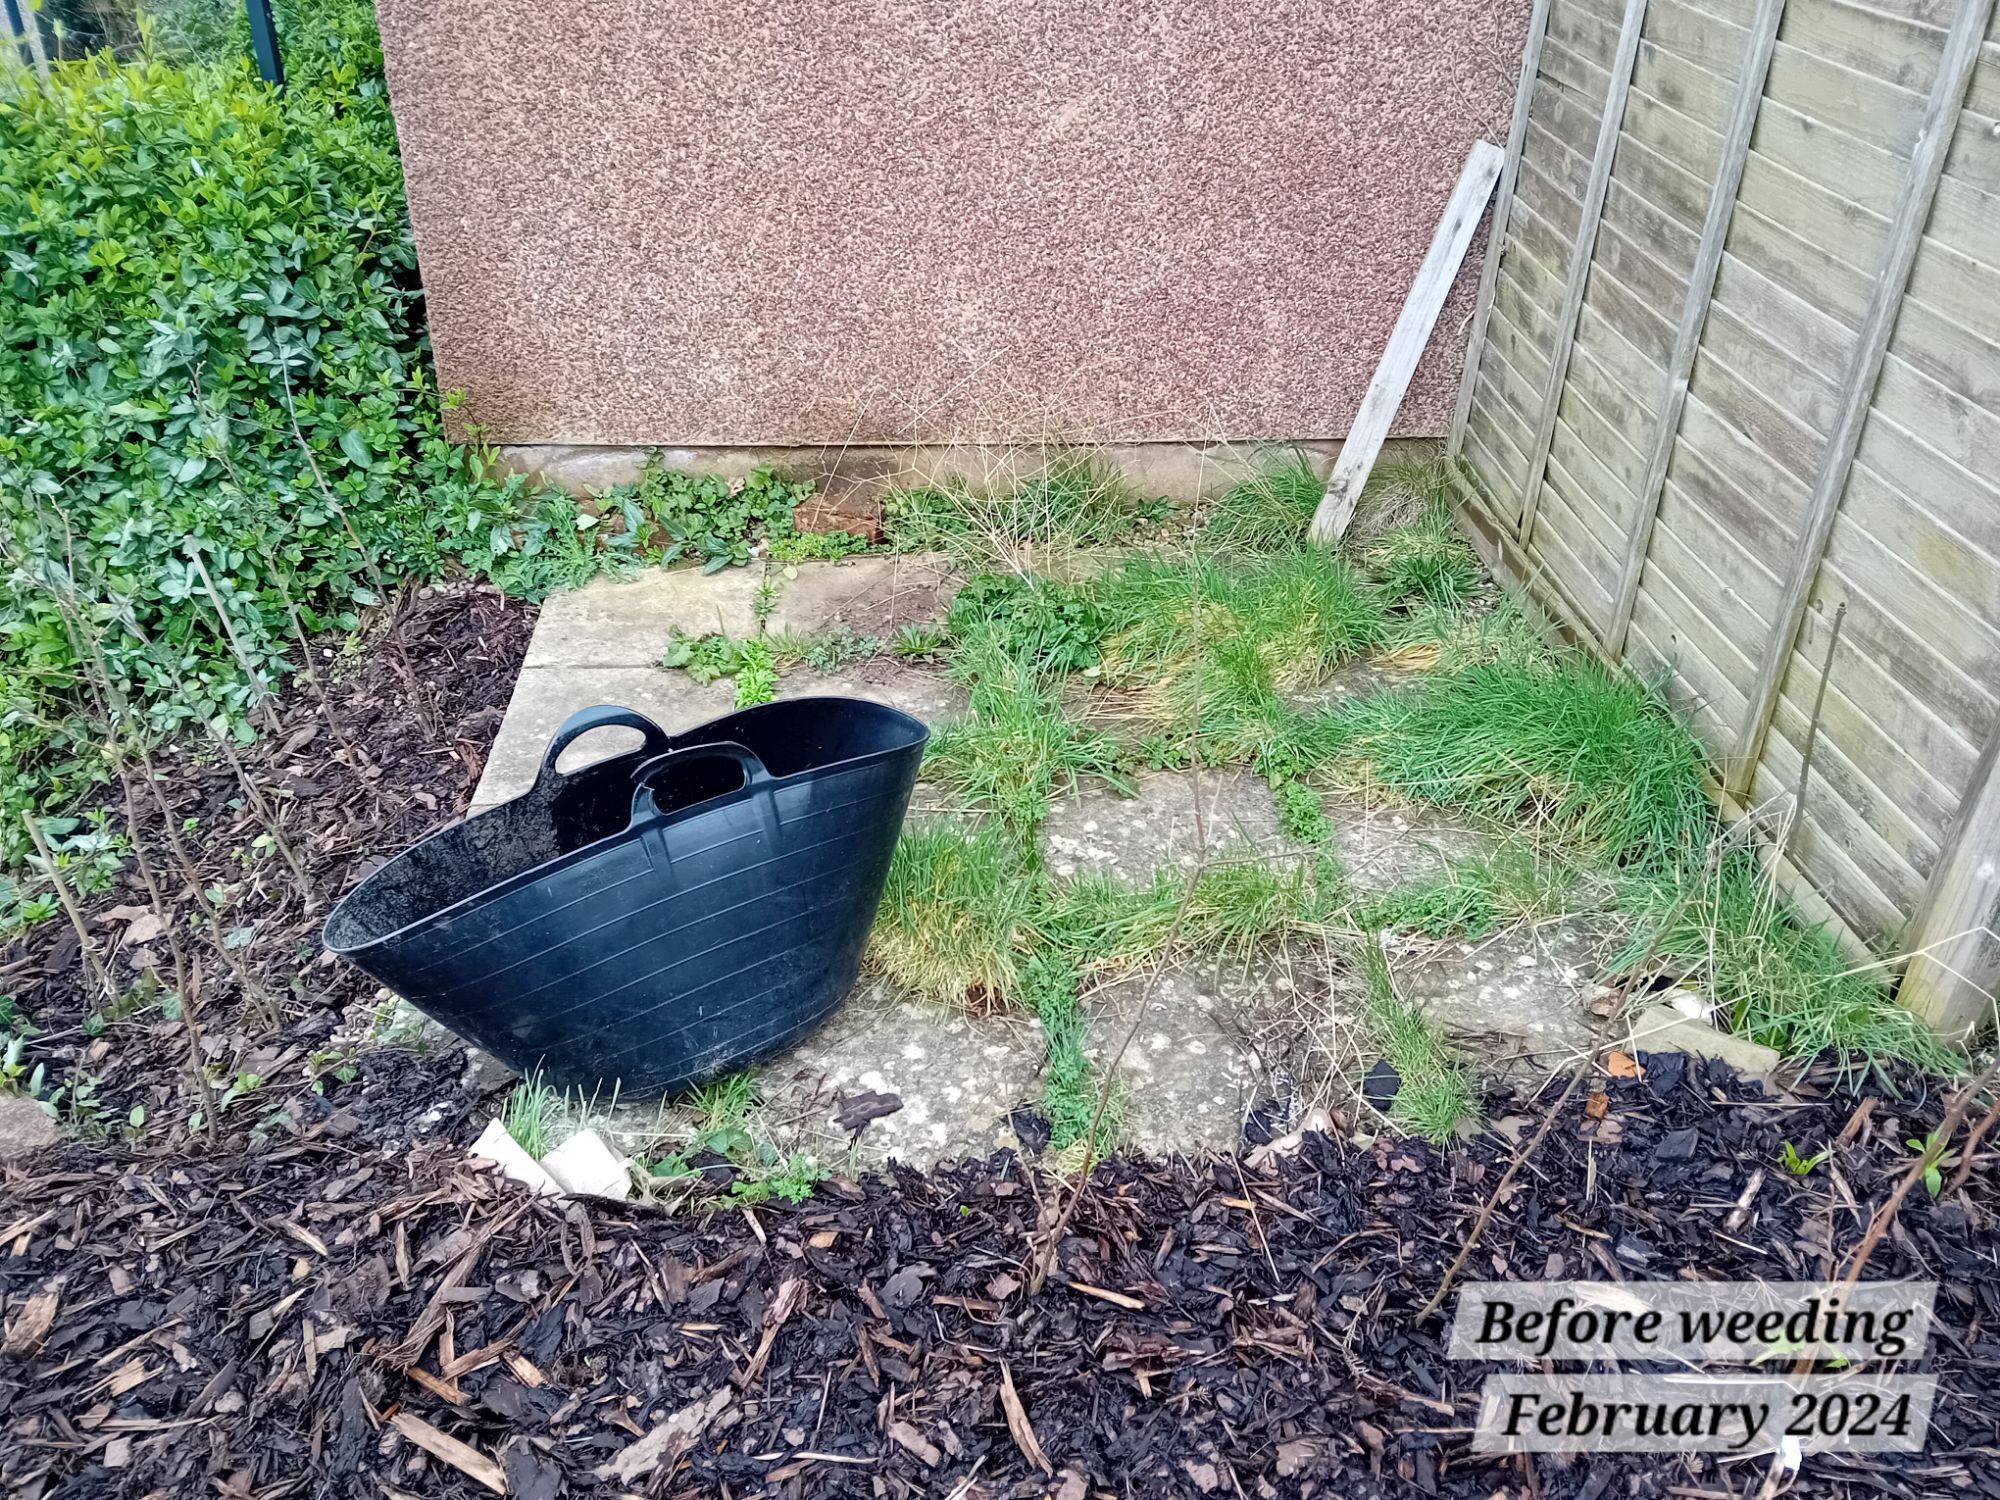
Brief snapshot – before and after
February 2023 to May 2025
Keep reading to see the transformation 🙂


To read my original blog post about The Fruit Garden – which shows you a full run through of how this area has changed over the years – click the link here:
Table of contents
- Brief snapshot – before and after
- Table of contents
- The Fruit Garden
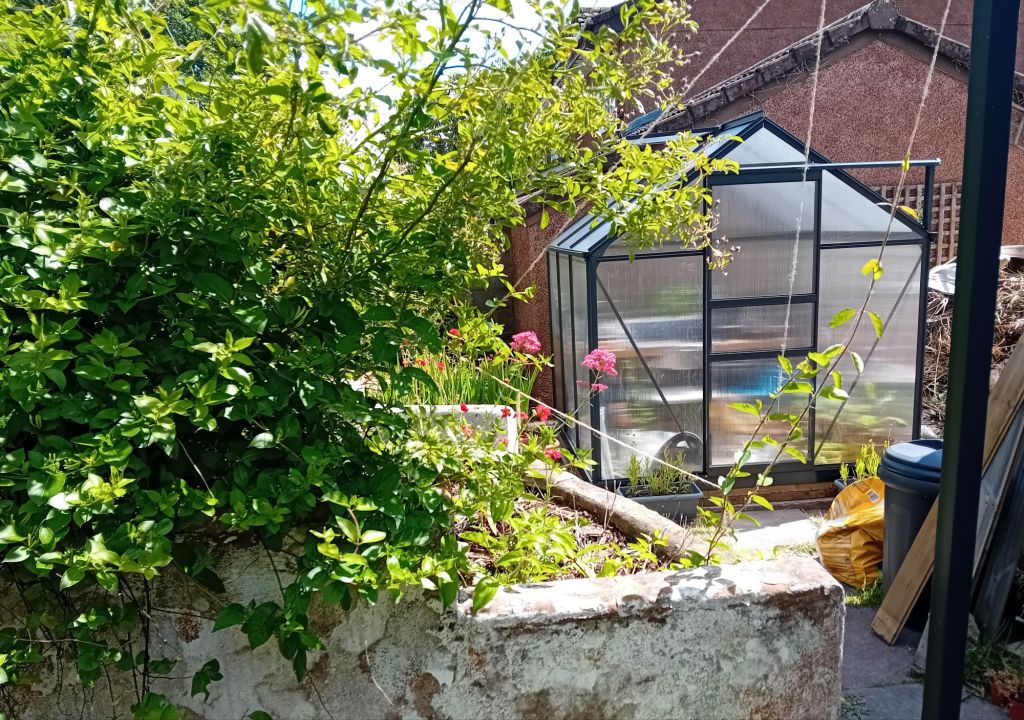
The Fruit Garden
PART ONE: Fruit supports and soil testing
Adding fruit supports
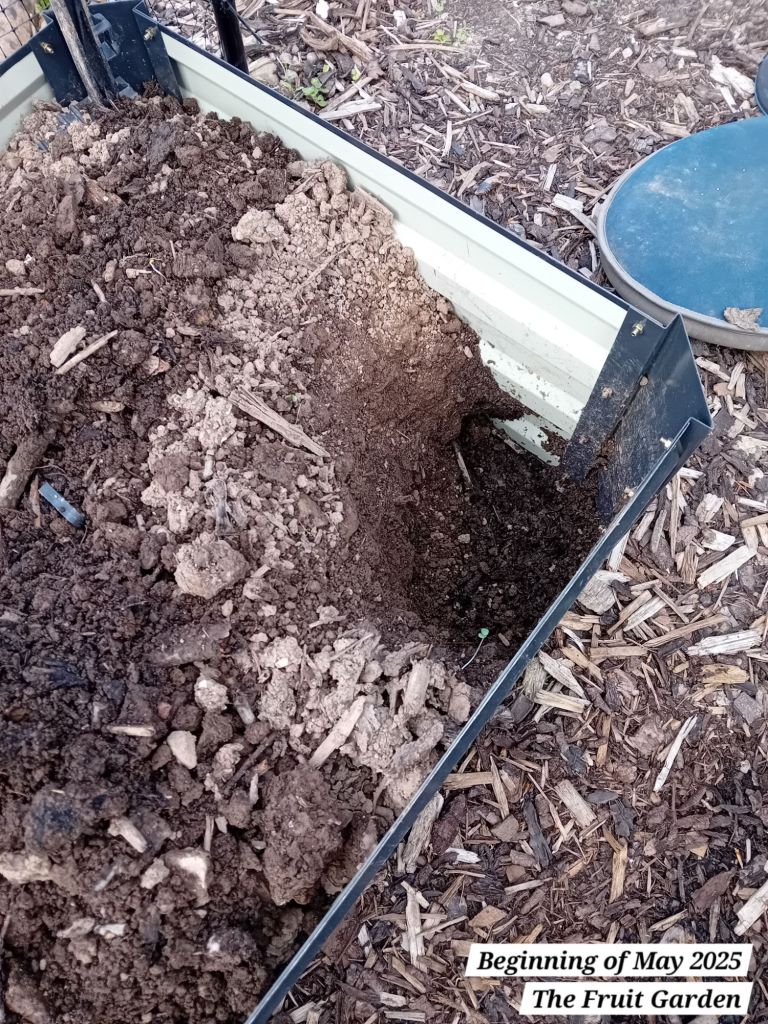
Before any further progress could be made in The Fruit Garden, some monotonous jobs had to be completed. One of those jobs was installing some additional uprights to provide supports for growing fruit.
Two weeks ago, the Mr and I completed this job and added some fruit supports in The Fruit Garden. These will be used for training the raspberries and all of the espalier and fan-trained fruit trees.
To install these, I simply dug a hole in each raised bed and then the Mr used the metal pole originally supplied with the fruit cage, to create 30cm to 40cm holes in the ground for each upright.
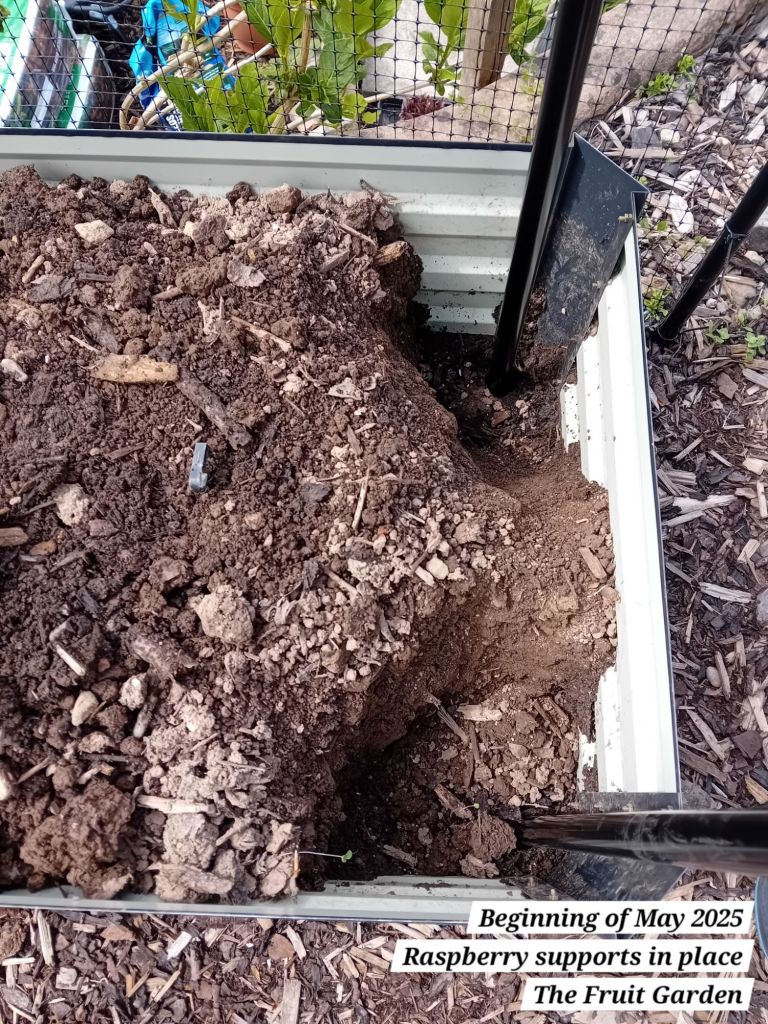
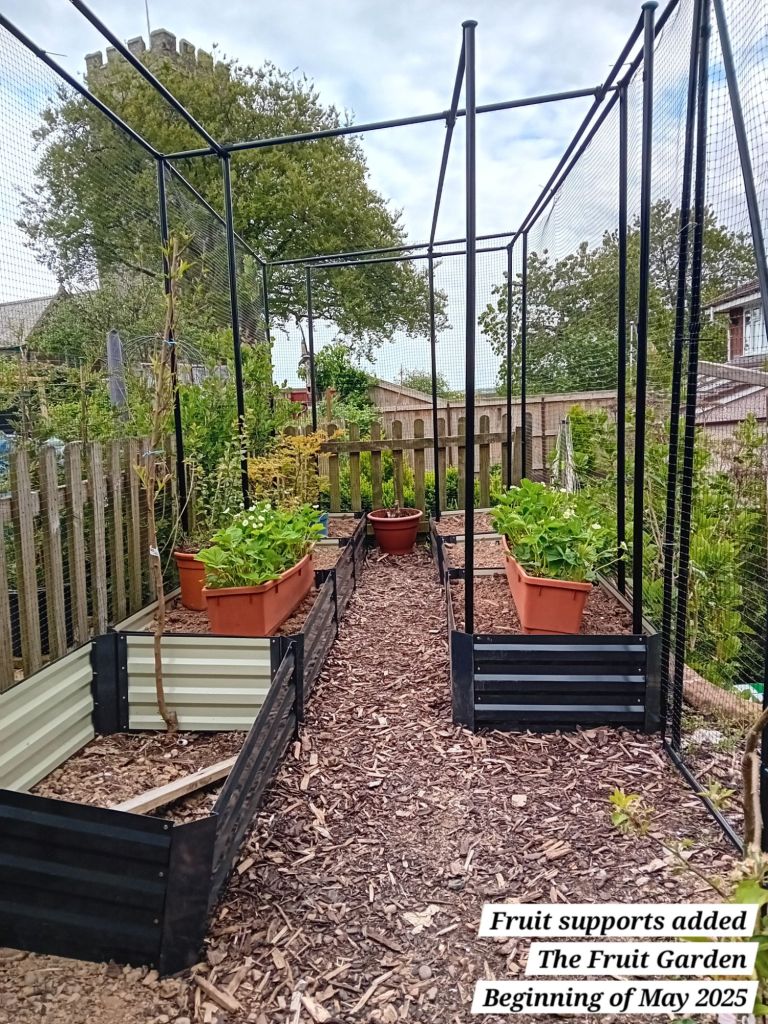
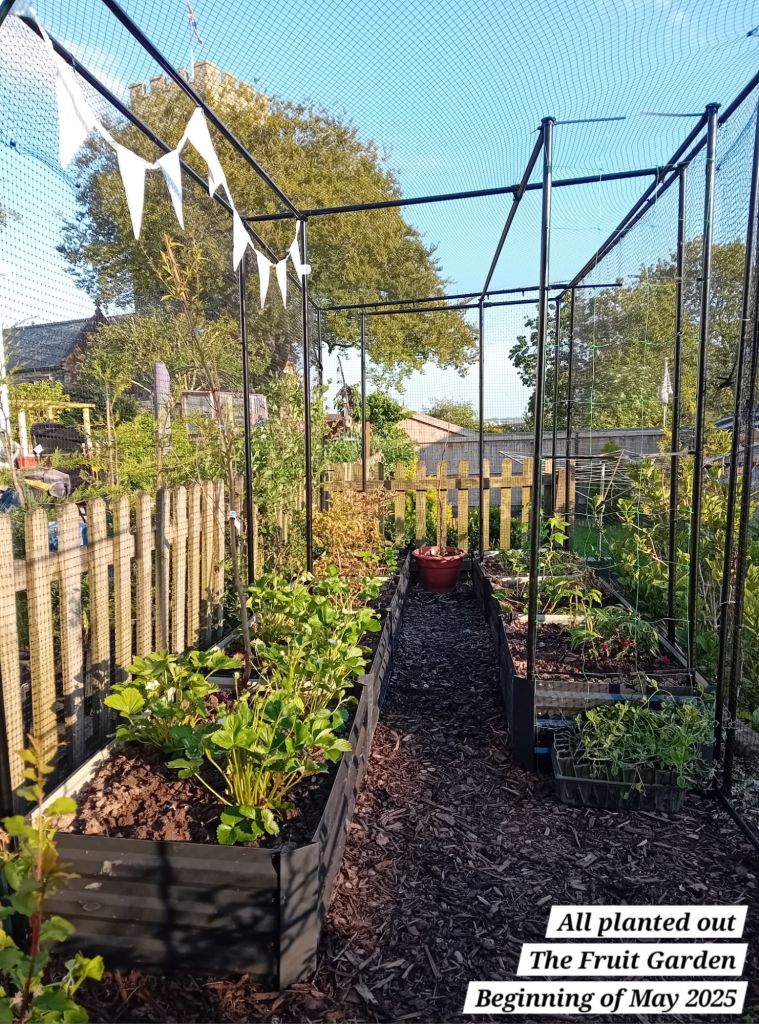
I will still need to add wires and other supports as necessary for each area as plants develop, but I was pleased to get this job done. Here is how the area was looking once all of the supports had been added. You may notice from the photo below that I added another bed to fill in the gap on the left – I later filled this in.
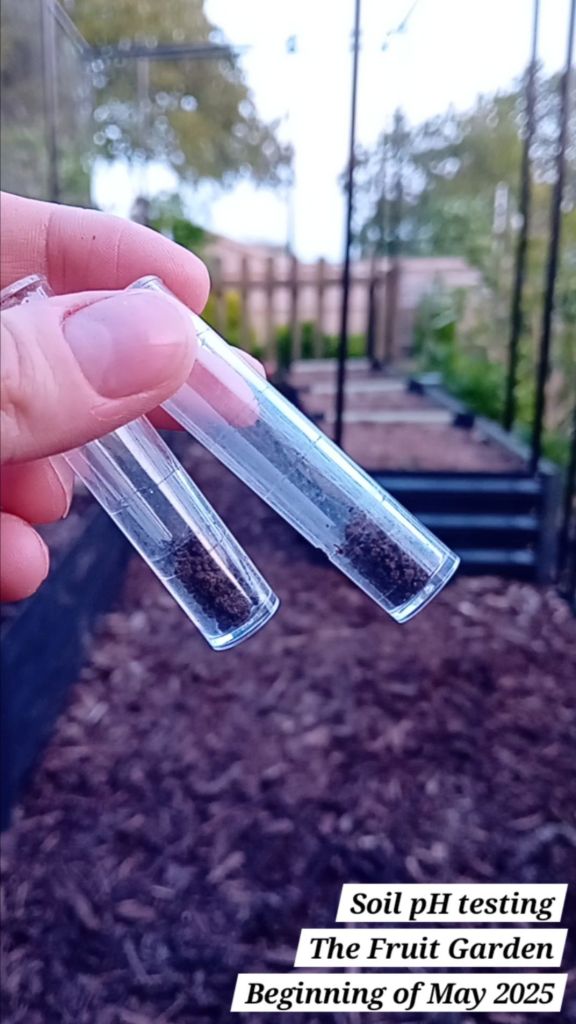
Soil pH testing
After the supports were all installed, I carried out a soil pH test to ensure that the soil in the raised beds was acidic (a video of that is available on Instagram here) The soil tested as acidic 🙂
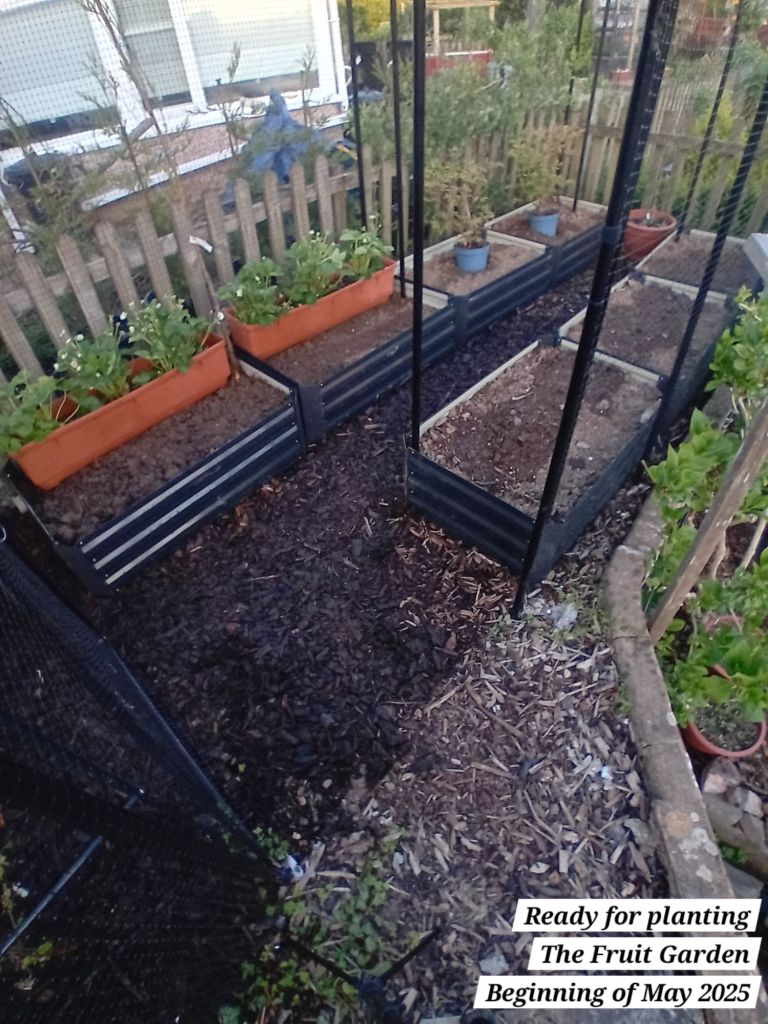
I also finally added the net roof to the cage. Then, at long last, the planting could finally begin!
PART TWO: The planting begins
I had originally thought I was going to plant out in stages, given the unseasonably warm and dry weather. However, there was an overcast and slightly cooler day last week and rain was forecast in the days following that, so I ended up planting everything out on that day! I gave everything a thorough watering in and then left the rain to settle everything in further in the following days.
It is still incredibly warm and dry weather, so I have been soaking all of my new plants really well about once a week whilst they get established. I have listed below all of the details of each fruit I planted and details of what I will be growing in The Fruit Garden 🙂
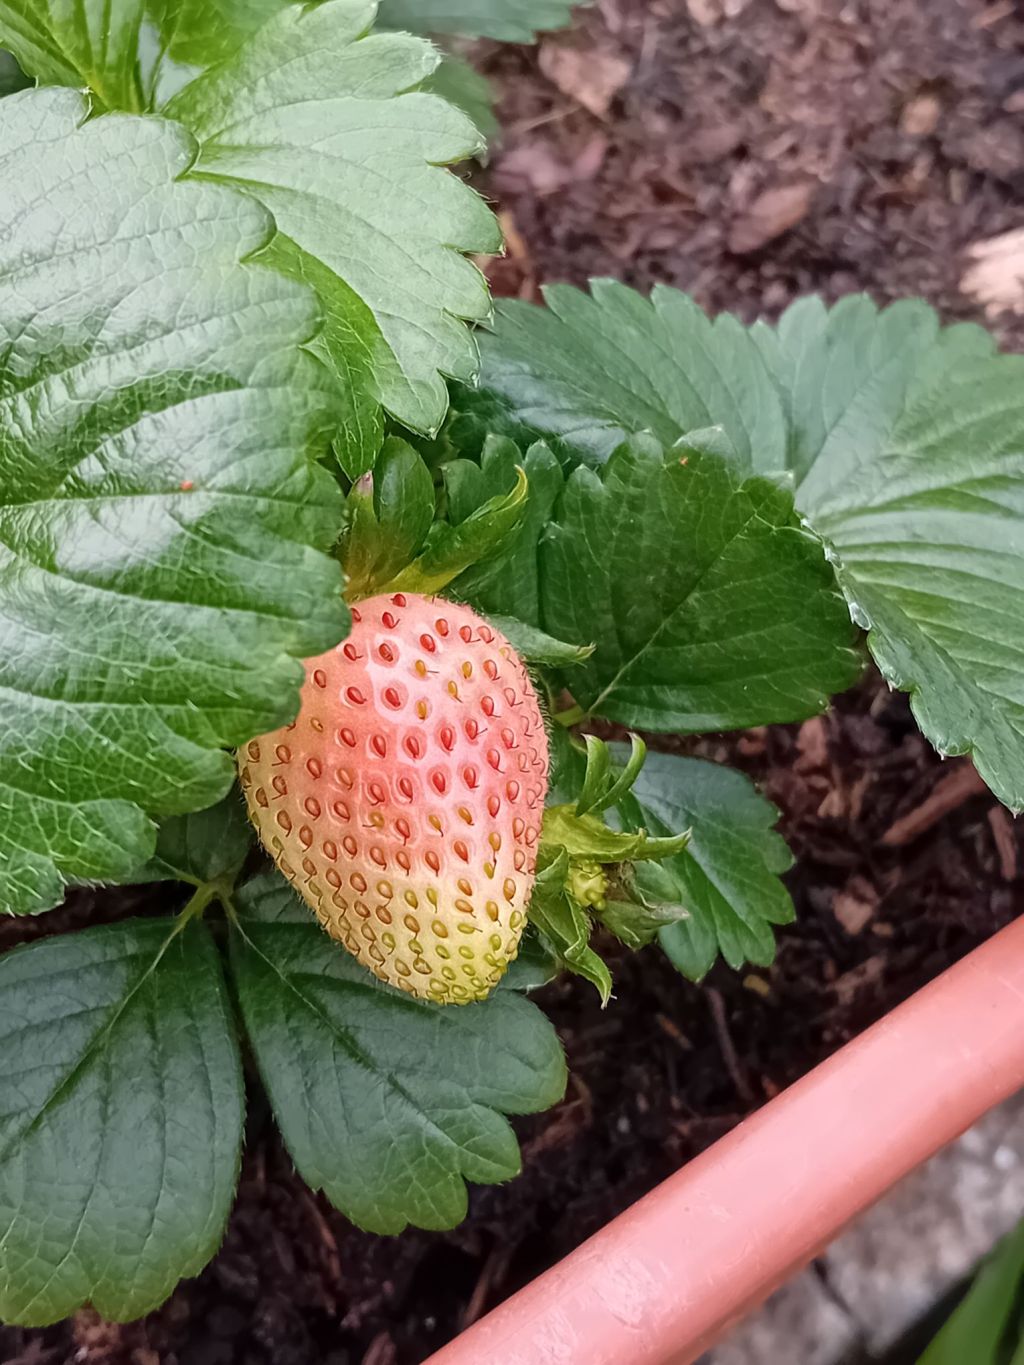
Strawberries
Fragaria x ananassa ‘Elan’
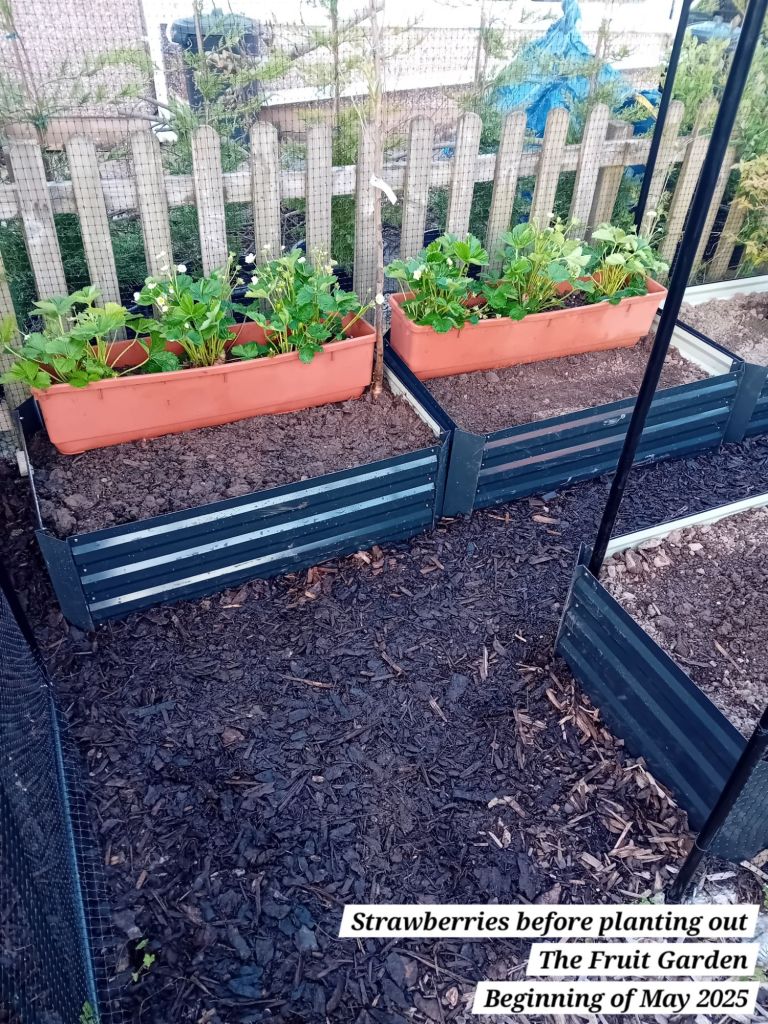
I originally bought and planted strawberry plants in May 2024 and they have sat in large troughs:
I propagated new strawberry plants from these last year, which are currently potted up and I have more to plant out once they have been hardened off. I will be gifting some spare ones away, too.
To read the original post about the strawberries, see here: Planting out potatoes and strawberries… and experimenting with a globe artichoke
To find out how to propagate strawberries, click the link here: Propagating strawberry plants and adding a gorgeous new dahlia to the garden
Keeping these strawberries in troughs was less than ideal, because I had to be careful to ensure they stayed well hydrated in dry, sunny weather. The access to The Fruit Garden is up a flight of stairs in the garden, so it is less than ideal to have to constantly drag up hosepipes or watering cans for watering pots etc!
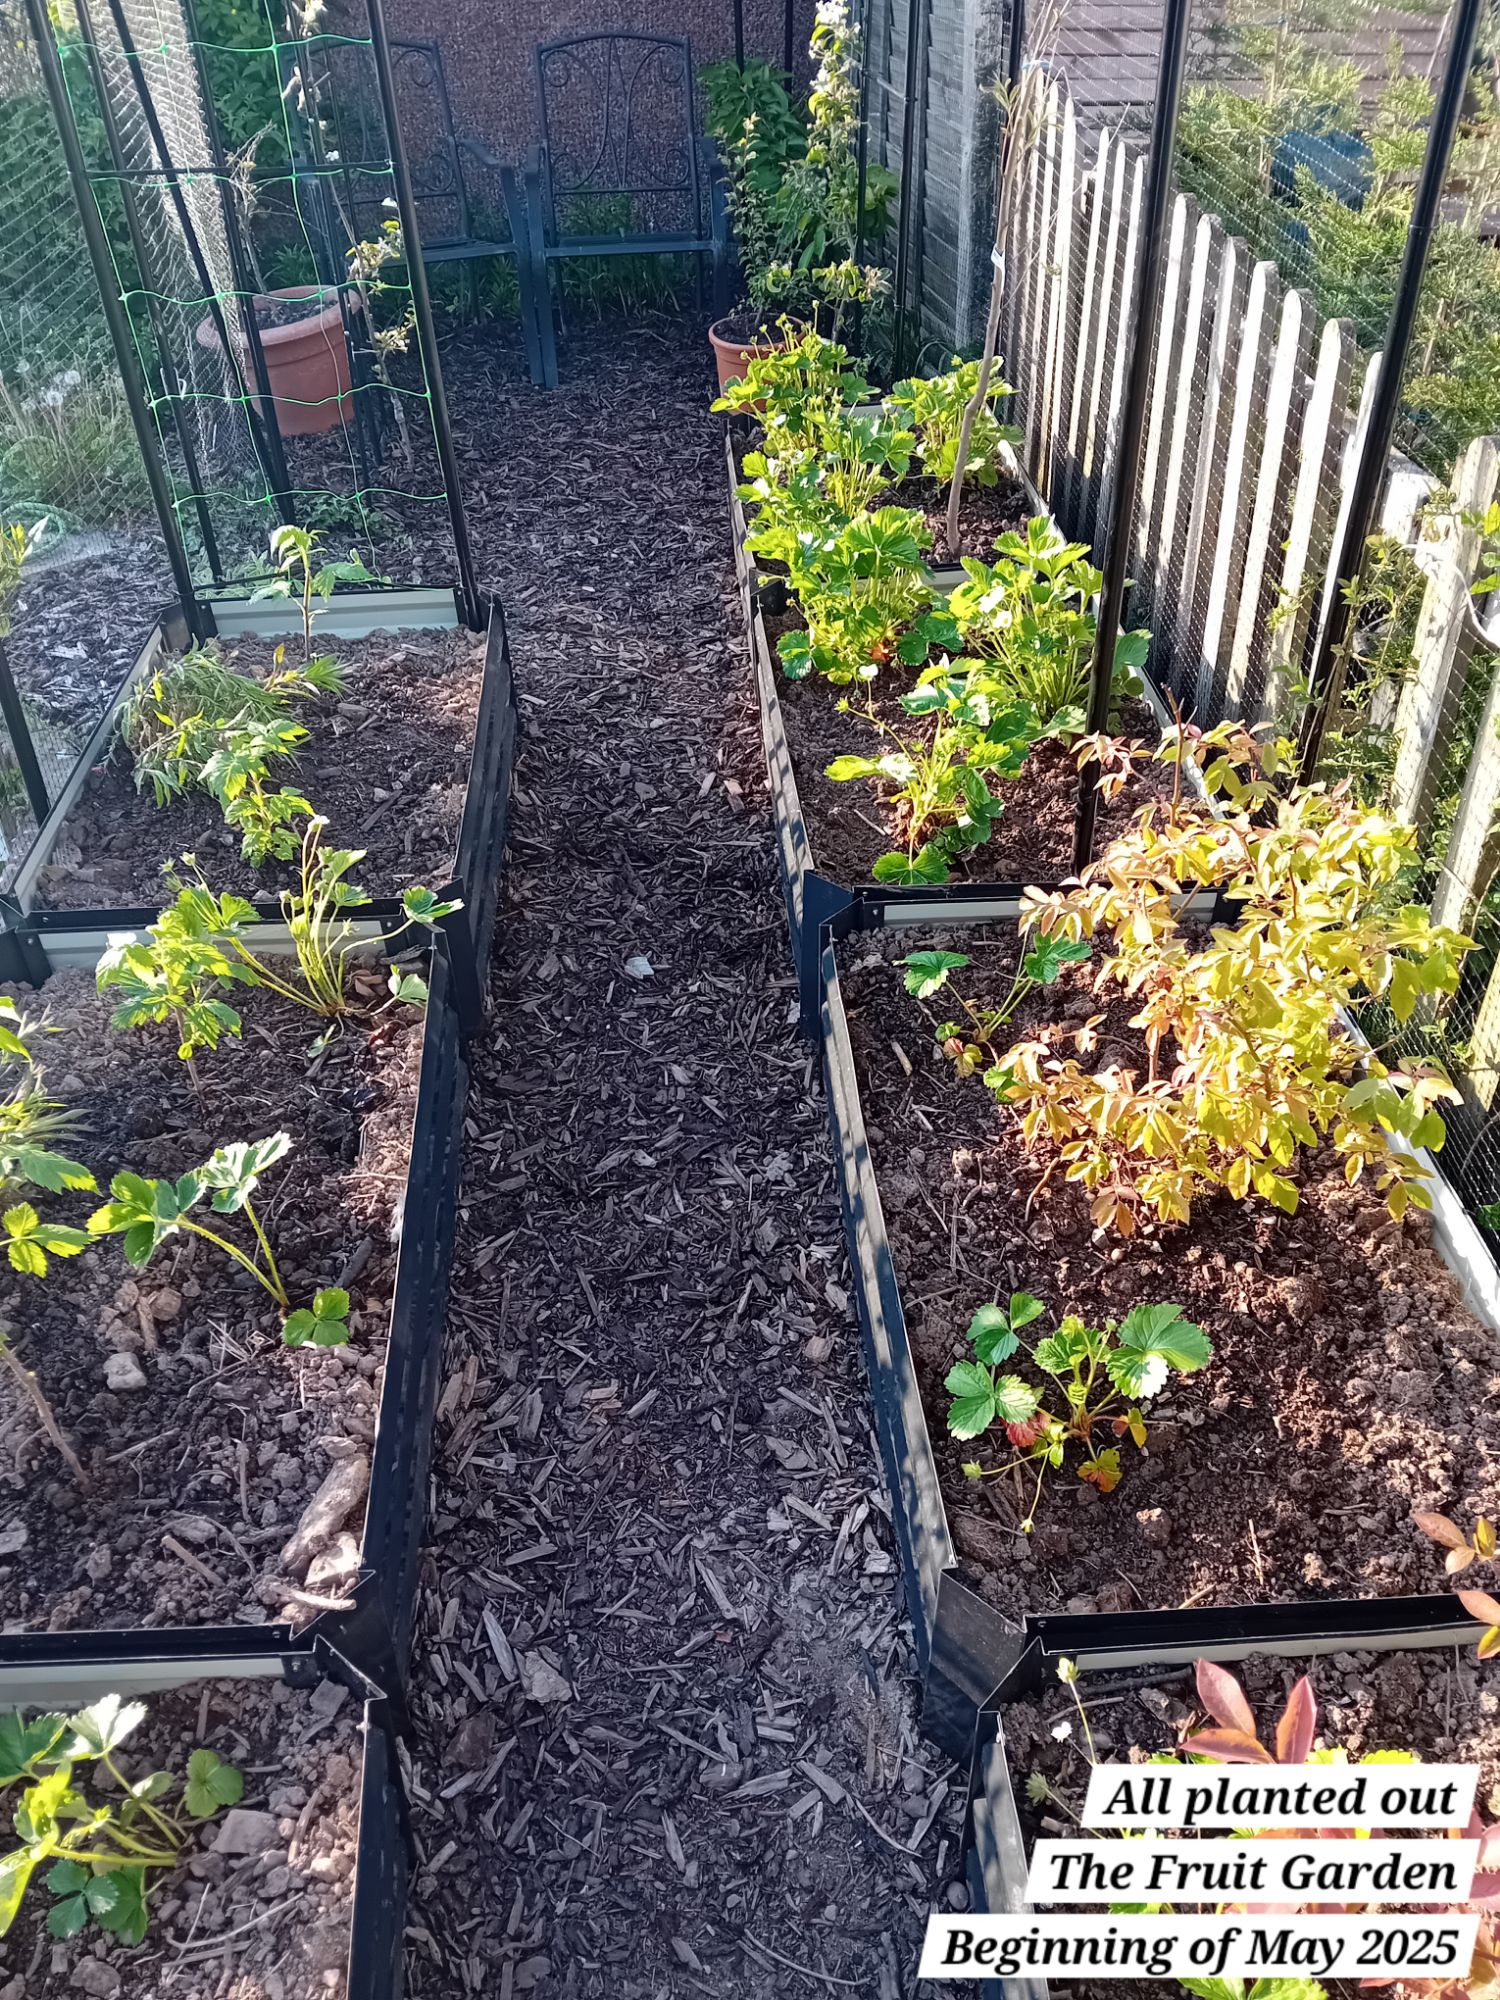
I therefore planted the strawberries throughout the raised beds in The Fruit Garden, using them as evergreen ground cover to retain moisture and suppress weeds:
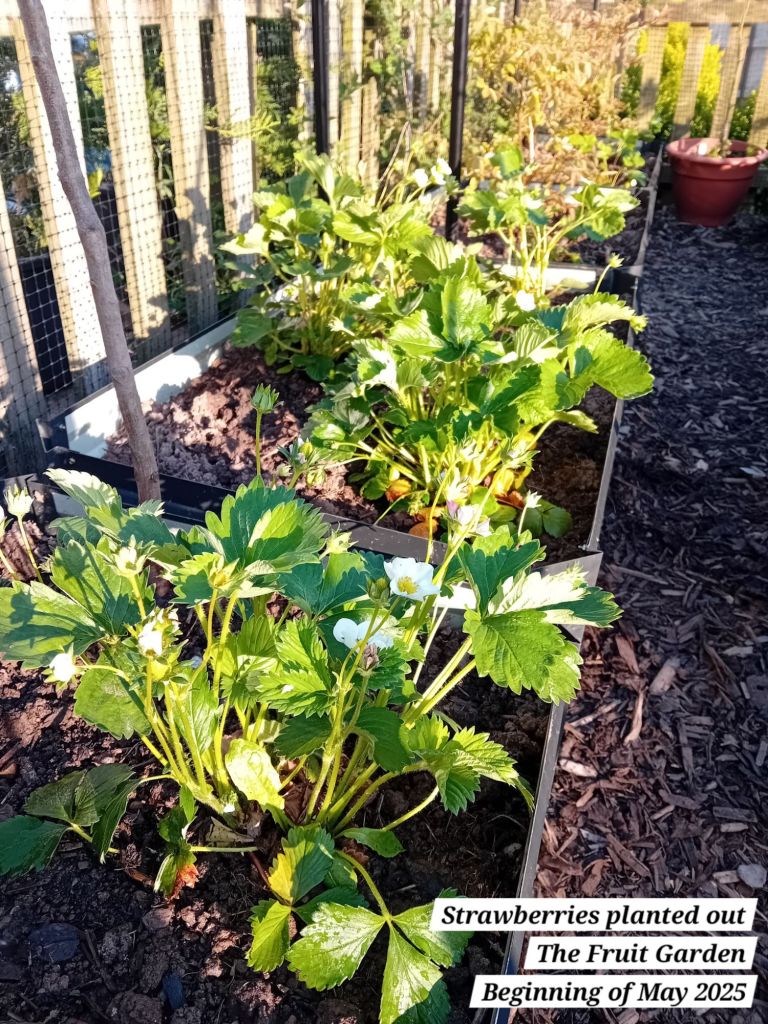
This variety of strawberry is an ever-bearing variety that produces medium-sized juicy fruits from July to October and they have a sweet flavour. I really don’t think you can beat the taste of strawberries picked fresh from the plant!
Blueberries
Vaccinium corymbosum ‘Rancocas’
The next plant I planted out were the blueberries.
Last year, I bought two blueberry bushes from my local garden centre, with the intention of starting to plant out in The Fruit Garden. However, life became very busy with work commitments and I ended up deciding to keep the blueberries in their pots until I was ready to progress further with the garden.
I planted both of these blueberry bushes in their own individual raised beds:
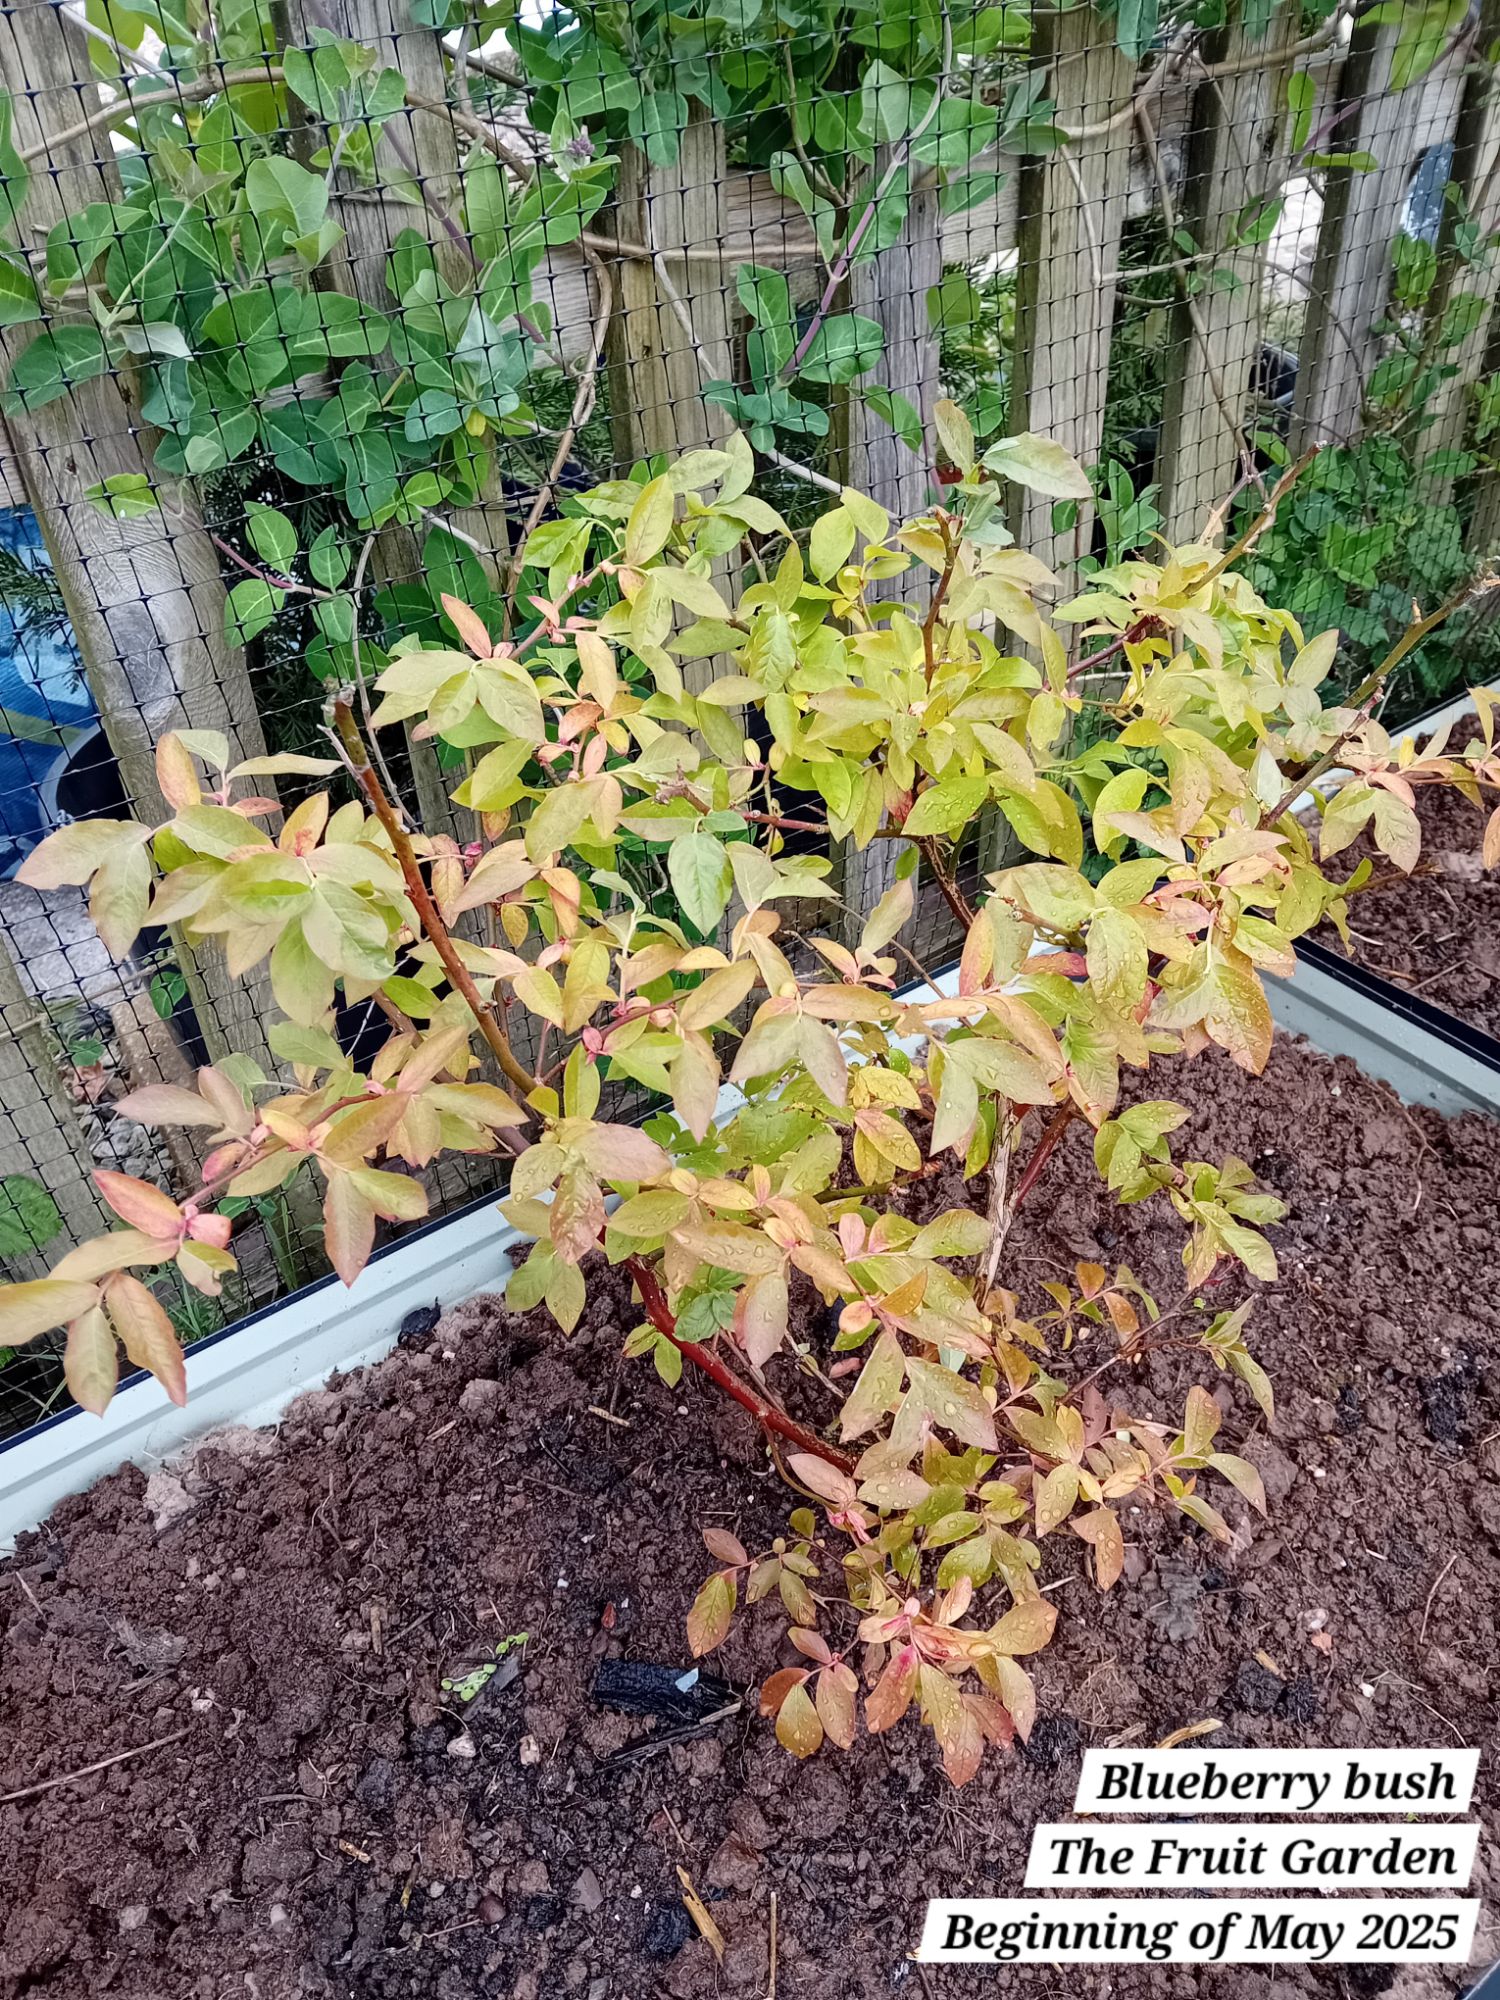
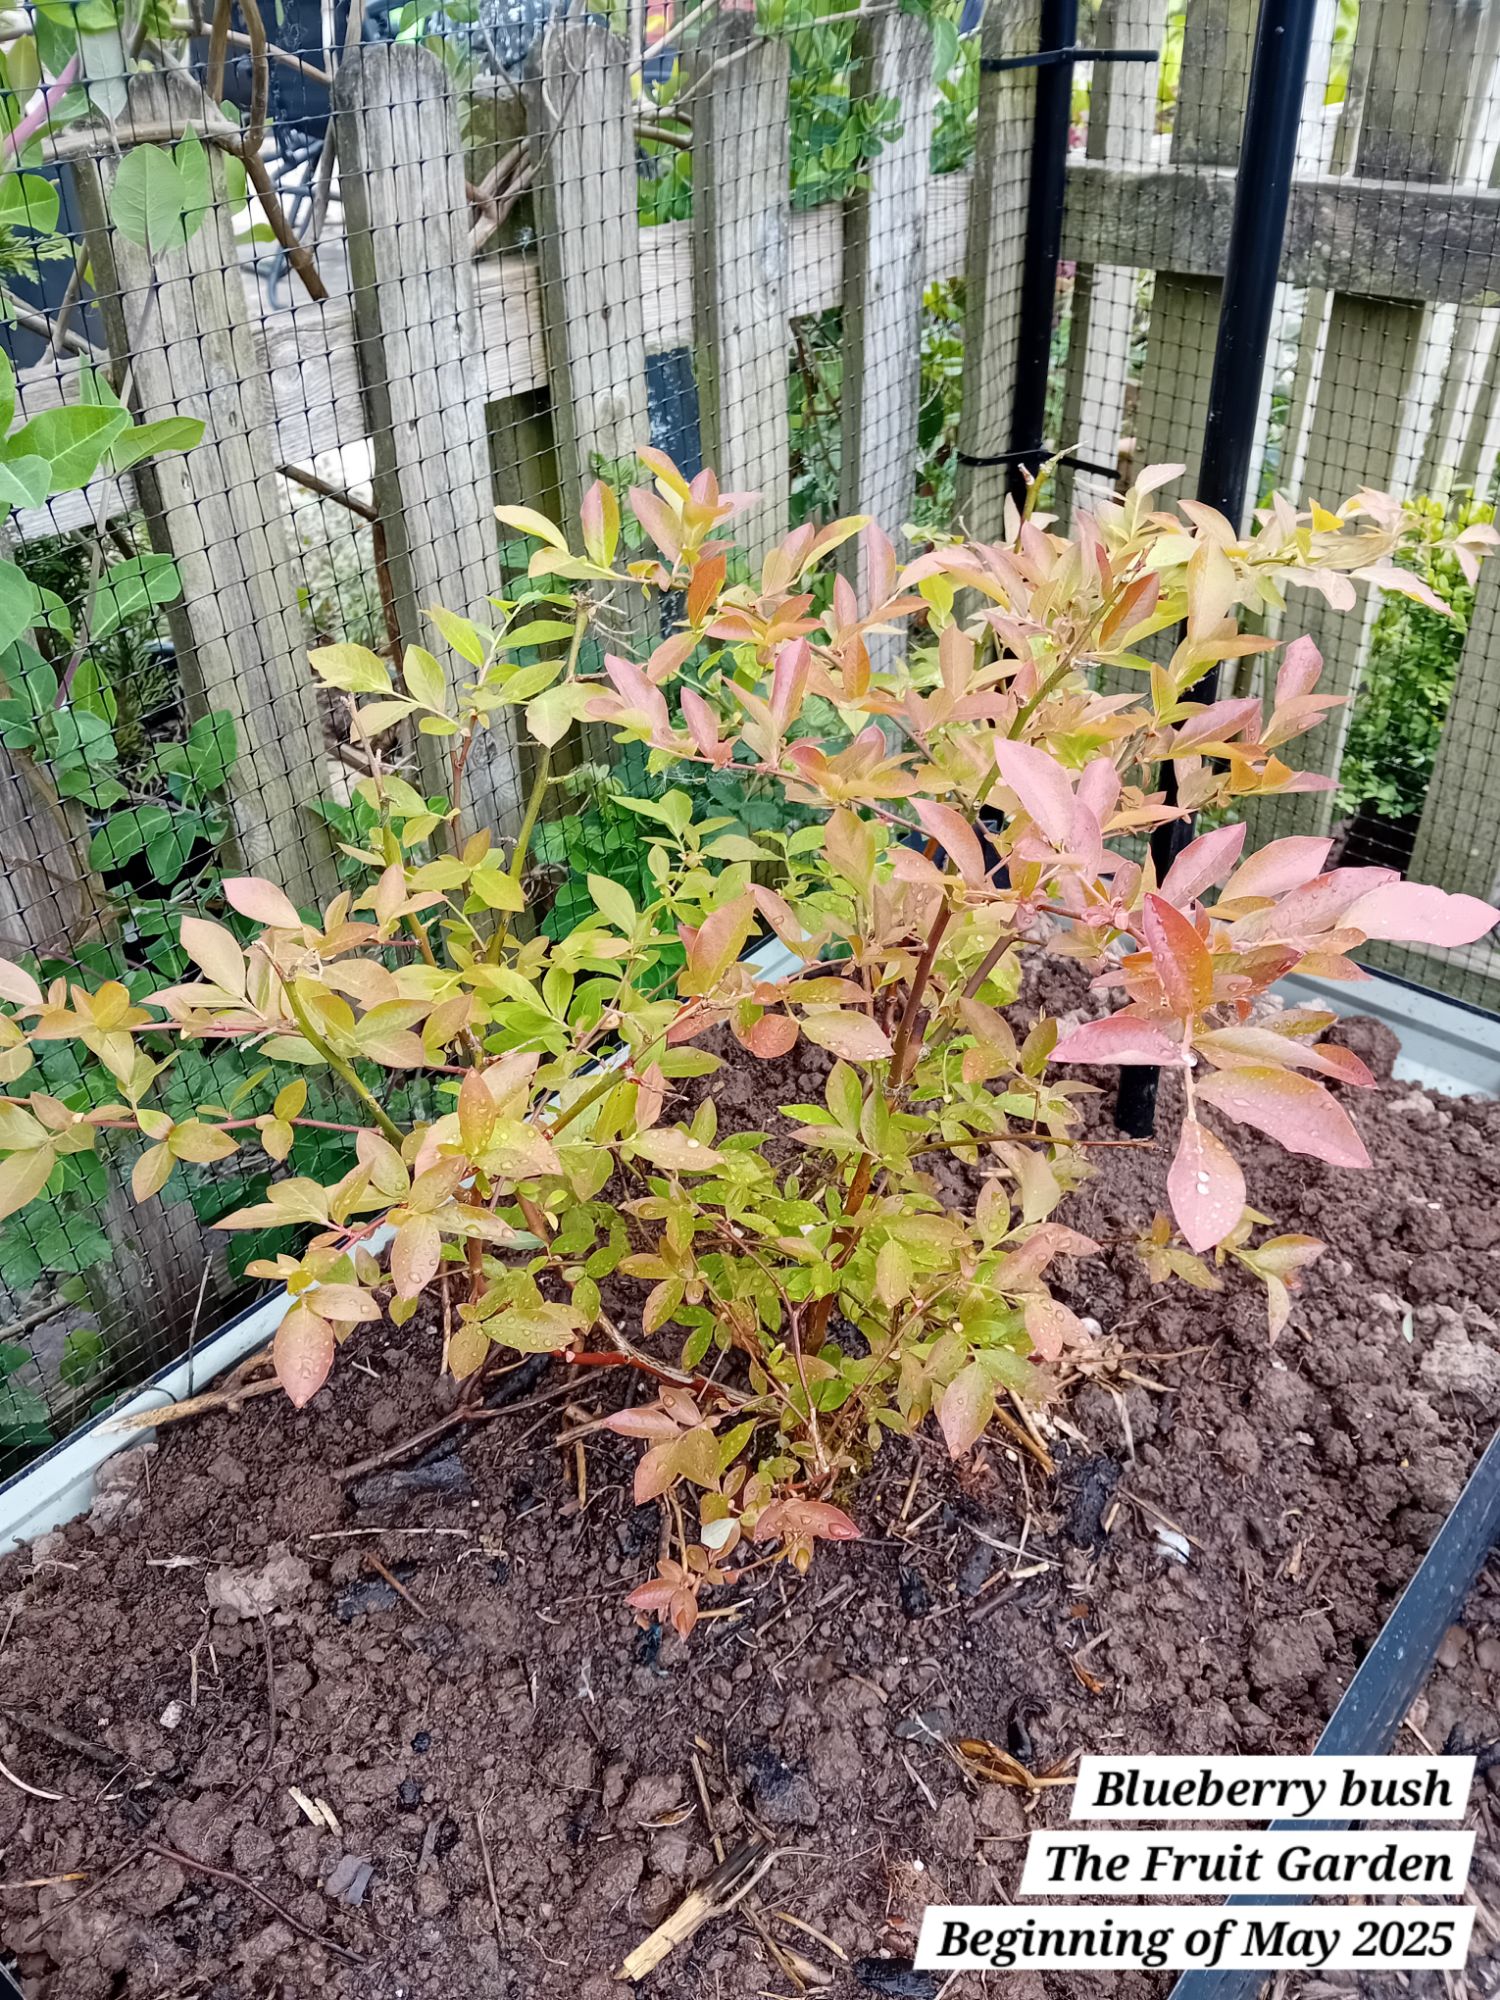

I underplanted these with the strawberries, which is an ideal planting combination as they both love acidic soil and should not compete too much for nutrients.
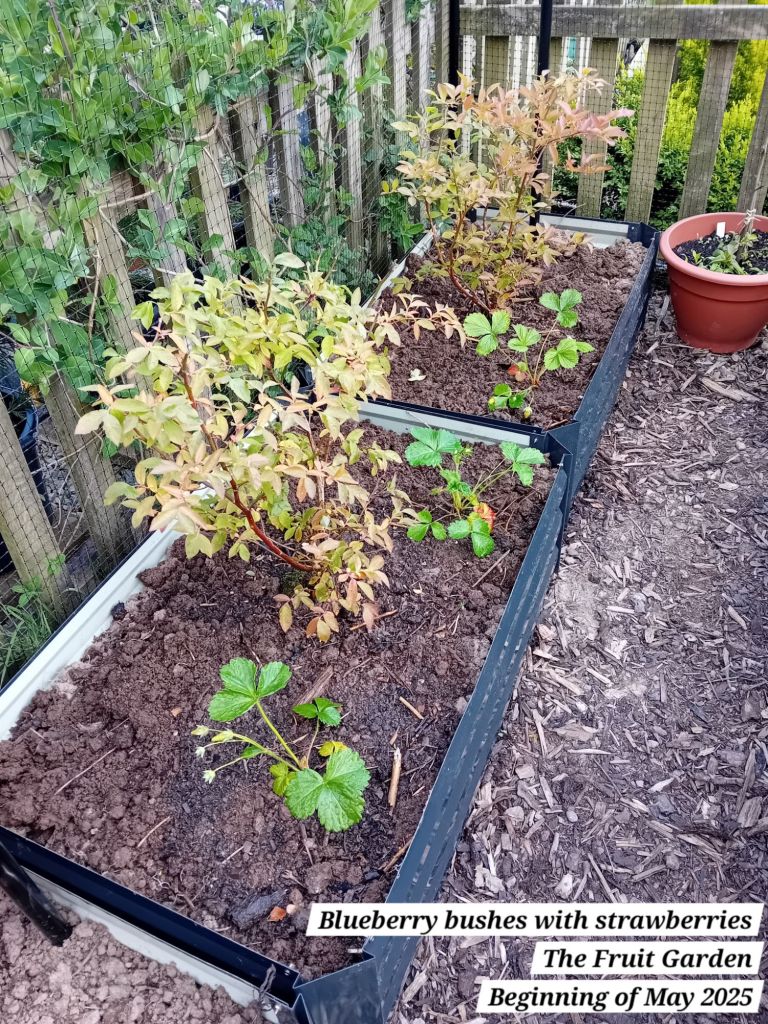
This variety of blueberry is a bushy shrub, that according to the plant label can reach a height and width of 1.25cm, but I have read information online that that states they may grow up to 2 metres in height and width. I don’t mind these bushes growing taller, but I will have to prune their width if they grow too much. I am aware that you can train blueberries vertically, so that is always an option to experiment with if needed! These ideally want a semi-shaded position; as other plants in the opposing beds grow, they will eventually provide some shade for the blueberries.
These blueberries produce light pink flowers from May to June and the fruits ripen from July.
Raspberries
‘Autumn Bliss’
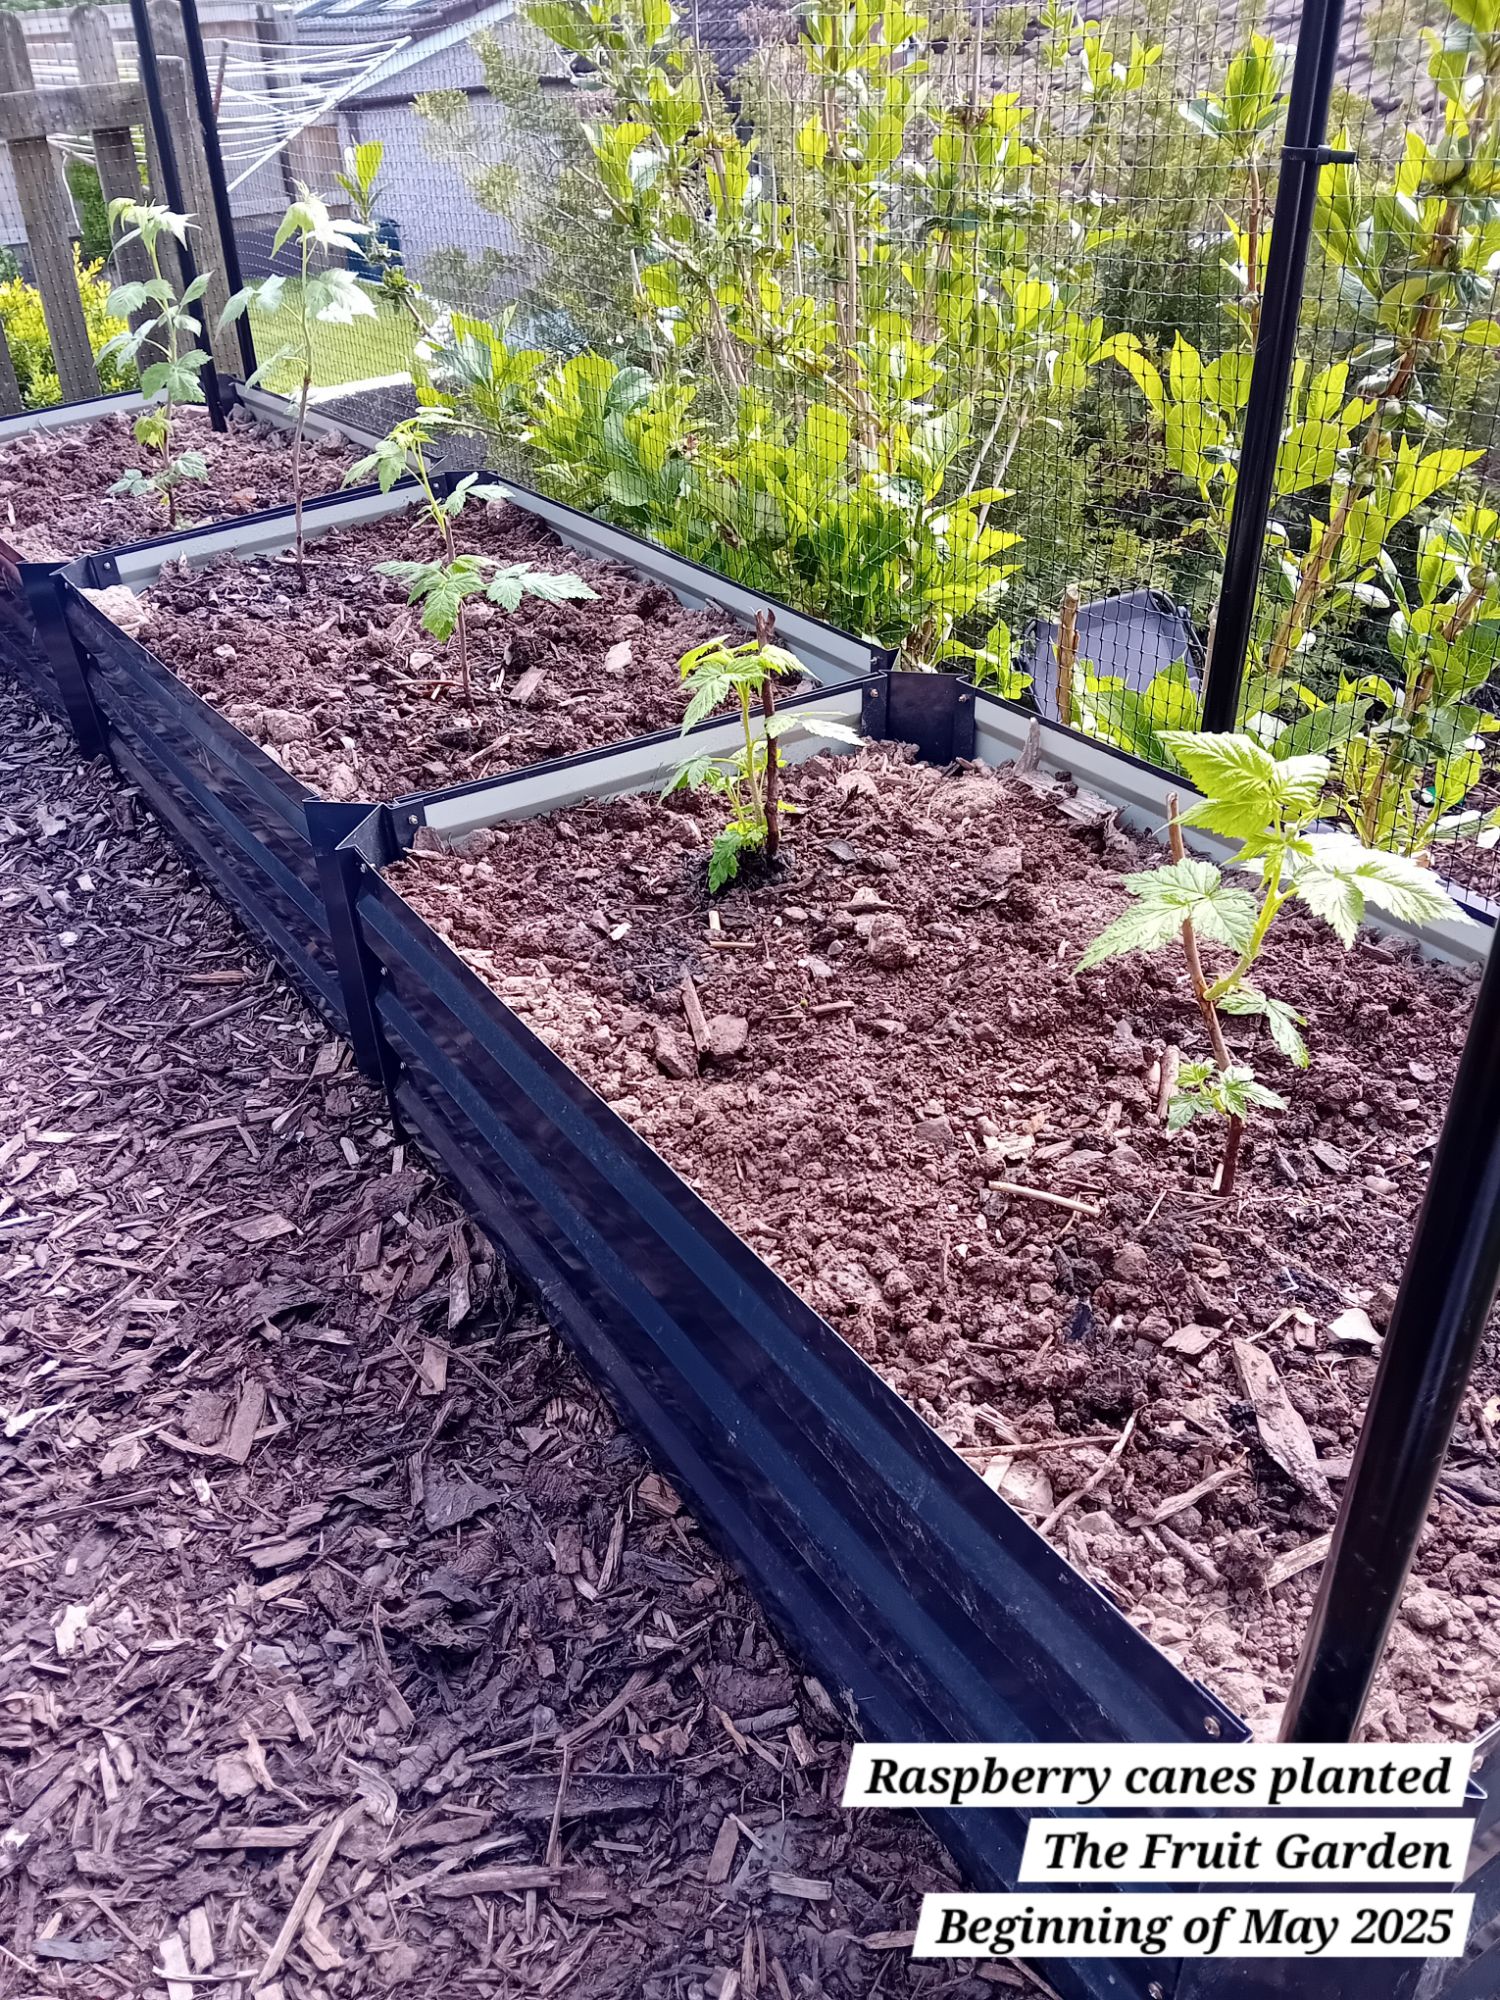
I also planted out five autumn fruiting raspberries; a well-known variety known as ‘Autumn Bliss’. I potted these as from bare root canes at the beginning of April 2025:
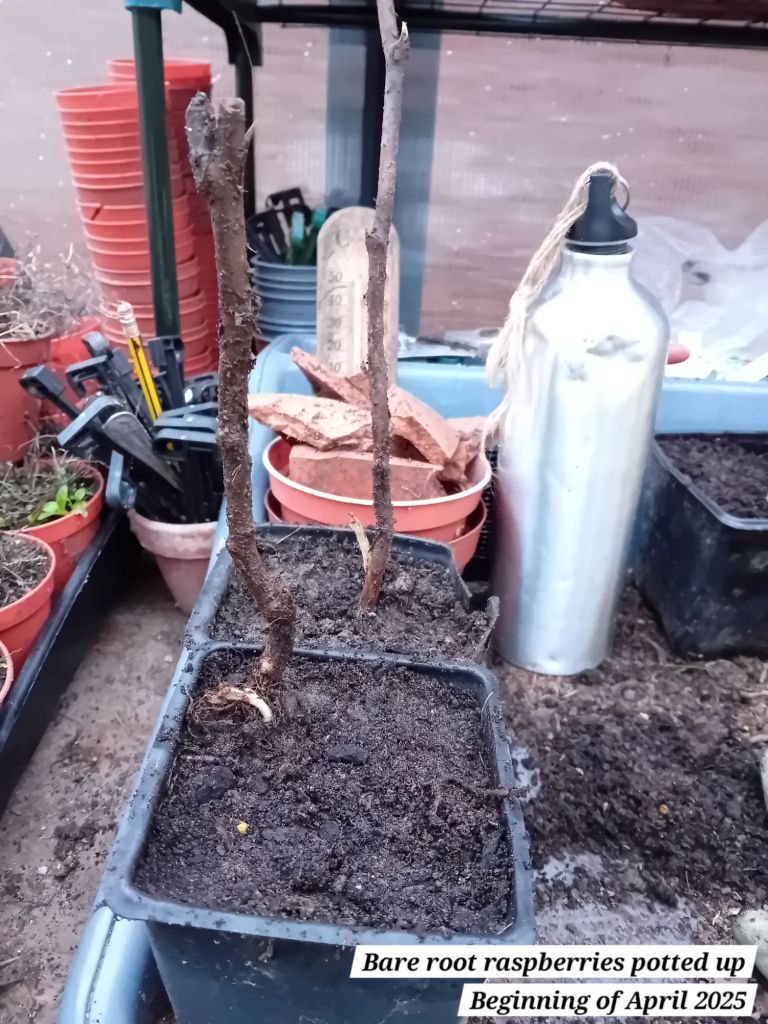
To read my post about potting up bare root raspberry canes, click this link: A brief update – cherry blossom, japanese anemones, bulbs and fruit
After potting these raspberries up, I have just been looking after them to get them ready for planting out. Every cane took well:

This variety of raspberry is considered the most reliable of the Autumn-fruiting varieties and it produces a heavy crop of large, attractive berries from late August until mid-October (and possibly later if the weather stays fair in warmer parts of the country).
I planted these out across the front row of beds, spaced about 50-55cm apart, which looks too wide for now, but as they mature, they will fill this bed. 60cm is the ideal spacing if you have the space for that, but between 45 to 60cm will be fine:
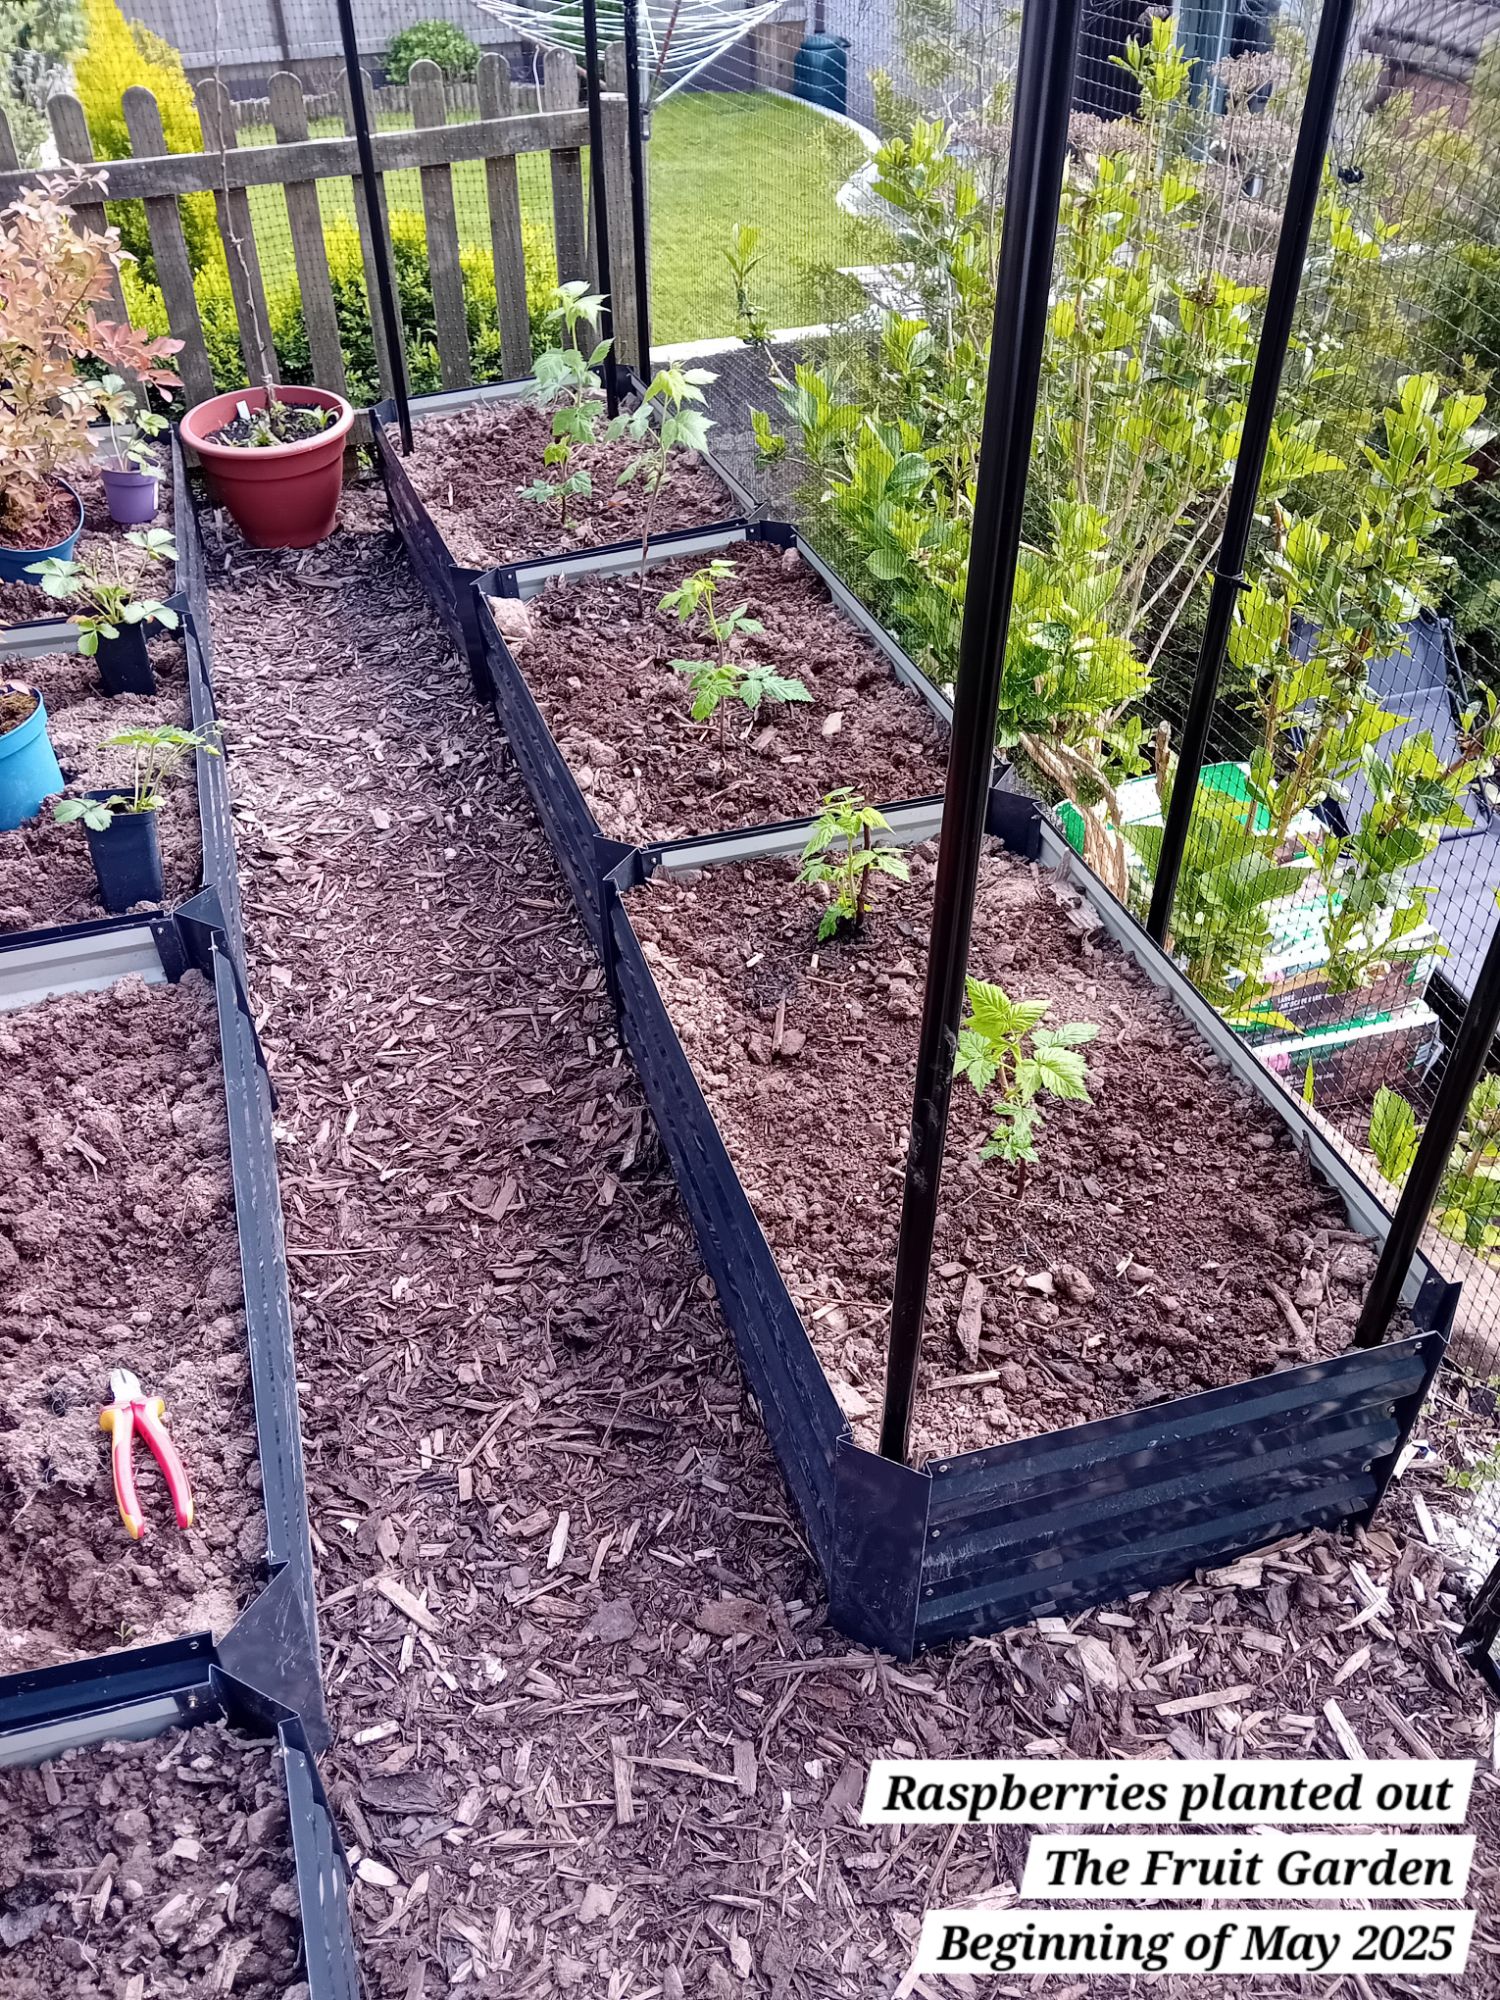
You will notice that I am only growing one row here, but if you have a larger space, you should space the rows 180cm apart. The spacing will ensure you can easily access each plant for harvesting and pruning, and it will also ensure that each plant has enough air flow and space to grow to its full potential and that will reduce the risk of diseases etc.
I have always chosen to grow Autumn fruiting raspberries, as the pruning routine is much simpler than Summer fruiting raspberries.
For those that don’t know:
Autumn-fruiting raspberries (Primocanes)
- Autumn-fruiting raspberries are known as primocanes, meaning that they fruit from the current year’s growth and will therefore fruit from the very first year that you plant them. Raspberries will be on their way later on this year! 😀
- The pruning routine is really straightforward: just prune out all the canes to the ground in Winter. You can use the canes as pea sticks for the following year if you want, or add the material to your dead-hedge (the post about the wildlife hedge I recently created is available here).
- Autumn-fruiting raspberries are shorter and generally don’t need any support unless you are growing them on a windy, exposed site. In my garden, this top section can become windy at times and I am growing the raspberries in a narrow space, so I added four vertical posts that I will add thick wire around, just to keep the raspberries in bounds as they mature and to stop them flopping over. I will also be adding a climber to grow up the fruit cage, which will serve as a wind break for the raspberries and add beauty and colour. The sunshine shouldn’t be blocked out, as that netted wall where I intend to put a climber faces West.
Summer-fruiting raspberries (Floricanes)
- Summer-fruiting raspberries are known as floricanes, meaning that they fruit from the previous year’s growth. They will not fruit in their first year.
- Prune the old canes to soil-level after they have fruited and leave the new canes for next year. The old canes are the ones that have fruited this year. You will need to identify the new canes from the old, to ensure that you don’t accidently prune out the canes that will bear fruit the following year!
- They tend to be more vigorous and grow much taller and they will need a sturdy support system so that you can tie each cane into the support.
In an ideal world, it is best to grow both Autumn-fruiting and Summer-fruiting raspberries, because then you will have an extended crop of raspberries. However, when you have a smaller space, I don’t think you can beat the simplicity and benefits that Autumn-fruiting raspberries offer!
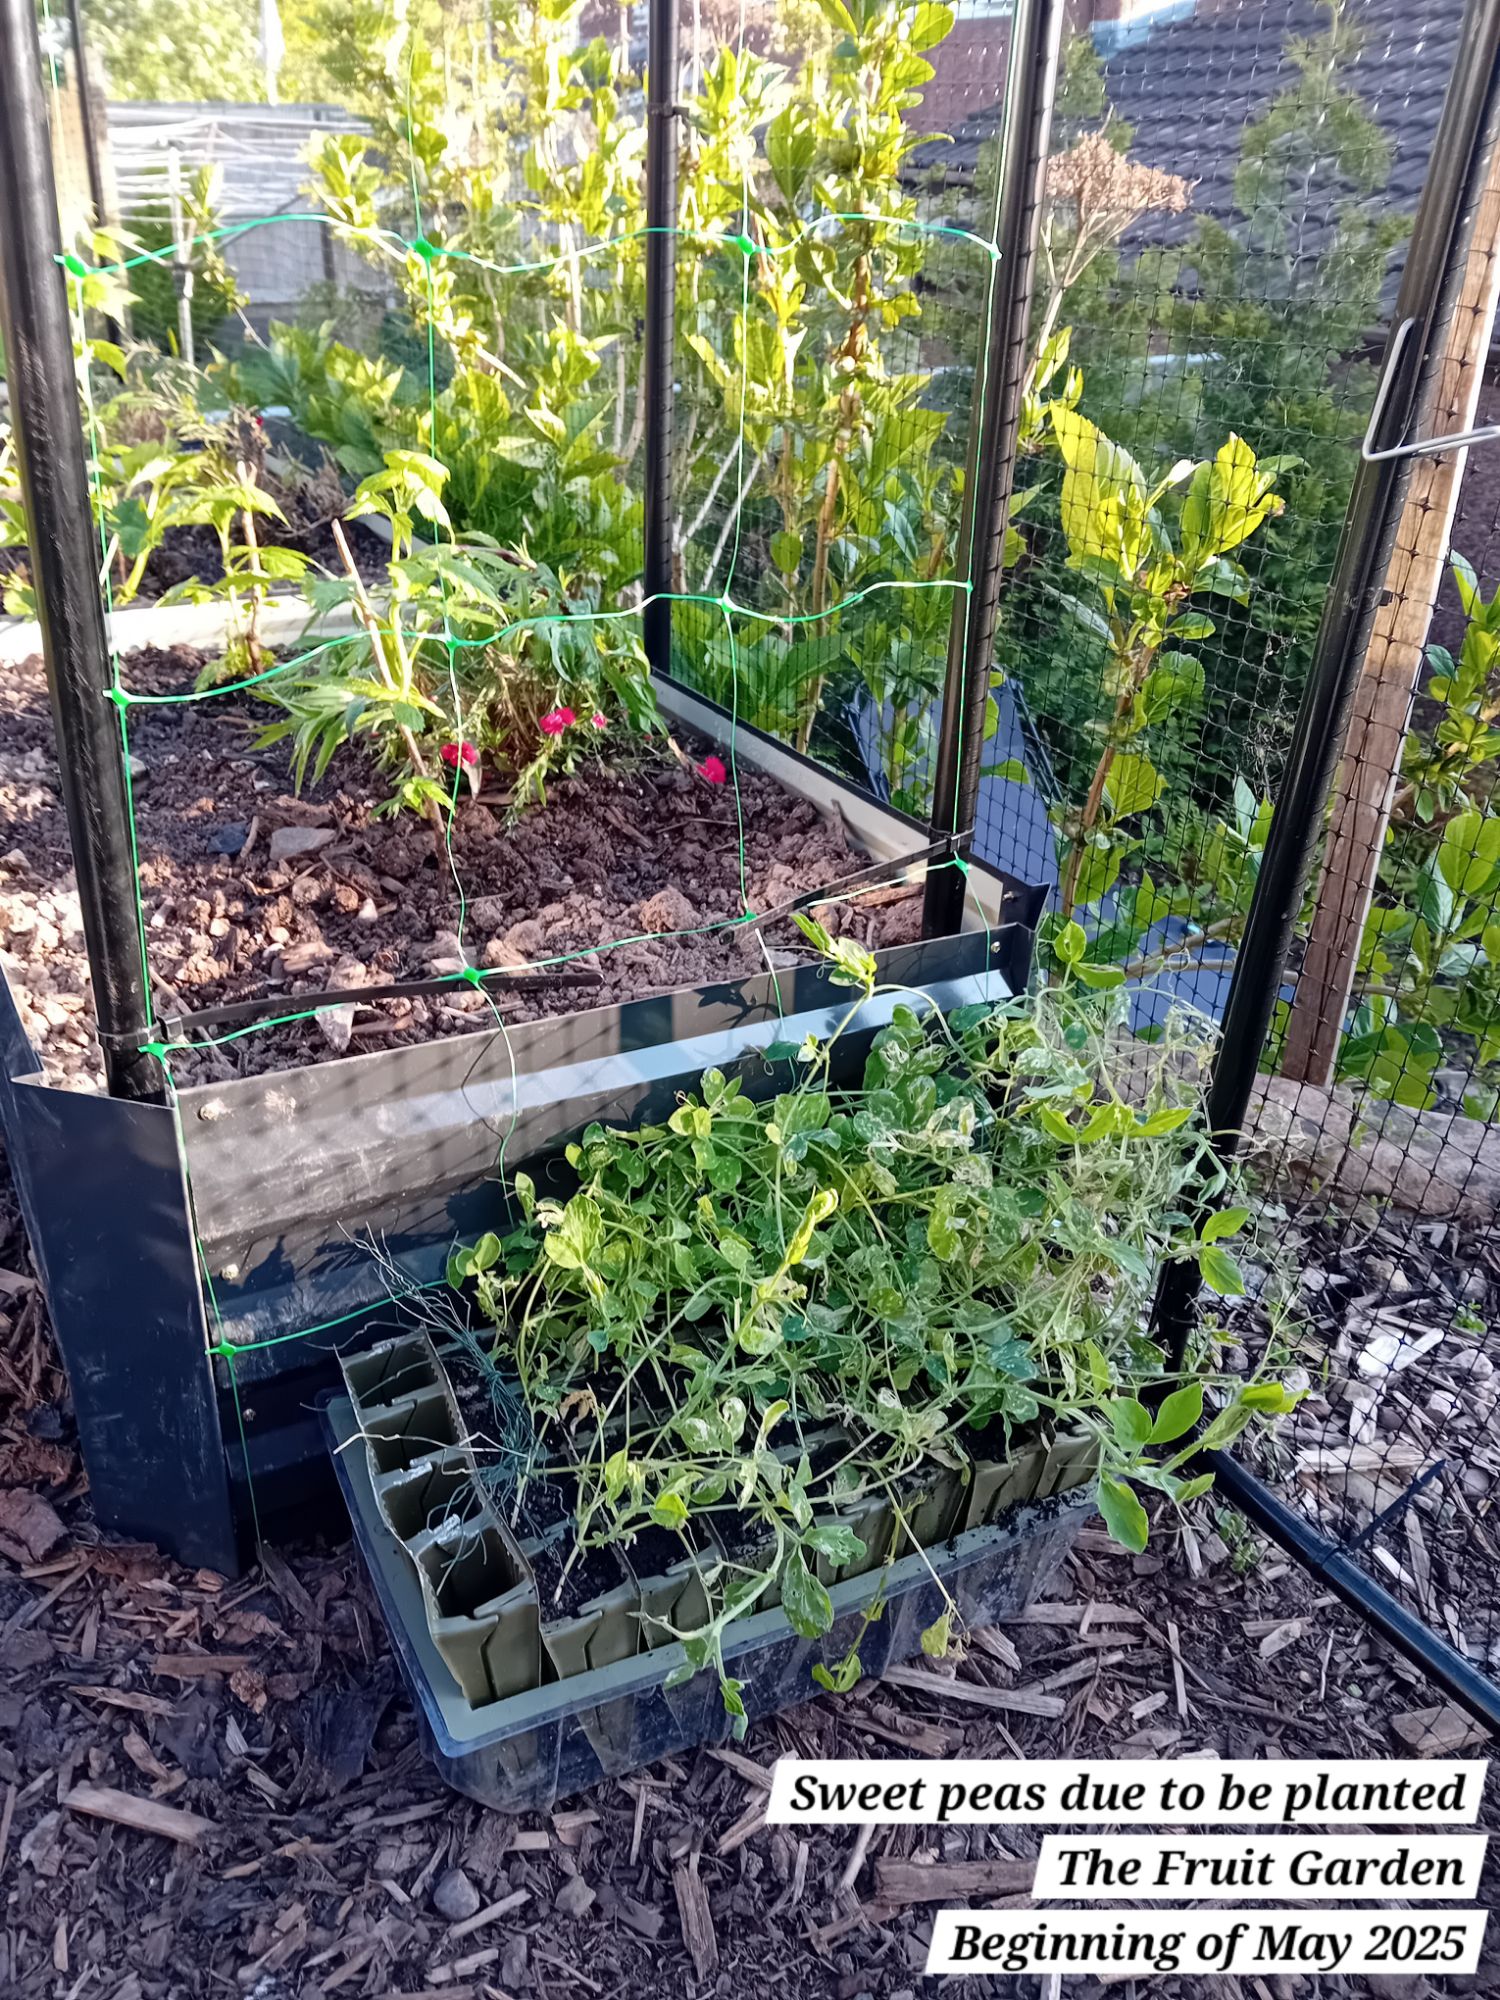
Sweet peas
I decided I wanted to add some sweet peas to The Fruit Garden, as I have plenty that I sowed from seed this year. I added netting to the end panel of the raspberry supports, where I plan to plant out sweet peas and train them up this side:

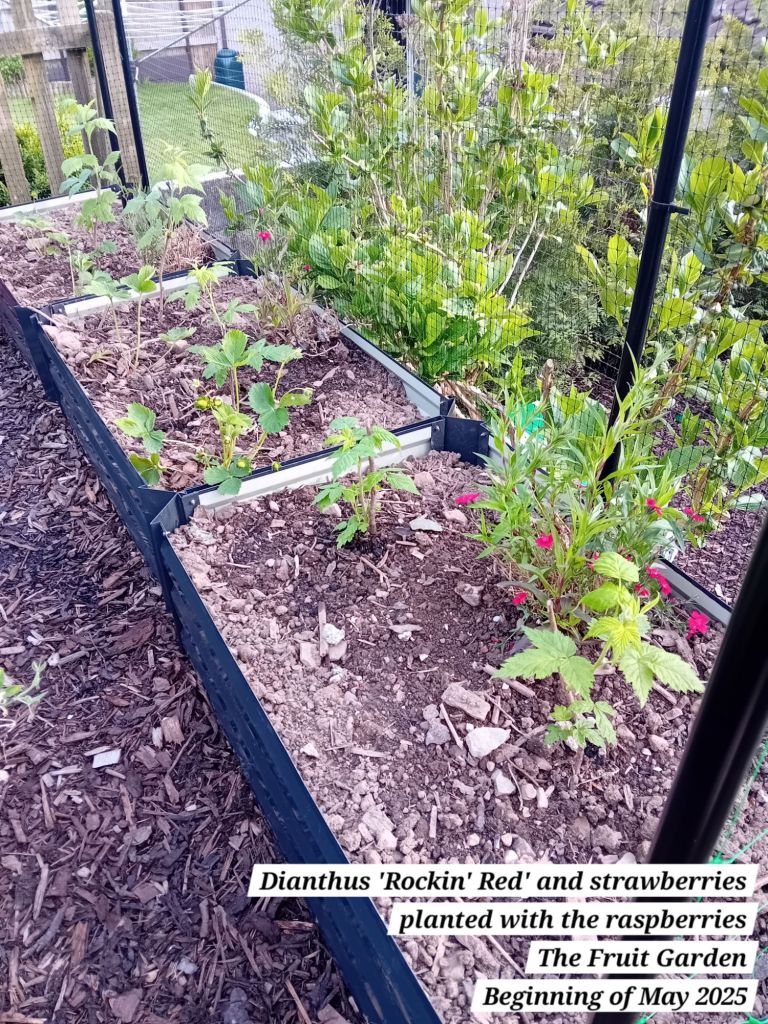
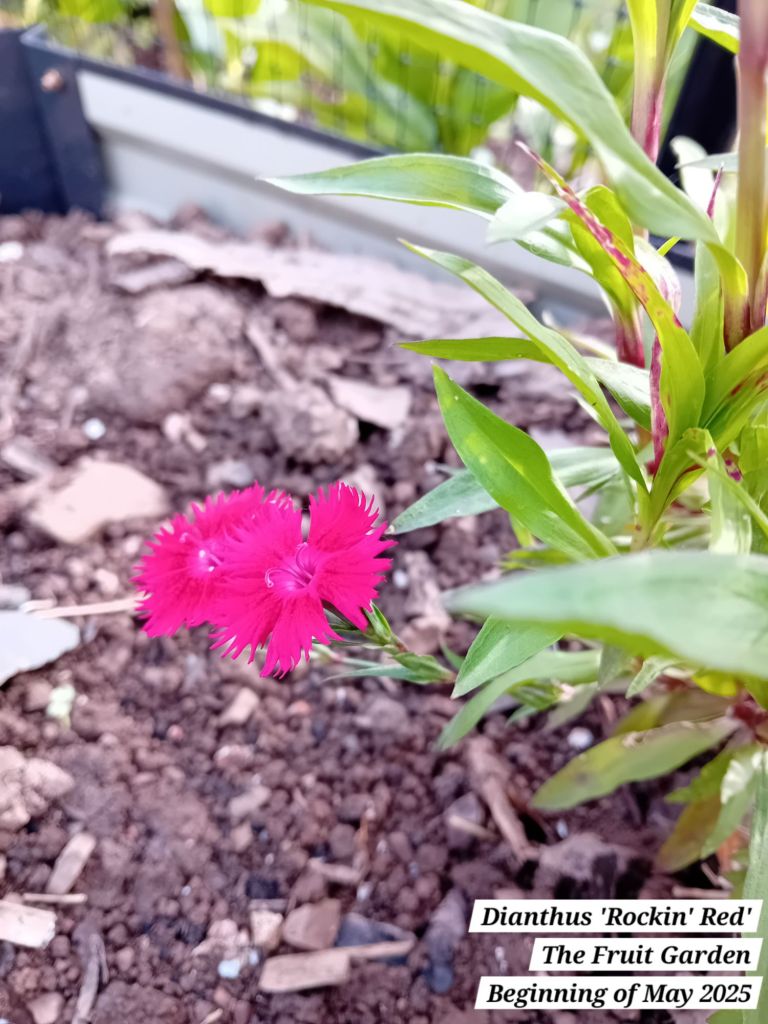
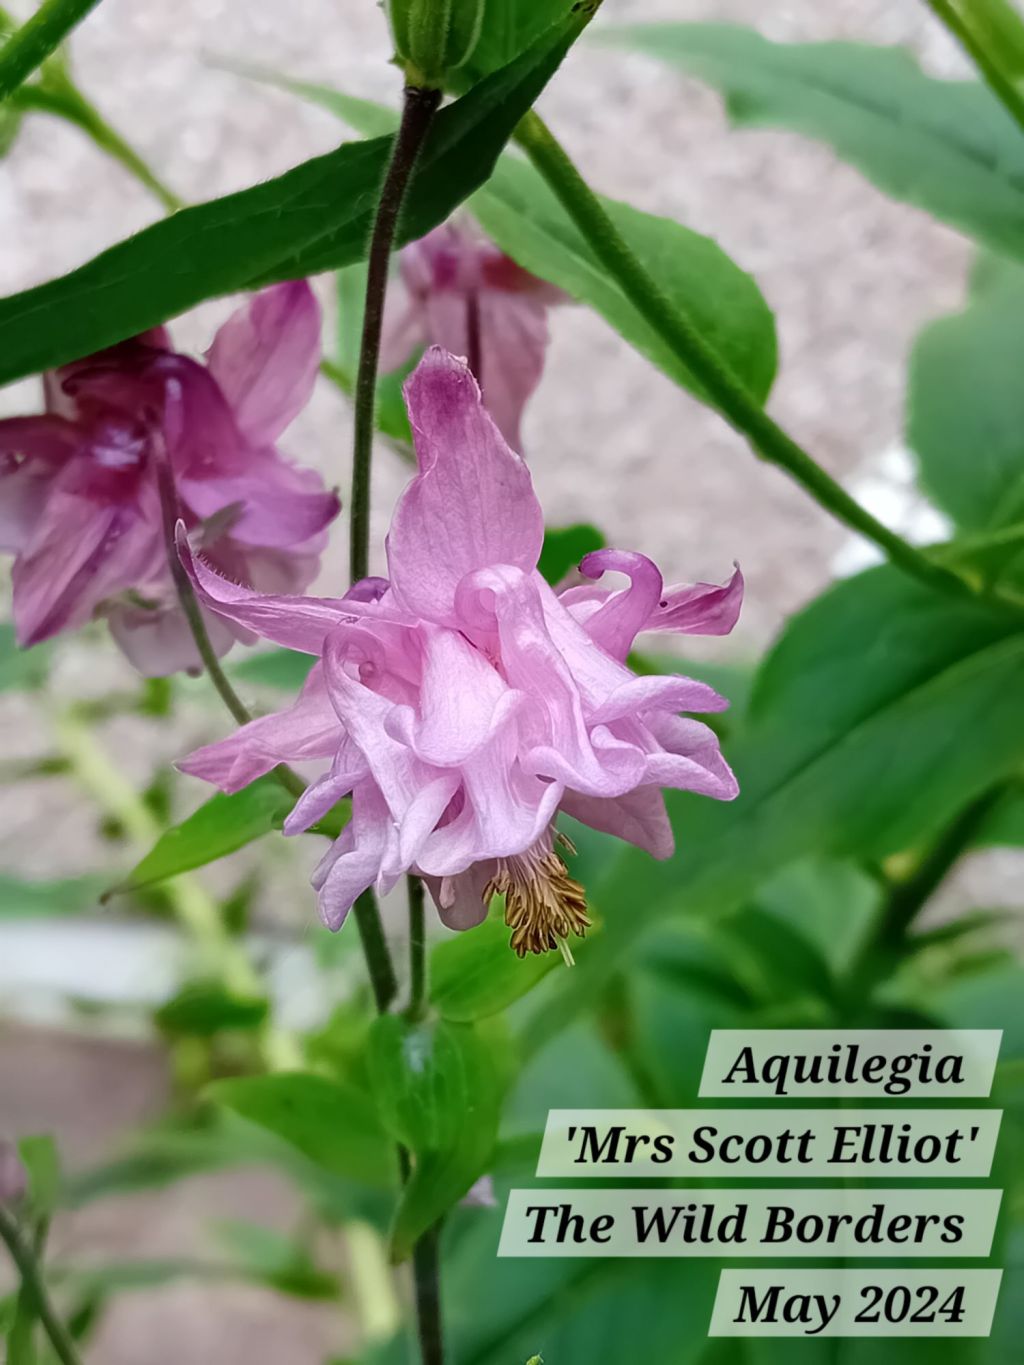
Dianthus ‘Rockin’ Red’
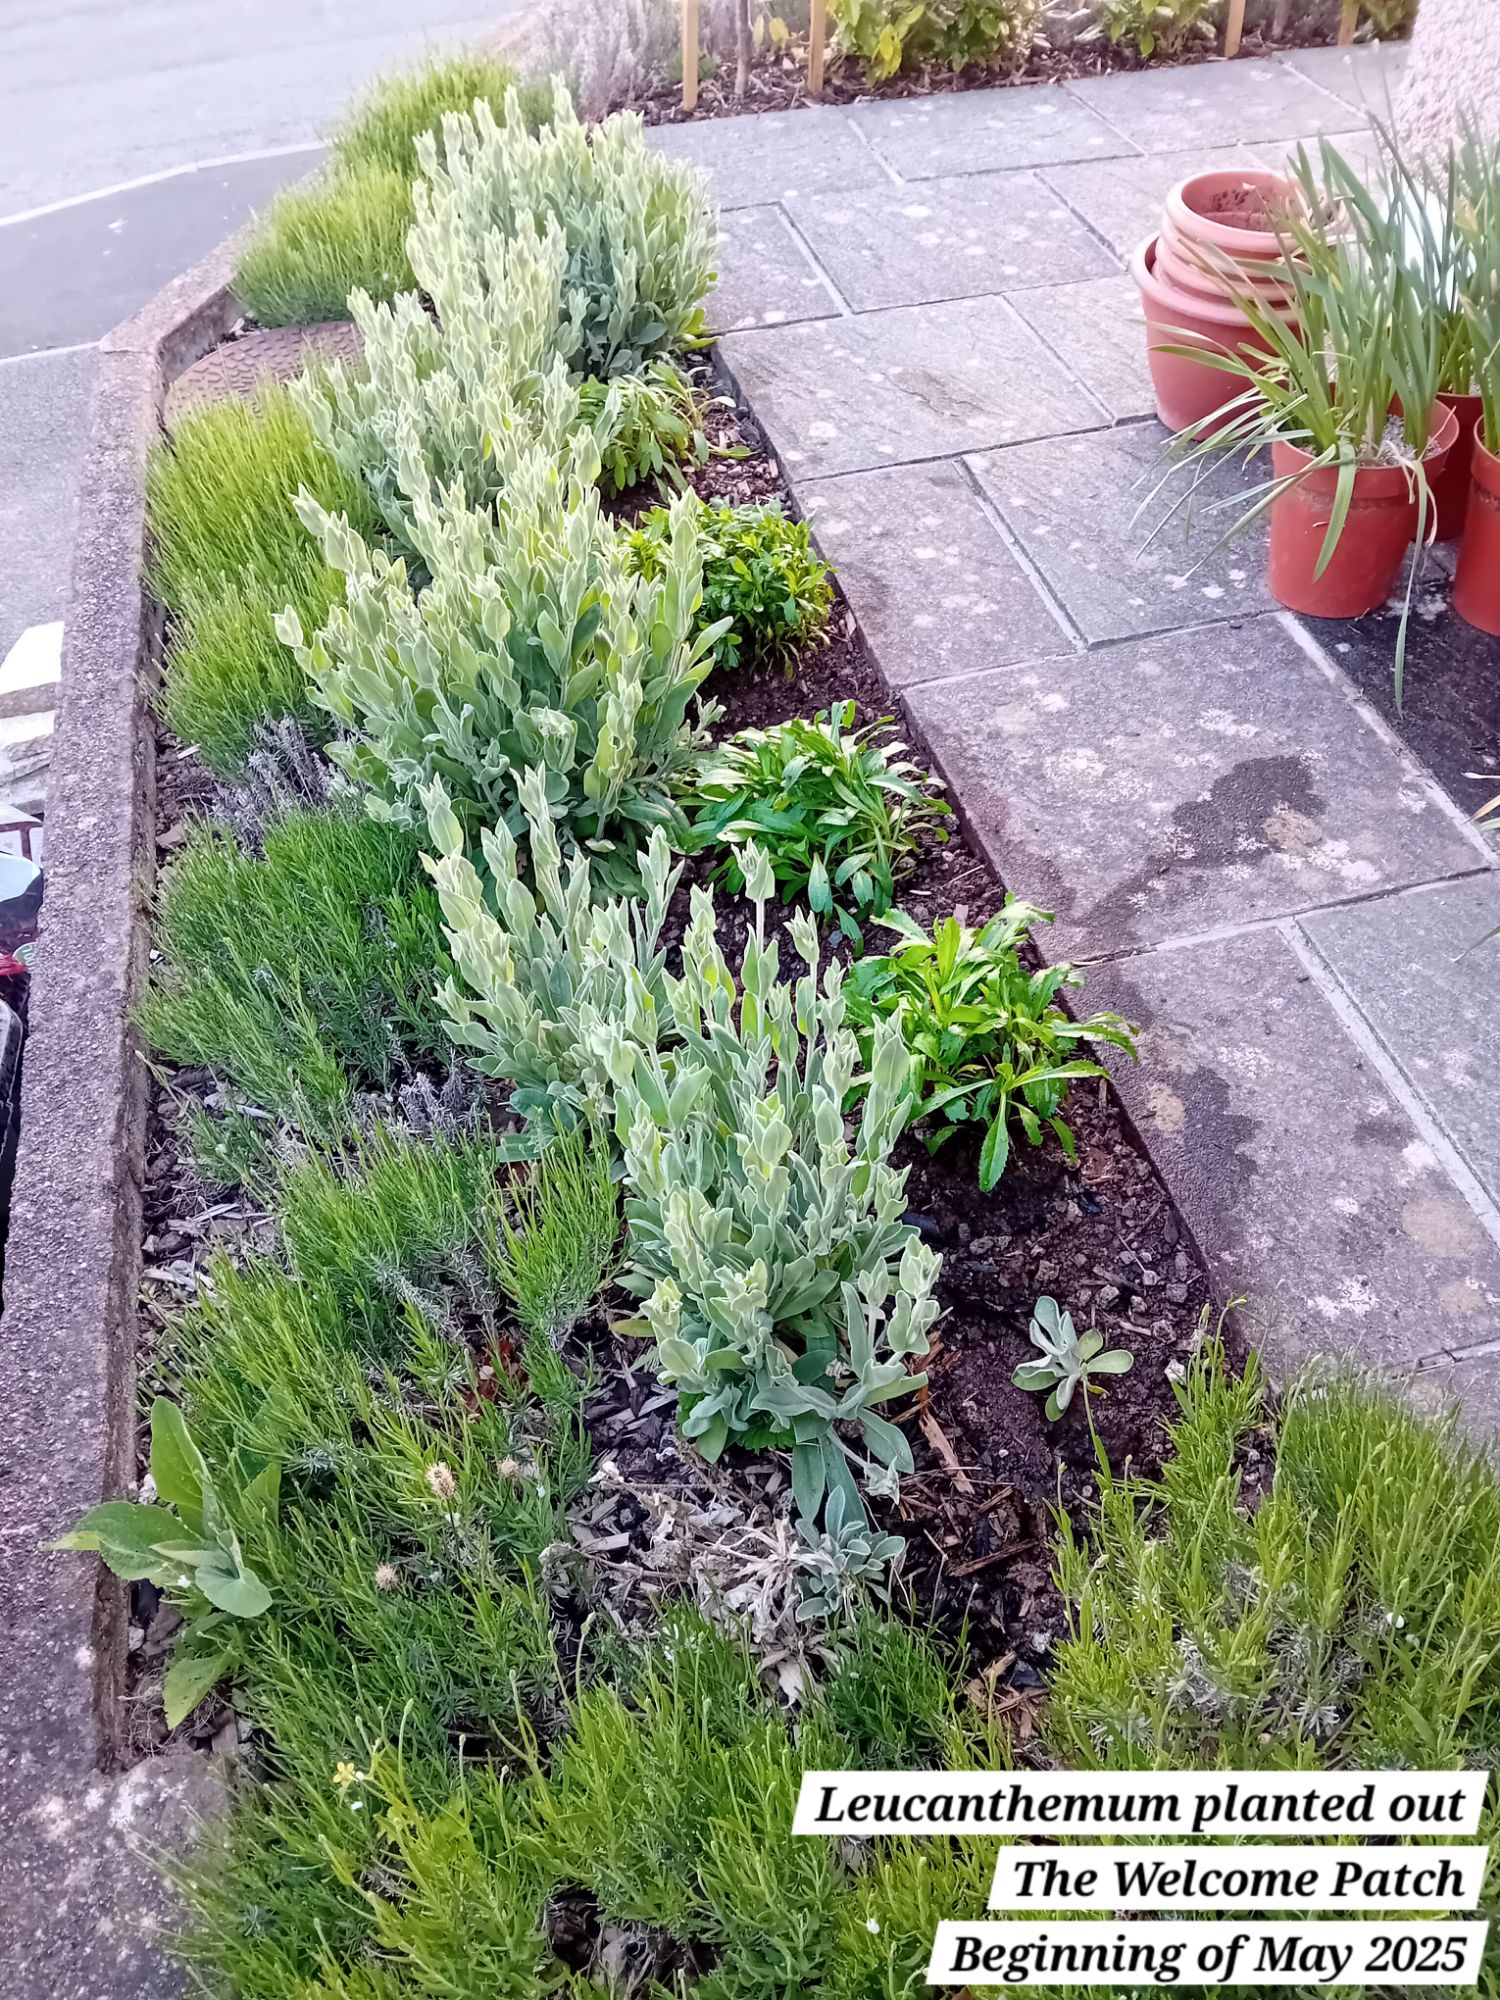
To finish off the raspberry bed (for now), I planted some strawberries and dianthus ‘Rockin’ Red’ to provide ground cover. The dianthus were growing in one of my front gardens, The Welcome Nook. I noticed that a number of these appear to have been hit by the cold Winter weather and they didn’t survive:

I therefore salvaged the ones I could and replanted those with the raspberries:
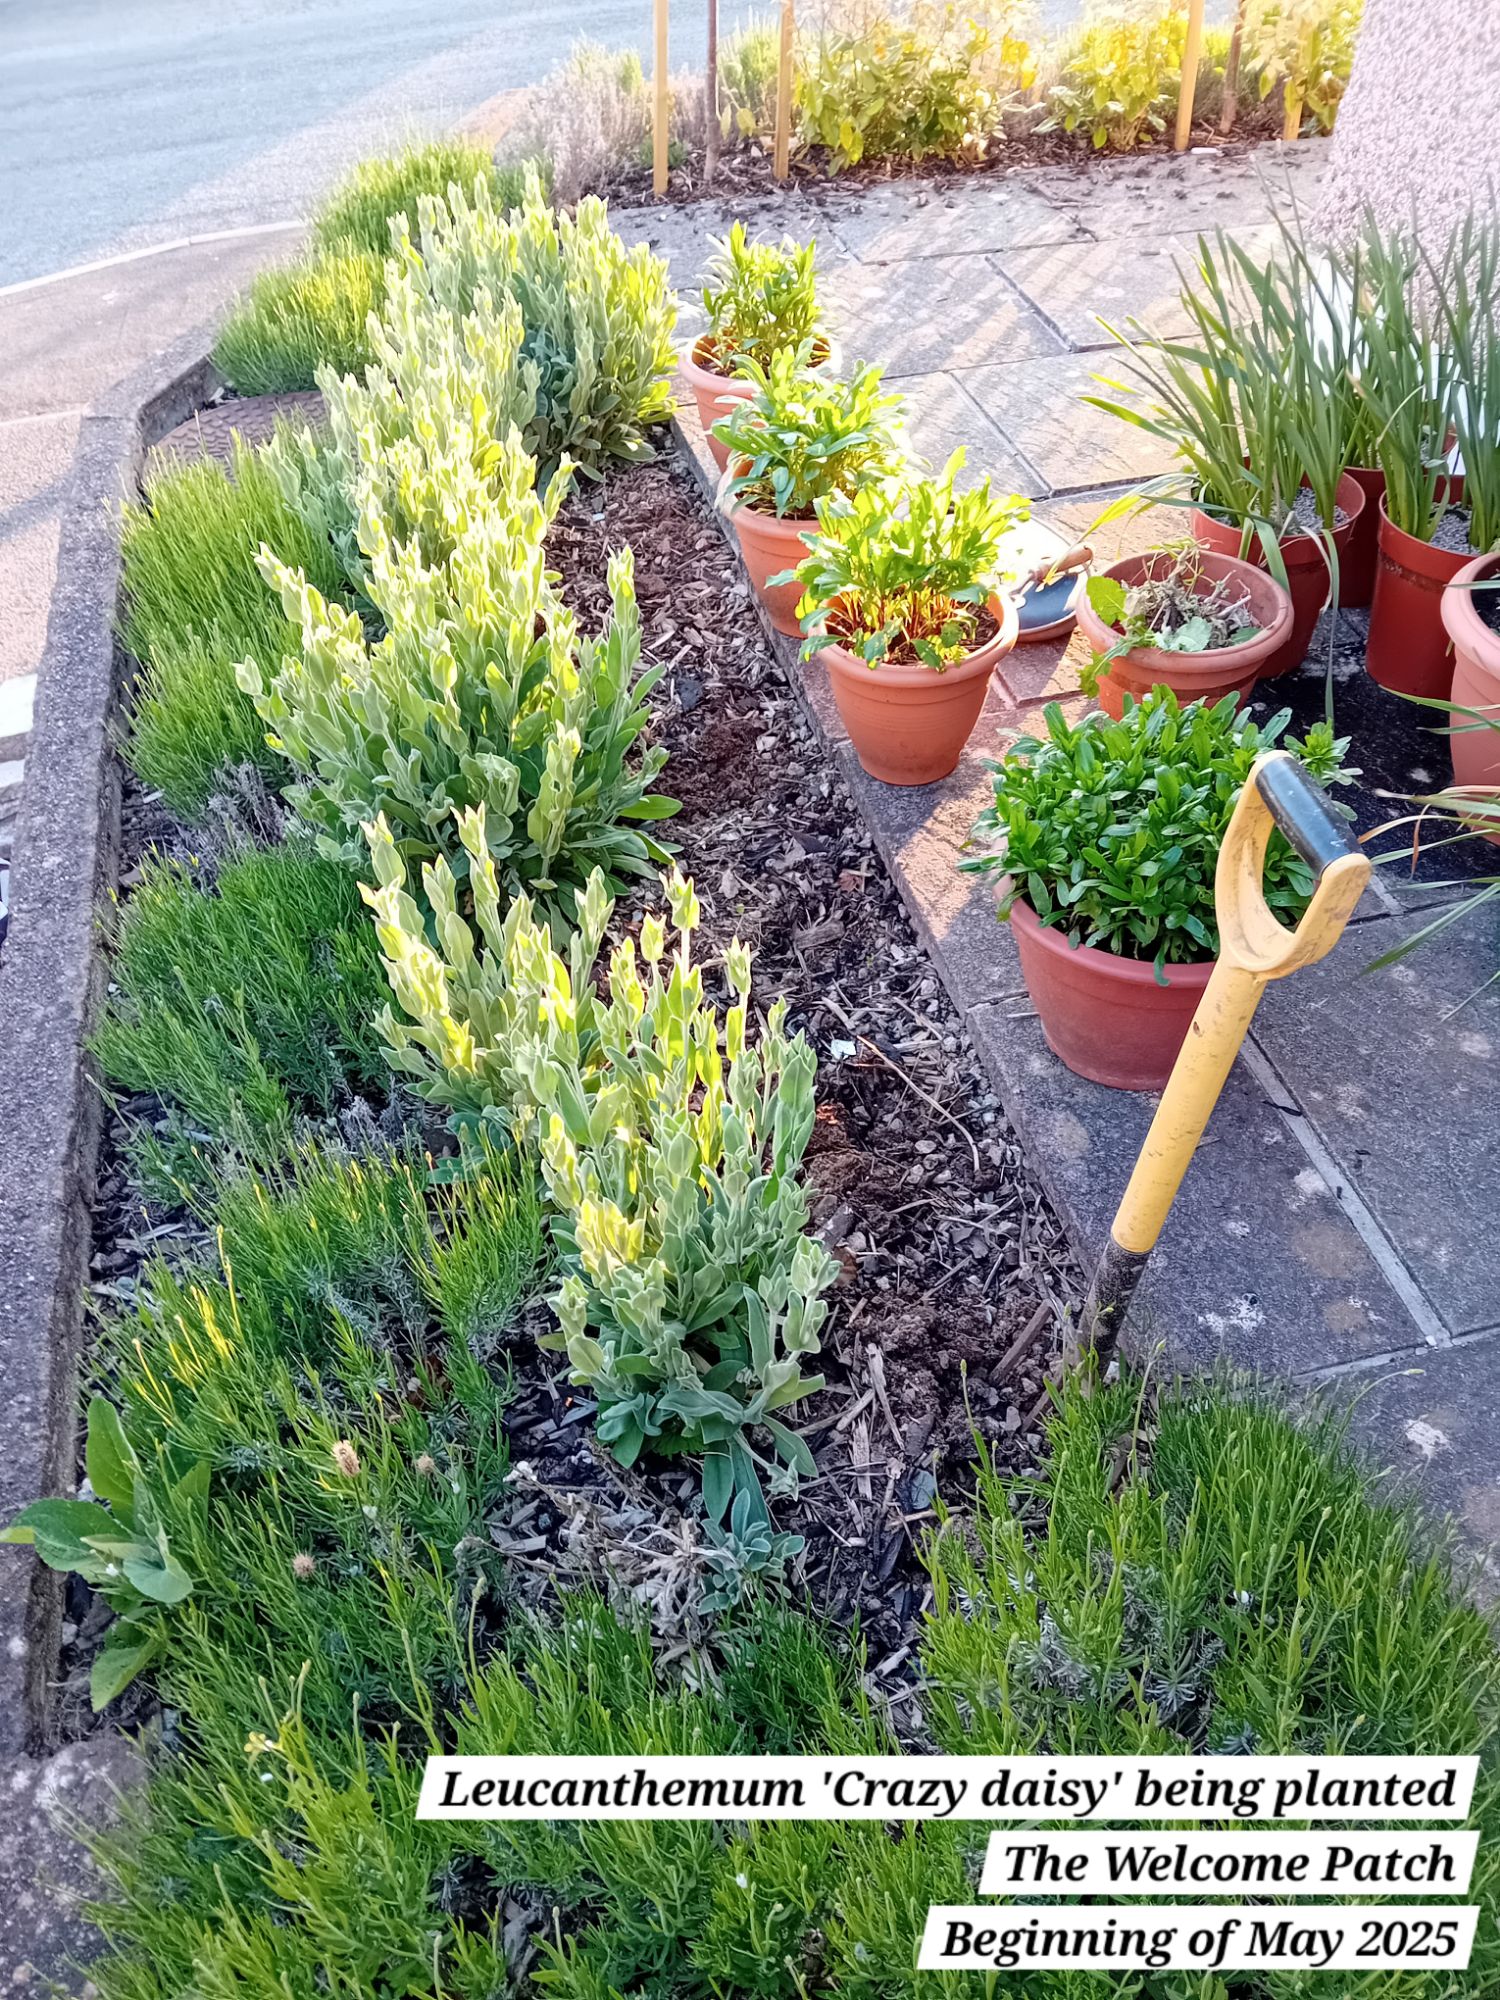
In The Welcome Patch, I then replanted some leucanthemum ‘Crazy Daisy’ that I had sitting in pots whilst I decided where they were going. This made an easy switch!
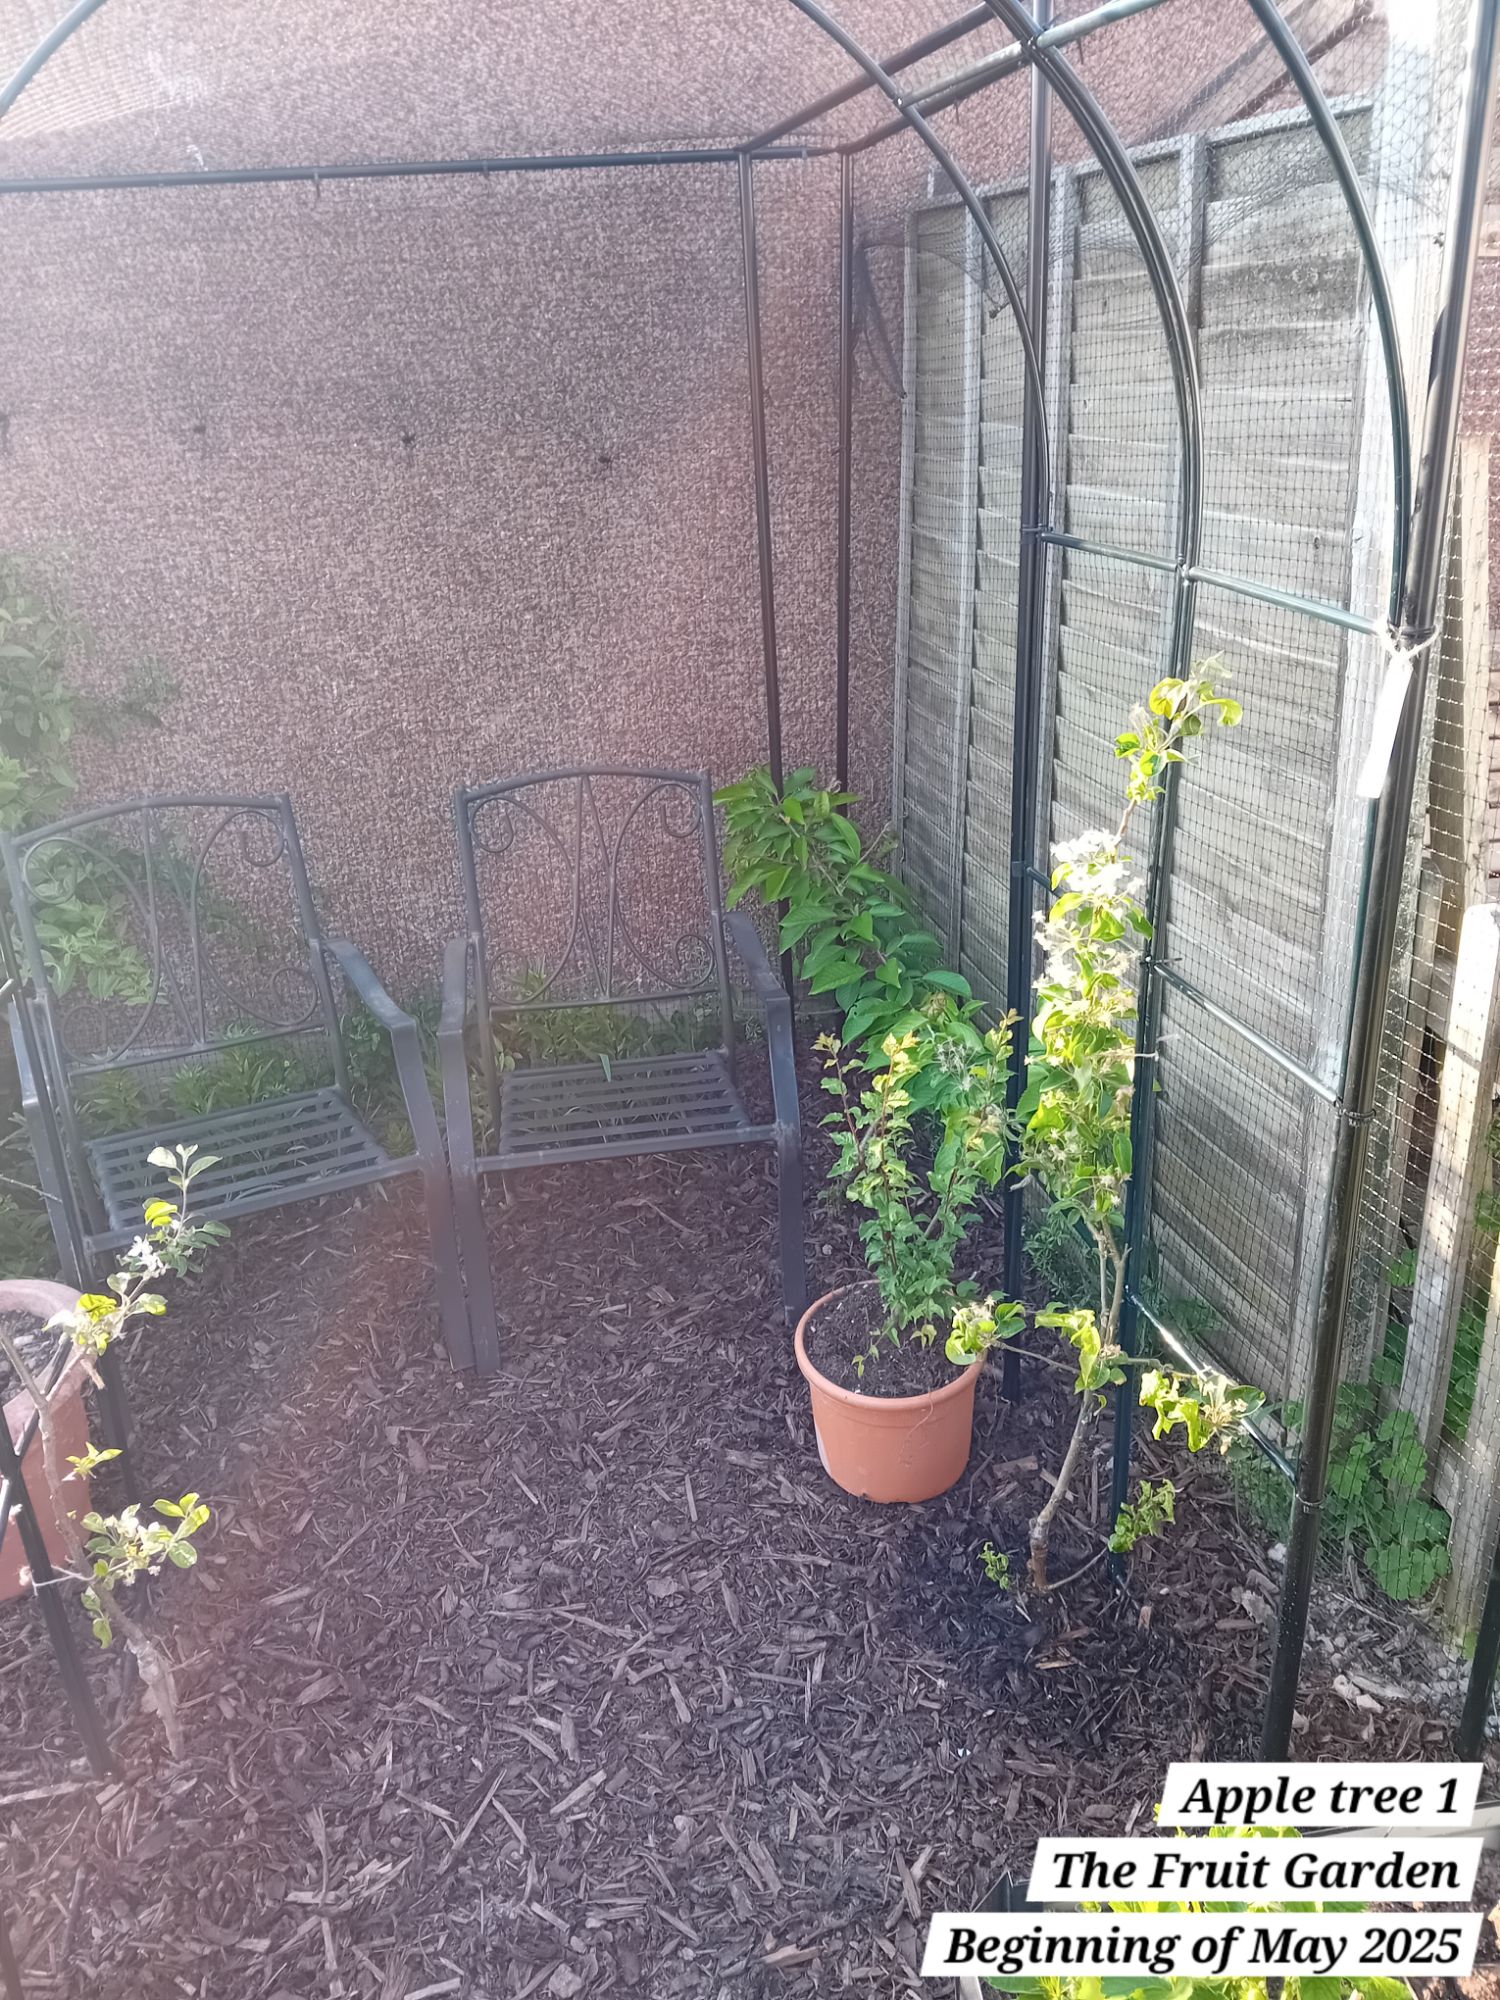
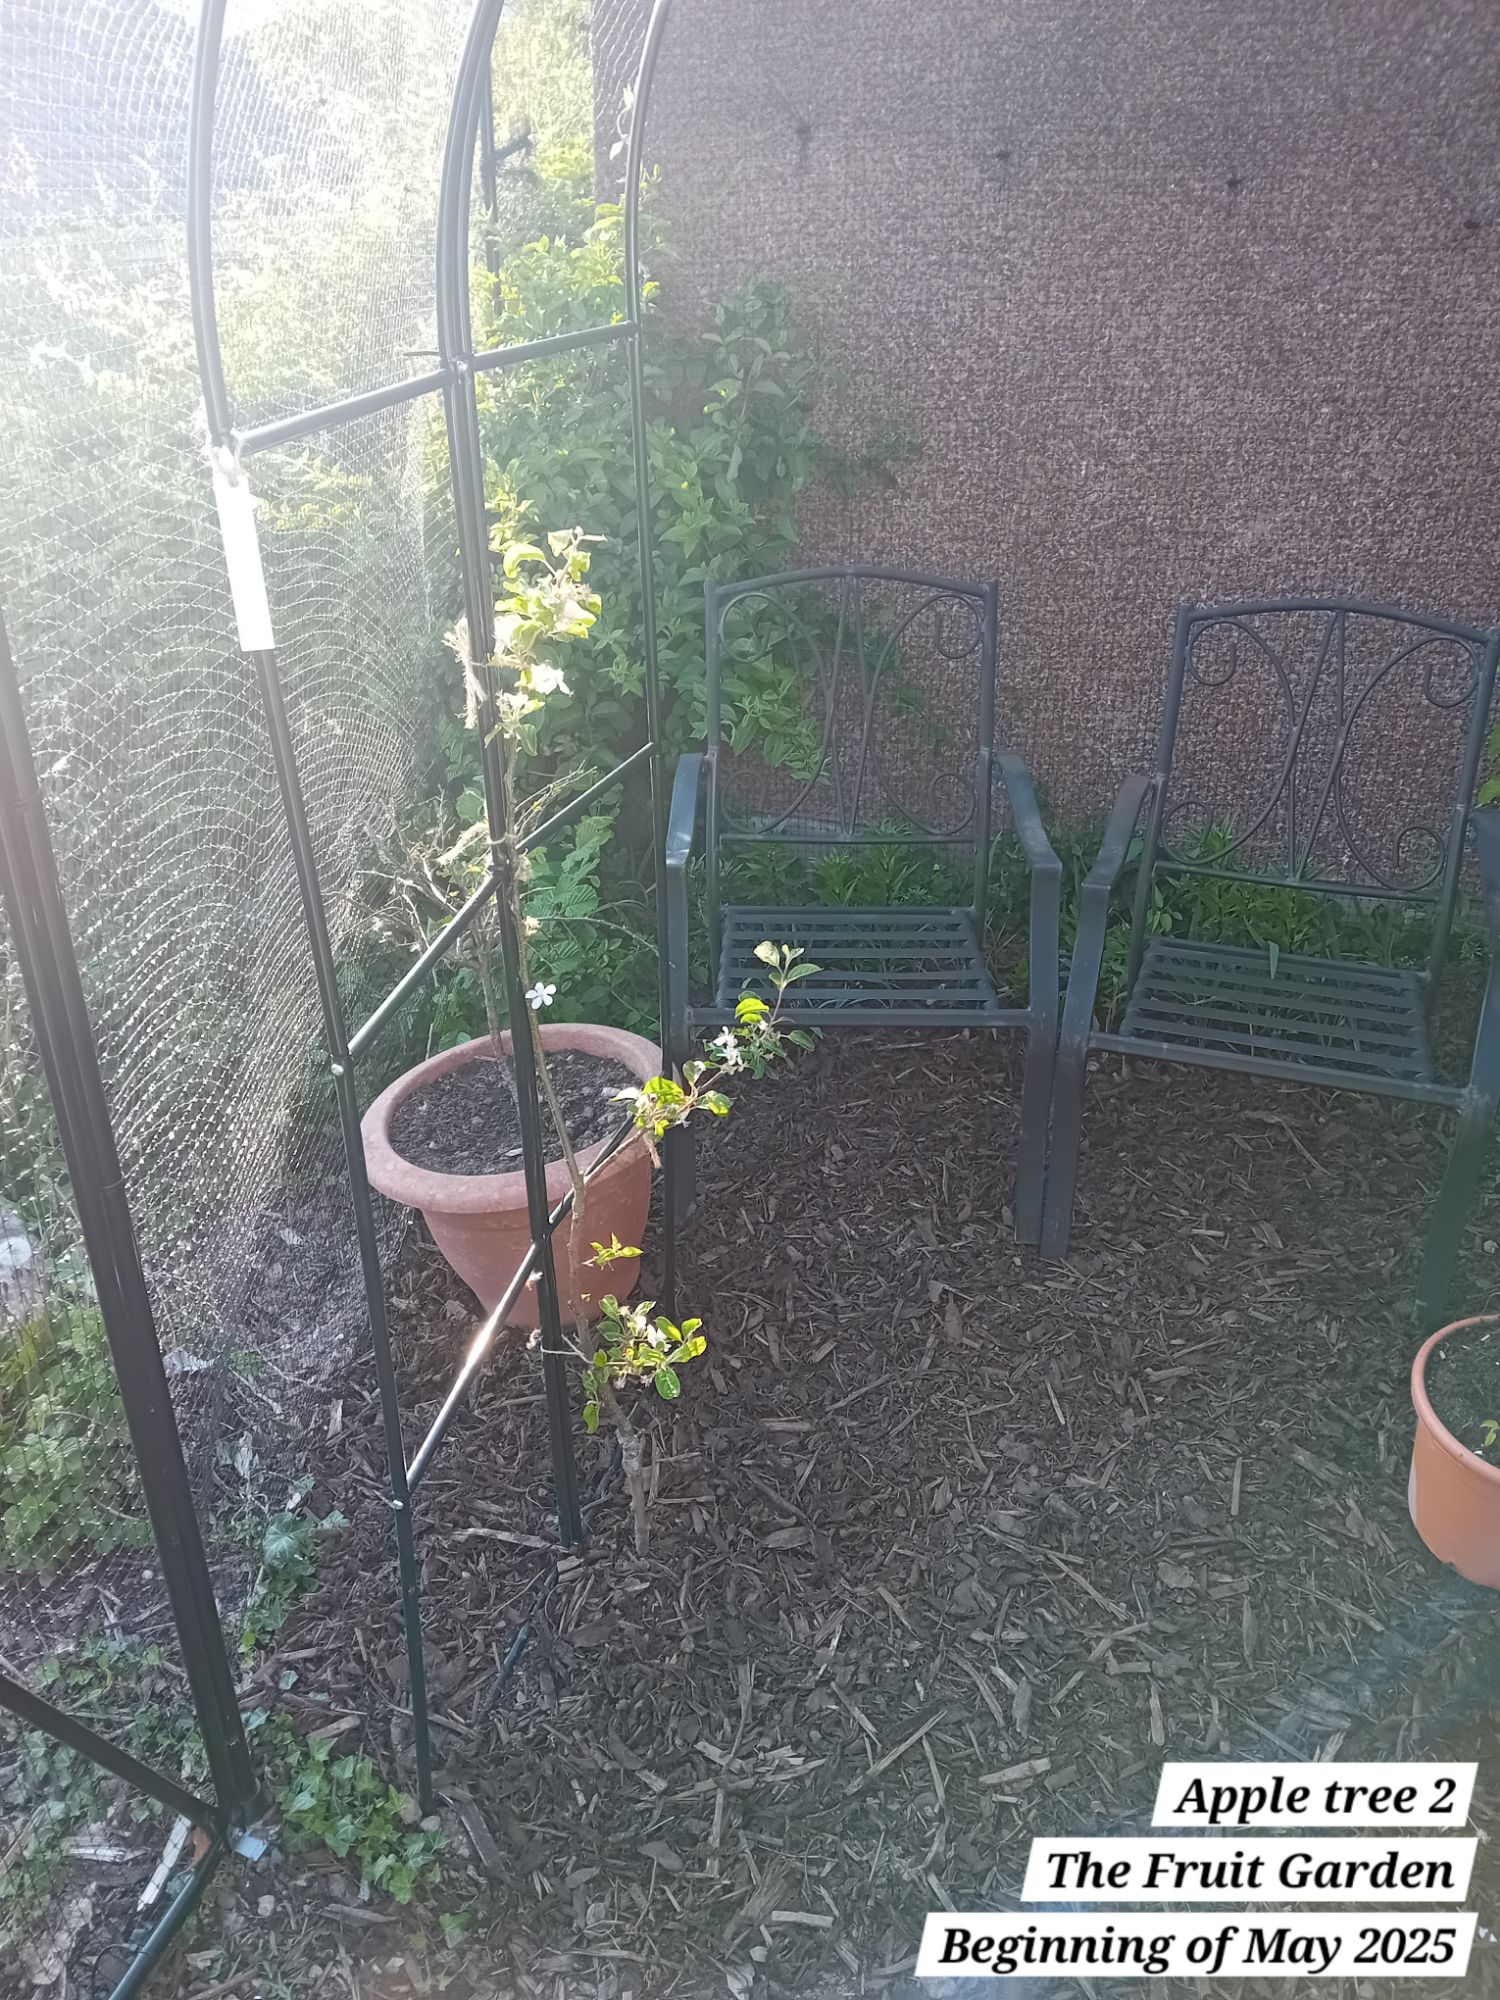
Espalier apple trees x2
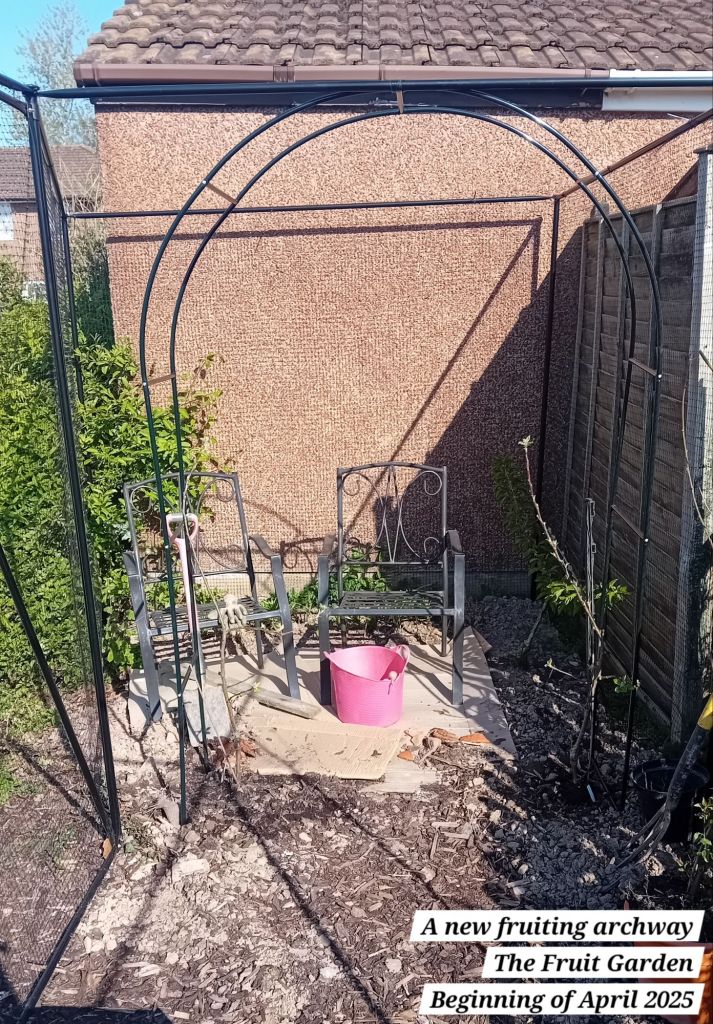
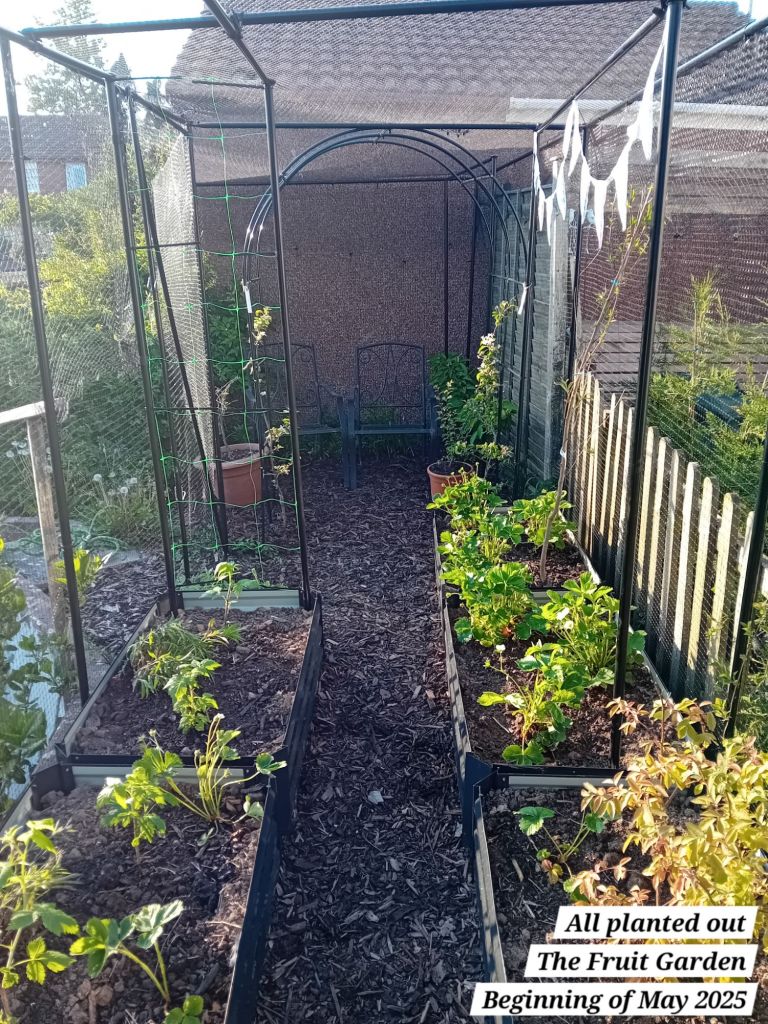
You’ll know if you read my blog, that I recently put an archway in The Fruit Garden, leading to the seating area. This arch was going to support espaliered apple trees and eventually form a fruiting archway:
You can read my post about the archway here: A fruiting archway for The Fruit Garden
Well, I said in the post referred to above that I had two arches and I originally planned to use both, but then only decided to use one. Surprise – I changed my mind 🙂 I wasn’t happy with how meagre the archway looked and how little space it provided for the apple trees, so I ended up adding the additional archway.
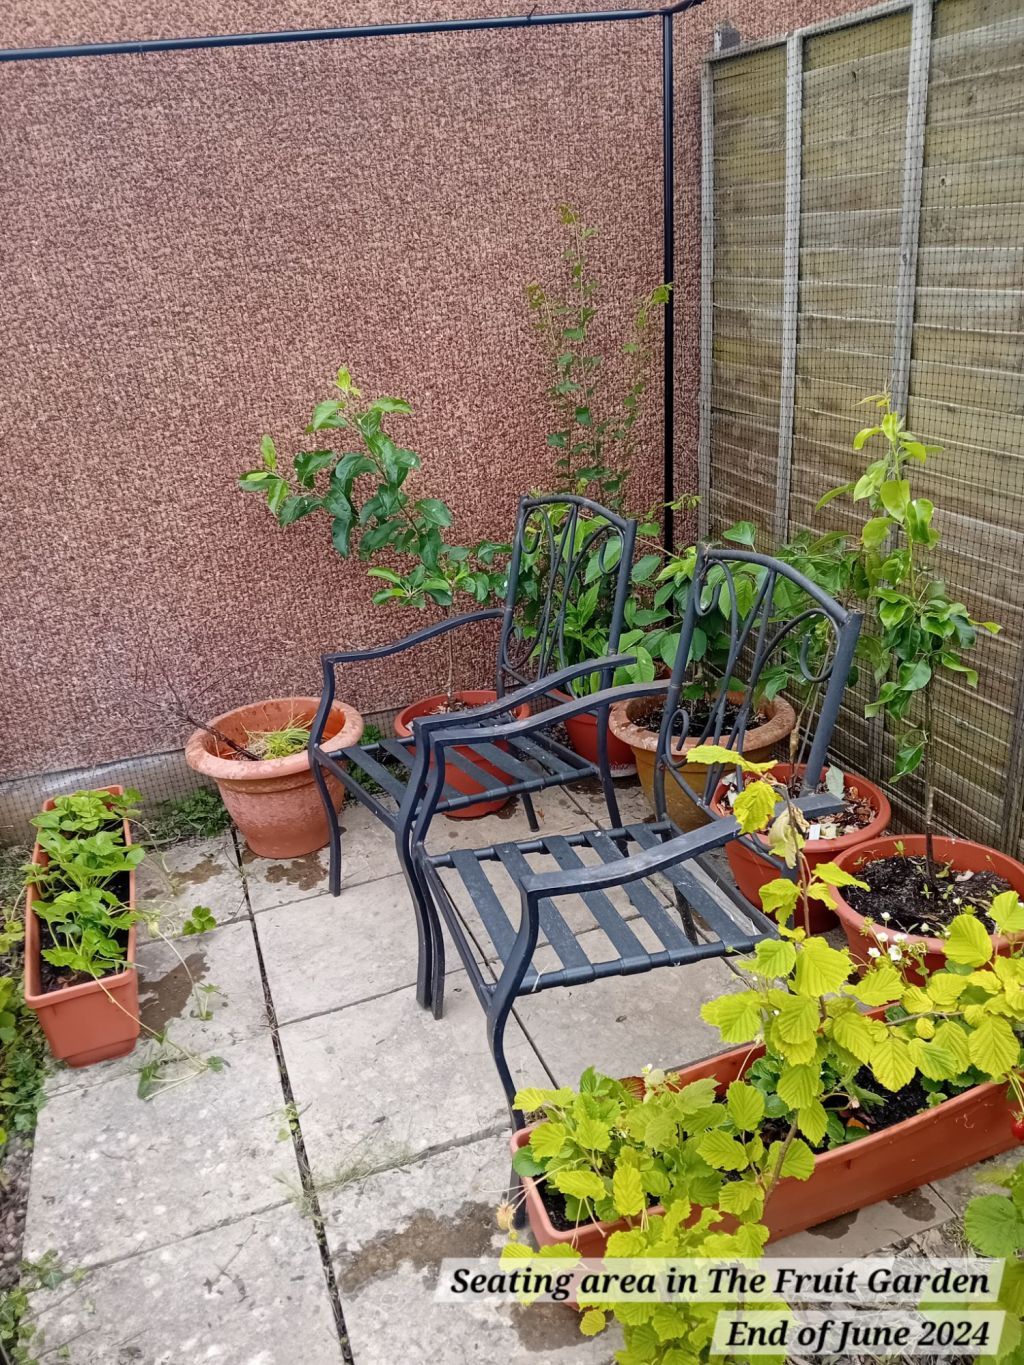
I had to carefully dig up and replant each apple tree, to center them evenly between each arch. I have been really diligent in ensuring each apple tree is well watered, as it was not the ideal time at all to dig them up and replant them! You’ll notice that I also added fresh bark throughout the seating area:
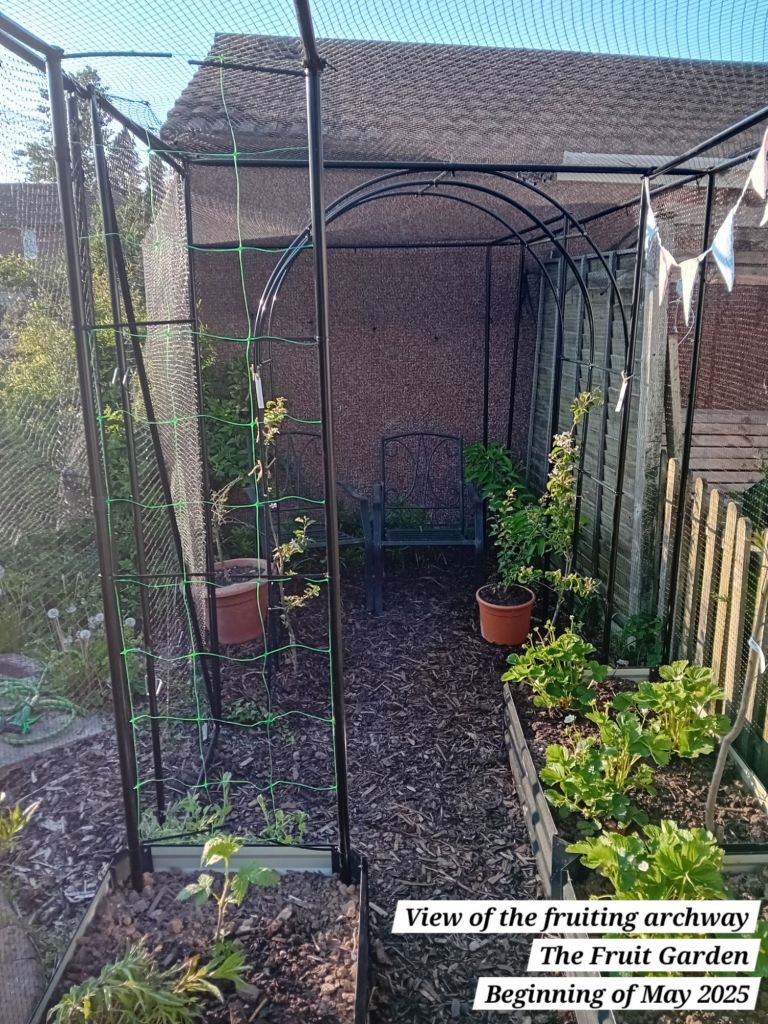
So far, each tree appears to be coping well. I have tied in each tree to the arches for initial formative training, but I will need to come back and prune them properly to form the espalier tiers.
In that area of the garden, the oriental lilies and crocosmia are still growing well:
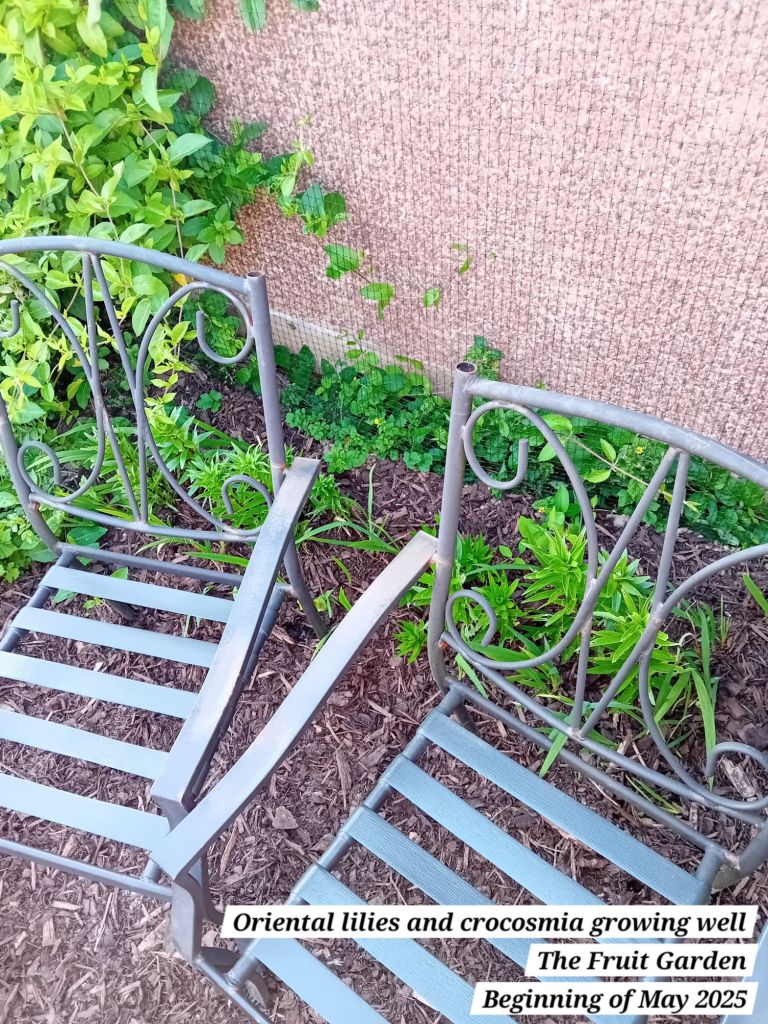
To read my original post about the crocosmia and oriental lilies, click the link here: The Fruit Garden: Blooms for beauty and the bees
I also have the fan-trained cherry tree in that corner of the garden, that I will be growing and training further this year. Due to adding the additional archway for the apple trees, I ended up having to carefully dig up this tree too and move it slightly. This tree has supports on either side, ready for adding supports for the eventual fan shape.

Peach tree
‘Peregrine’
I also planted out a bare root peach tree into the raised beds. I am aiming for this to be eventually fan-trained:
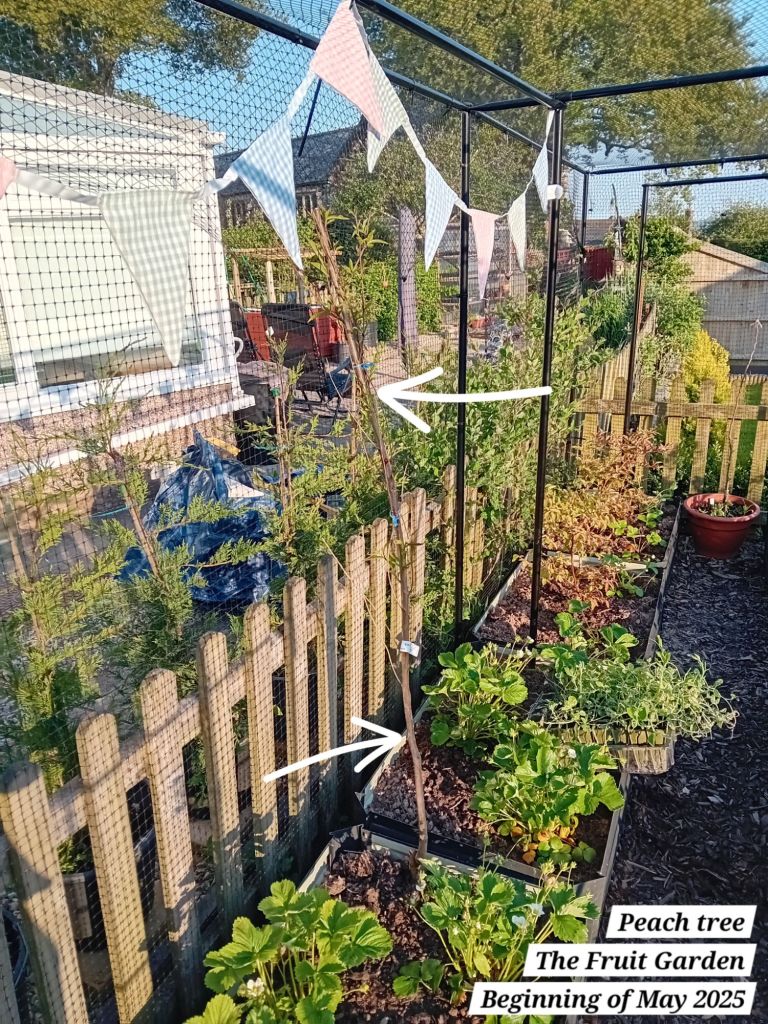
The fan-trained tree will add some privacy from our neighbours, who we are very friendly with, but I often feel like I may be invading their privacy as their conservatory is next to this garden. I have set all of the fruit tree supports about 30am away from the edge of the fruit cage and will be growing evergreen climbers up the side of the fruit cage in these areas, which will filter the wind and also provide privacy.
PART THREE: Adding wildflowers from L and H
The final (and rather fun) job I finished off in The Fruit Garden for now, was scattering some wildflower seeds that had been gifted to me from L and H last Christmas.

These are a vibrant mix of blooms that I thought would be fun to grow in The Fruit Garden, as I mentioned in an earlier post when I planted out crocosmia and oriental lilies in the seating area of this garden, I want to also grow flowers for attracting bees and pollinators – and also for adding beauty!
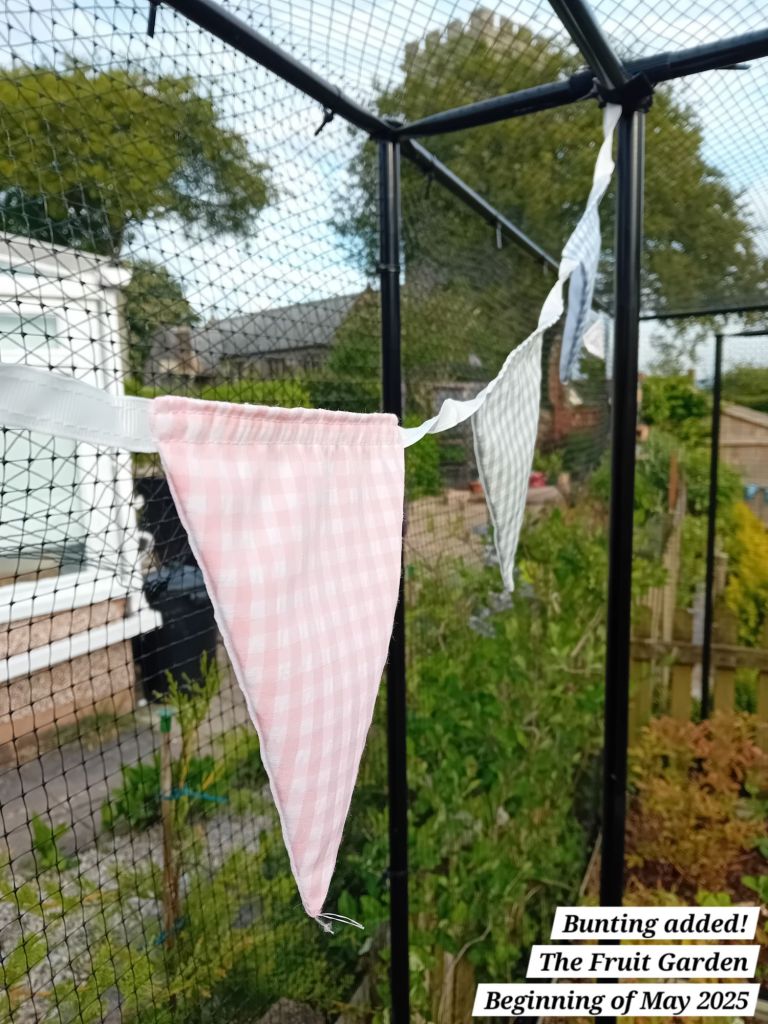
You’ll also notice from some of the earlier photos, that I added some fun bunting across one of the supports too:
I have some other flowers I want to add to this garden, which I will add in the coming weeks. I am throwing the design constraints of other areas of my garden out of the window for The Fruit Garden and I am going to be mixing really vibrant blooms with everything. Many of these flowers are wildflowers and I will be allowing them to self-seed freely.
Final snapshots
I’m really delighted with how The Fruit Garden has turned out and made this awkward space functional. In time, I want to bed in the fruit cage with the rest of the garden, by training a mixture of climbers over all of the netting. I think it should look more in-keeping with the rest of the garden by doing that. Having a specific space for growing fruit at home that is protected from the birds is a real luxury, but you don’t need a huge space to be able to grow a fair amount of fruit!

I hope you enjoyed reading this post! I have finally made more progress in Teddy’s Garden over the last week and I will be sharing that update on Sunday this week 🙂 Happy gardening!


Leave a comment