
Hello and welcome back to my blog 🙂 The weather is thankfully starting to brighten up here as Spring drawers nearer. Today we have some rain to wash and water everything, but then a good stretch of sunshine, albeit with some colder nights. To me, it always feels like we’re on the home straight waiting until Spring at this time of year, if the weather behaves!
Anyway, today’s post provides an update on some progress I’ve made in The Woodland Garden over the last few days. Enjoy!
Introduction
You’ll recall if you read my blog that I had written about trying to recycle the paving slabs and rubble taken up around the garden in one of my recent posts: here. I had put in the foundation of the wall initially and it was left looking like this:
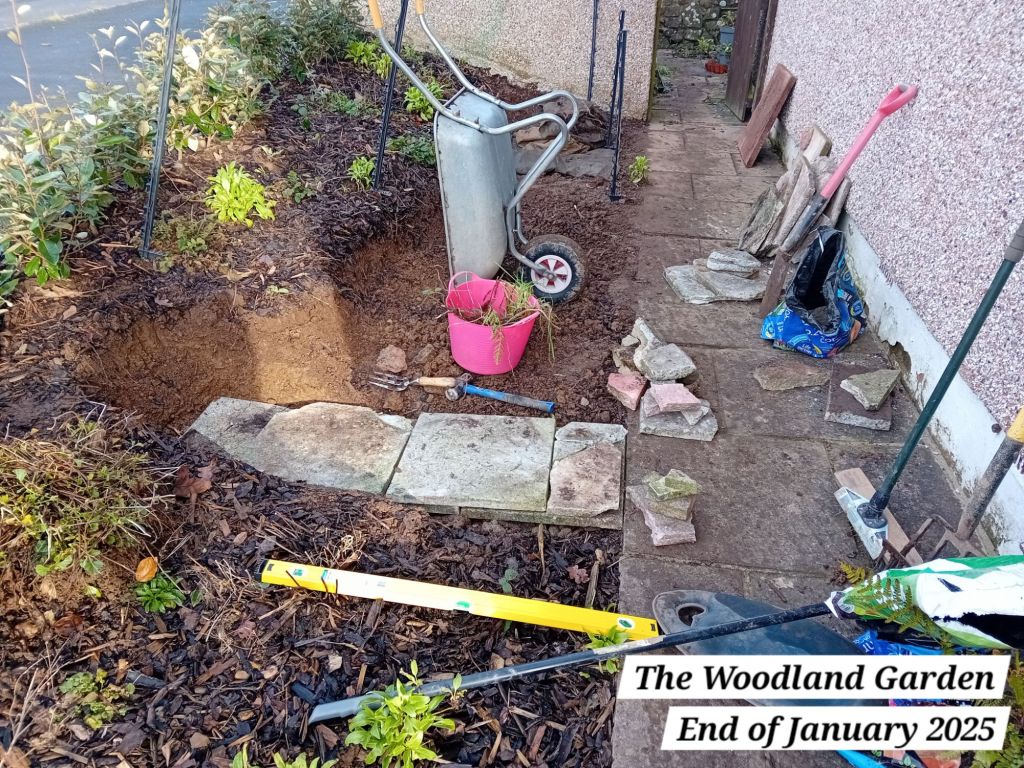
I then had spent one day at the weekend digging out more soil from the far left, so that in theory the wall could be extended around the back to essentially create the back of the heap.
I then started having doubts for various reasons:
- The rubble and broken paving slabs may leach chemicals and contaminants into the compost that I wanted to use around my garden, including for growing my own food;
- The amount of soil still to be dug out was huge and I wasn’t sure where else to store or put it;
- I wasn’t sure I had enough paving slabs to build the wall up as much as I wanted;
- And on and on etc…
Change of plan
I ultimately decided to change my plan and to find something that would also be more in keeping with the woodland theme and resolve the concerns above. That meant that the compost heap needed to blend in, using softer, rustic materials and styling. I finally settled on ordering wattle compost bins online.
These heaps were sold to be constructed with simply four sides of wattle panels connected together, but with no roof. When I received them, I was happy to see they are literally single panels and as I had suspected, I would then be able to construct them how I wanted to.
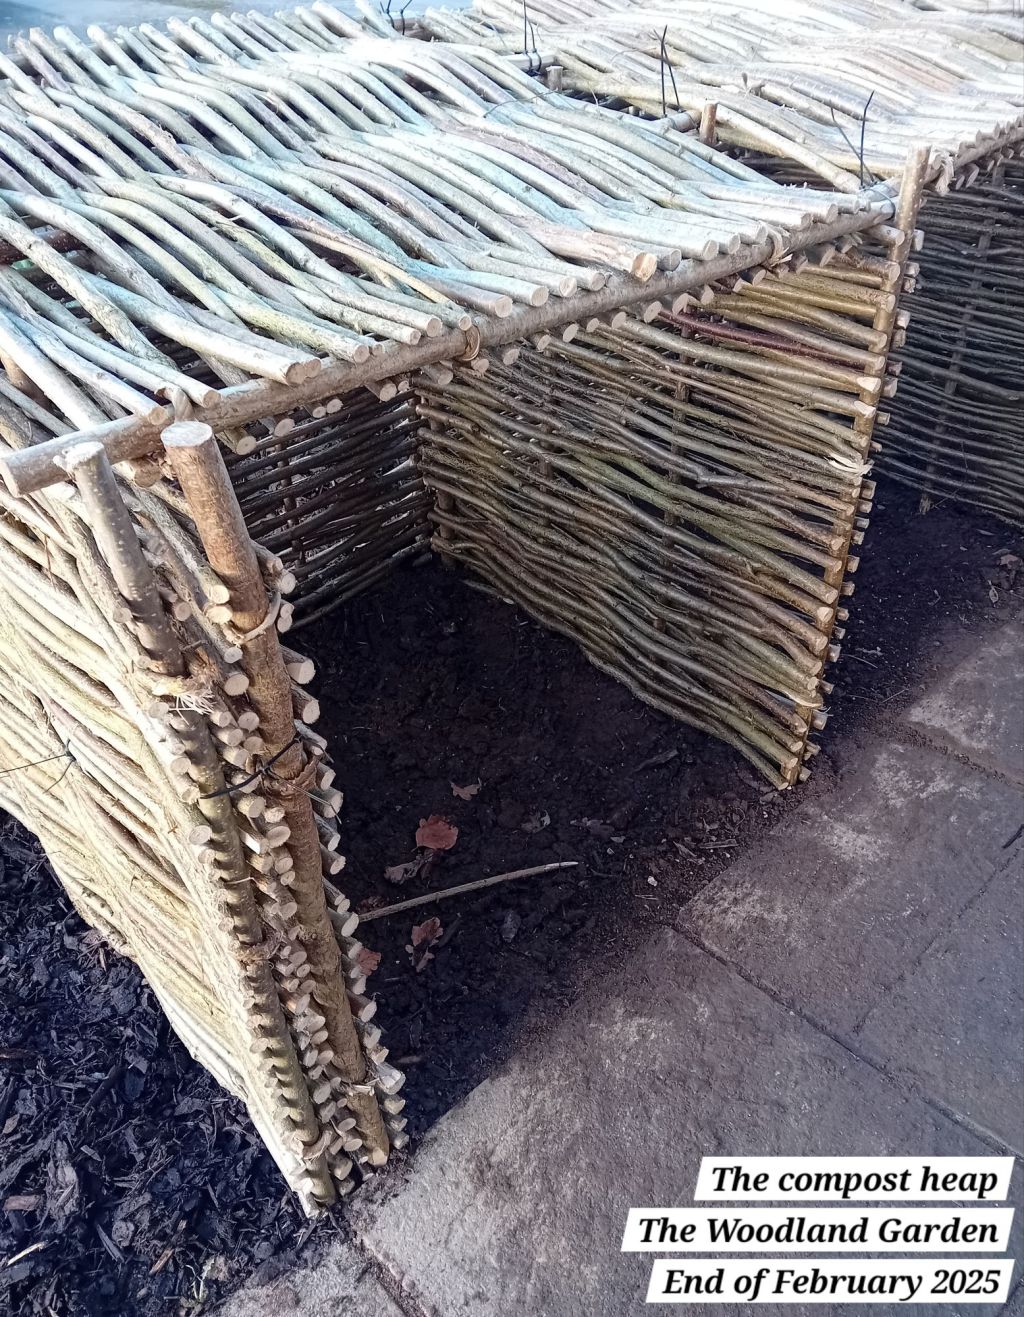
I decided to forego the front panel for now, keeping the front open and instead using that panel to construct a roof, to help hide the compost heap contents from the streetside. Here are the panels during construction:

I constructed four bays in total; three bays for turning composting material in stages as it decomposes and then the fourth bay is being used to store our wheelbarrow in for now:

I have the option of making the wheelbarrow section an additional composting bay if I need to, or adding another bay on to the far left. I’ll have to see how much composting space I need.
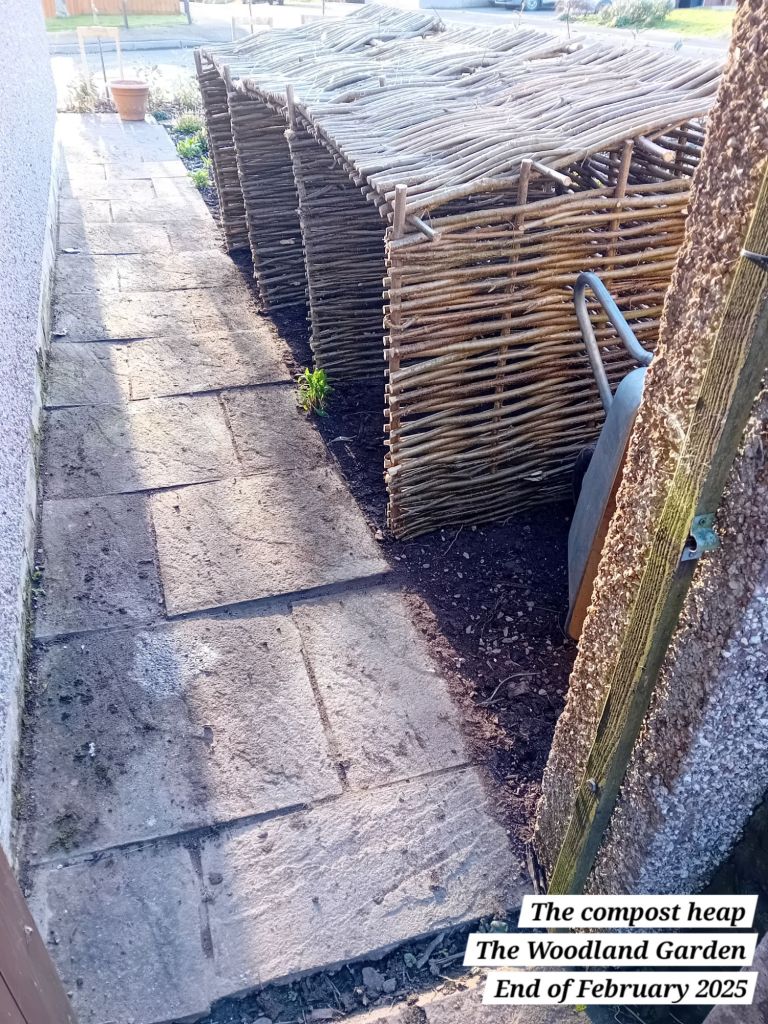
Here is an photograph once all of the bays were in place:
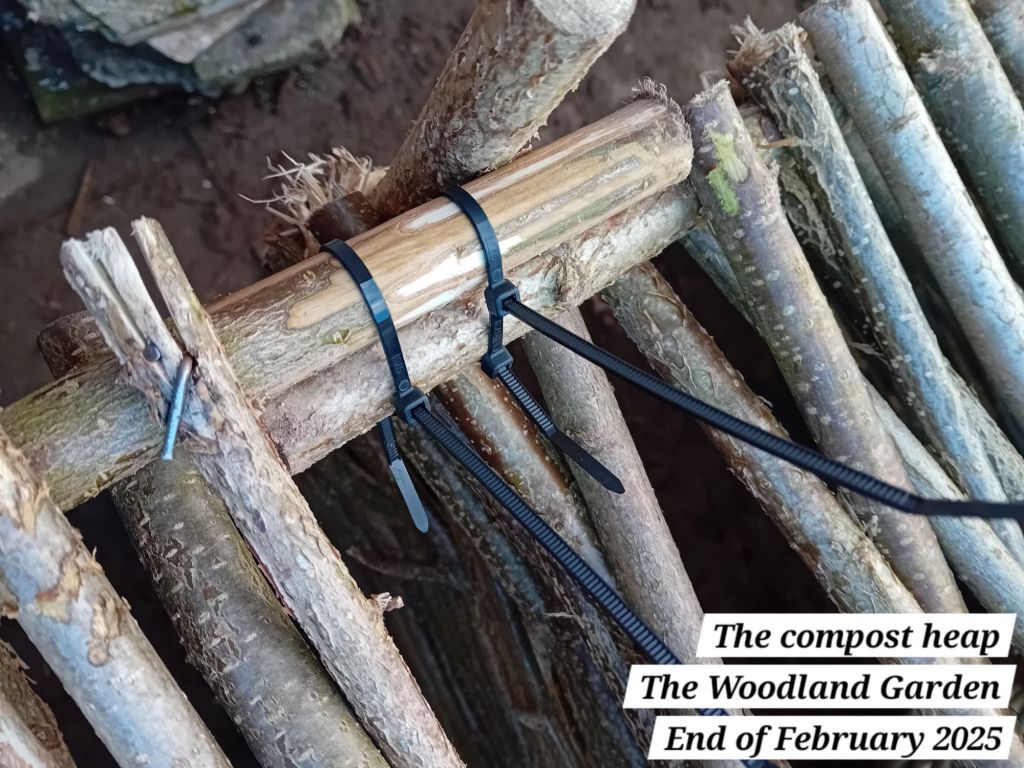
The beauty of this system is that there is no risk of any contamination of the compost from the materials I’ve used and it can be taken apart very easily if I want to change how many bays I have etc. The panels are literally hammered into the earth; I used a small sledgehammer to do the job and I worked on my own on this task.
I also zip tied the panels together, which was really easy and quick:

I’ll come back another day and trim down all the loose ends of the zip ties.
For the top, I made a ‘roof’ by just putting the panels on the top and connecting them with zip ties for now:
I will need to fashion some sort of hinge system so that the roof panels lift up for when I want to turn or access the heap. I will also need a prop for holding the panels up when in use. I am still considering my ideas for now, but there are a few options that would work… I also have the option of making it in a way that allows each individual panel to be lifted, rather than lifting all of the panels up collectively.
Adding the roof adds some protection for the heap from wind and rain, whilst still allowing both to filter through. The composting piles are now going to be essentially hidden from view, whilst still blending well into The Woodland Garden:
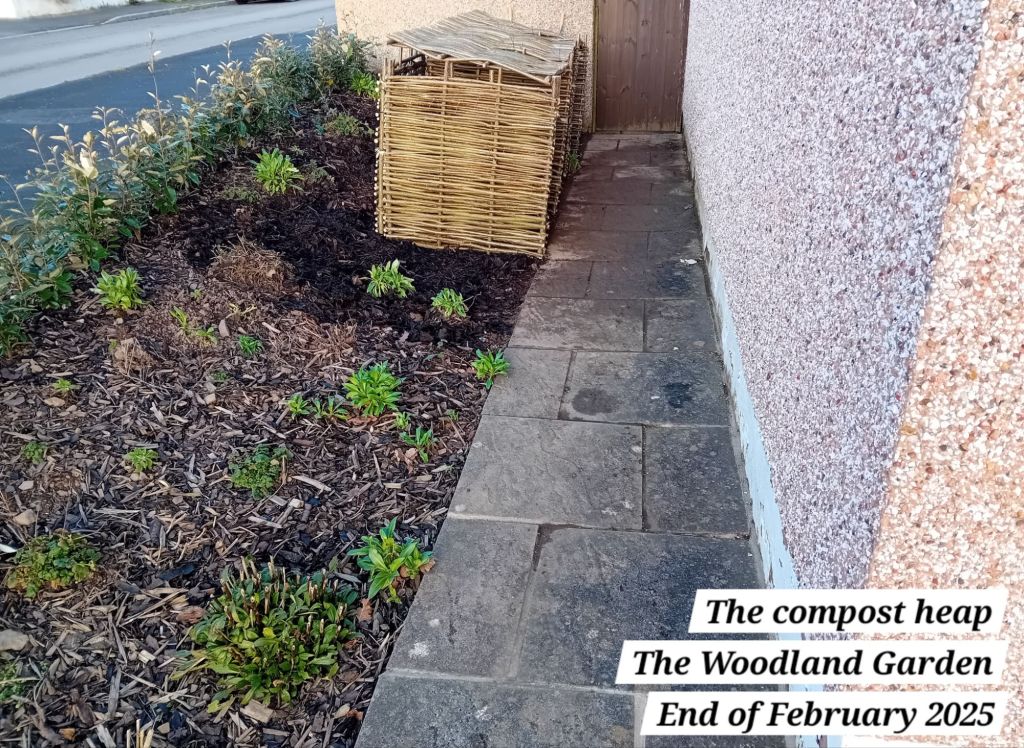
Each compost bay is about 1 metre squared in volume (about 900L), which should help the heaps warm up as they are filled:

You may notice from the photo above that I also used a spare panel to add another panel layer to the front of the compost heap. I did this to add some strength to that area and protection from the wind that blows from that direction. The heap surprisingly sturdy once it has been constructed and connected together. These panels should do a good job of slowing down the wind as it filters through the panels, rather than blocking the wind and creating more turbulence.
Before, during and after – snap shot
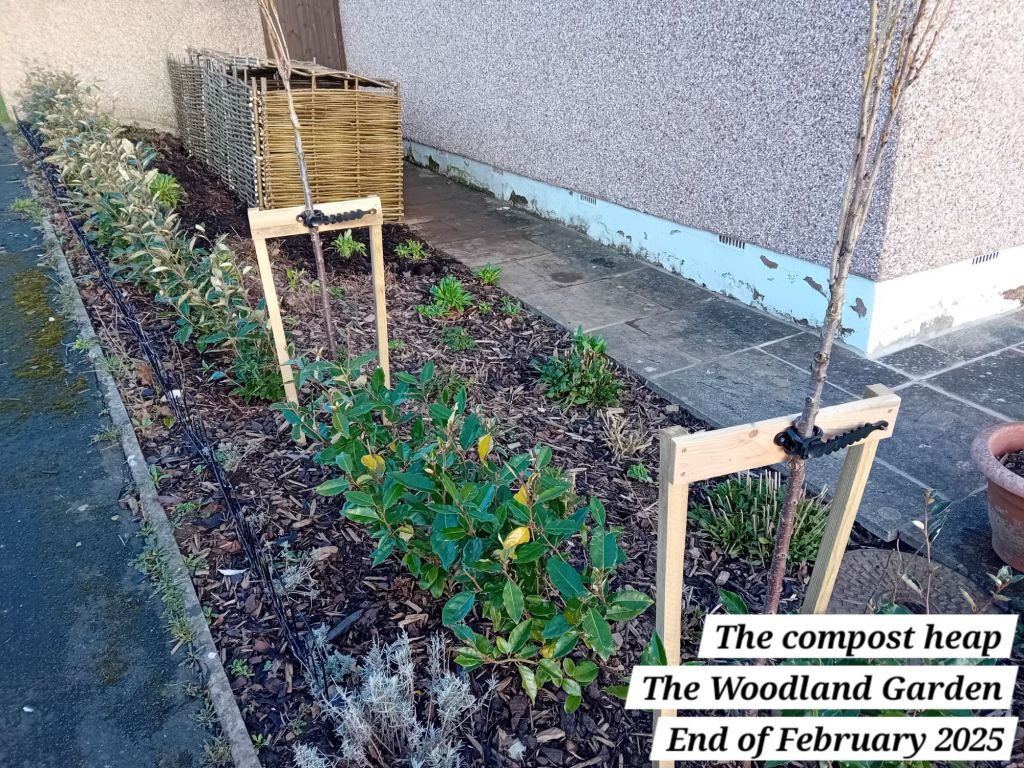
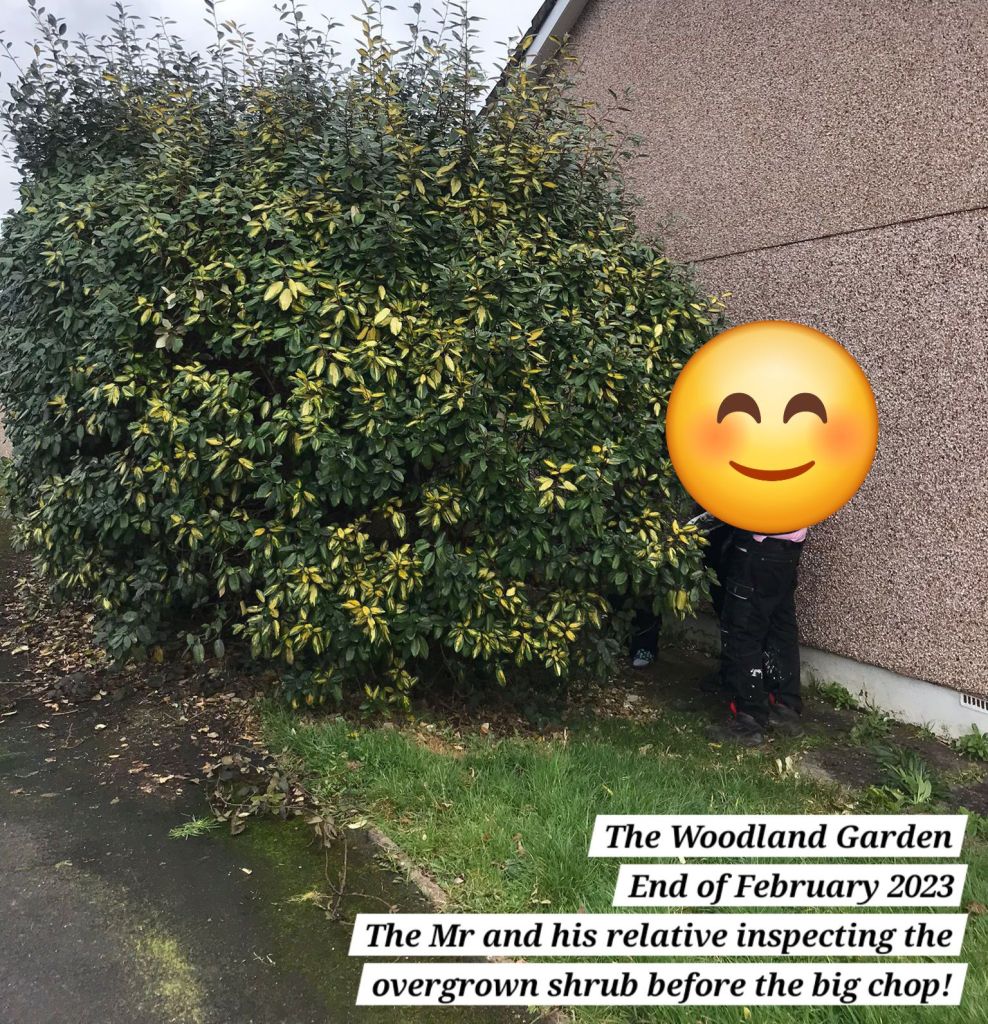
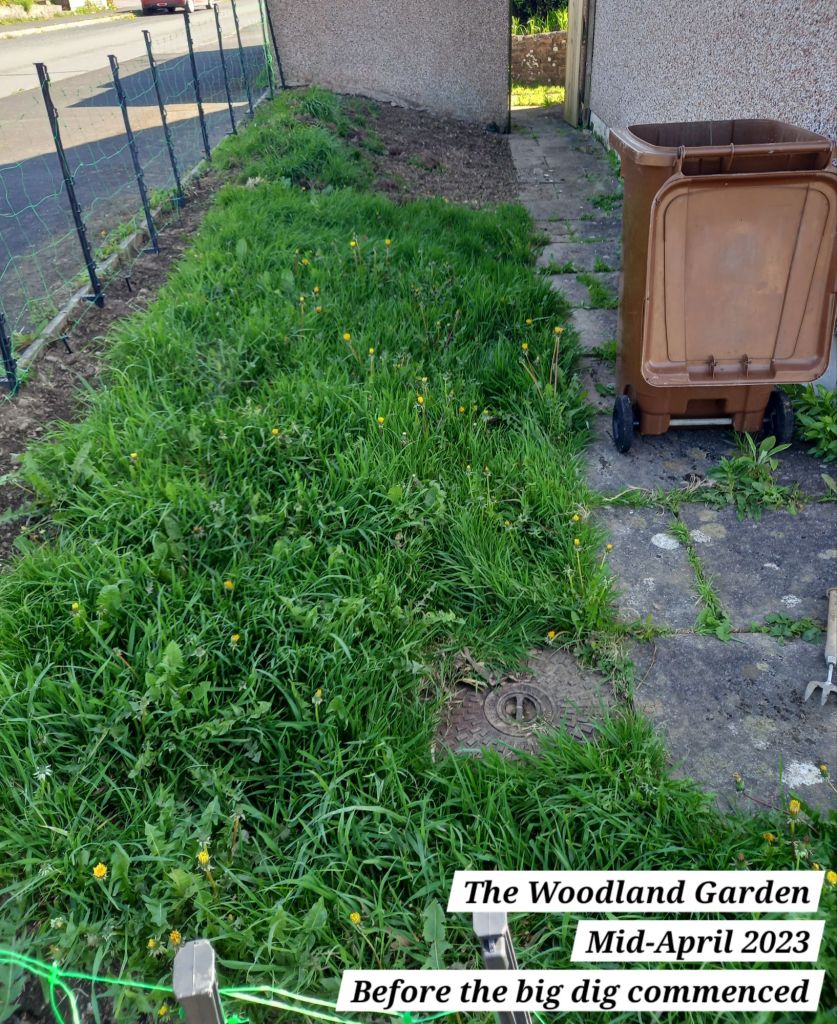
You’ll know if you read my blog that I recently introduced The Woodland Garden (post available to read here) and this garden has gone through various transformations over the last two years. Here is a quick snap shot of how it used to look compared to now:
Before
During

After
Conclusion
I’m really happy with the change I made to my plans for the compost heap and I think the wattle fencing fits in much better in this garden. I also have some hazel hedging currently growing in The Fruit Cage that I am planning to dig up and plant around the compost heap, which will help with further disguising the heap, filtering the wind, add benefits for wildlife and add natural insulation around the heap.
I will now start slowly moving material from our current temporary compost heap that is next to The Greenhouse. I think we may have hedgehogs nesting in the current compost heap, so I will only take a section from the top of the heap and I will wait until Spring to slowly move the rest over. Once that is all moved, there will be another new area of the garden cleared that I have future plans for 🙂
Until next time, happy gardening!


Leave a comment